Using your freezer, Plug it in, Setting the cold control – Whirlpool EH060FXK User Manual
Page 3: Adjusting cold control, Cooling freezer first, Exterior signal light
Attention! The text in this document has been recognized automatically. To view the original document, you can use the "Original mode".
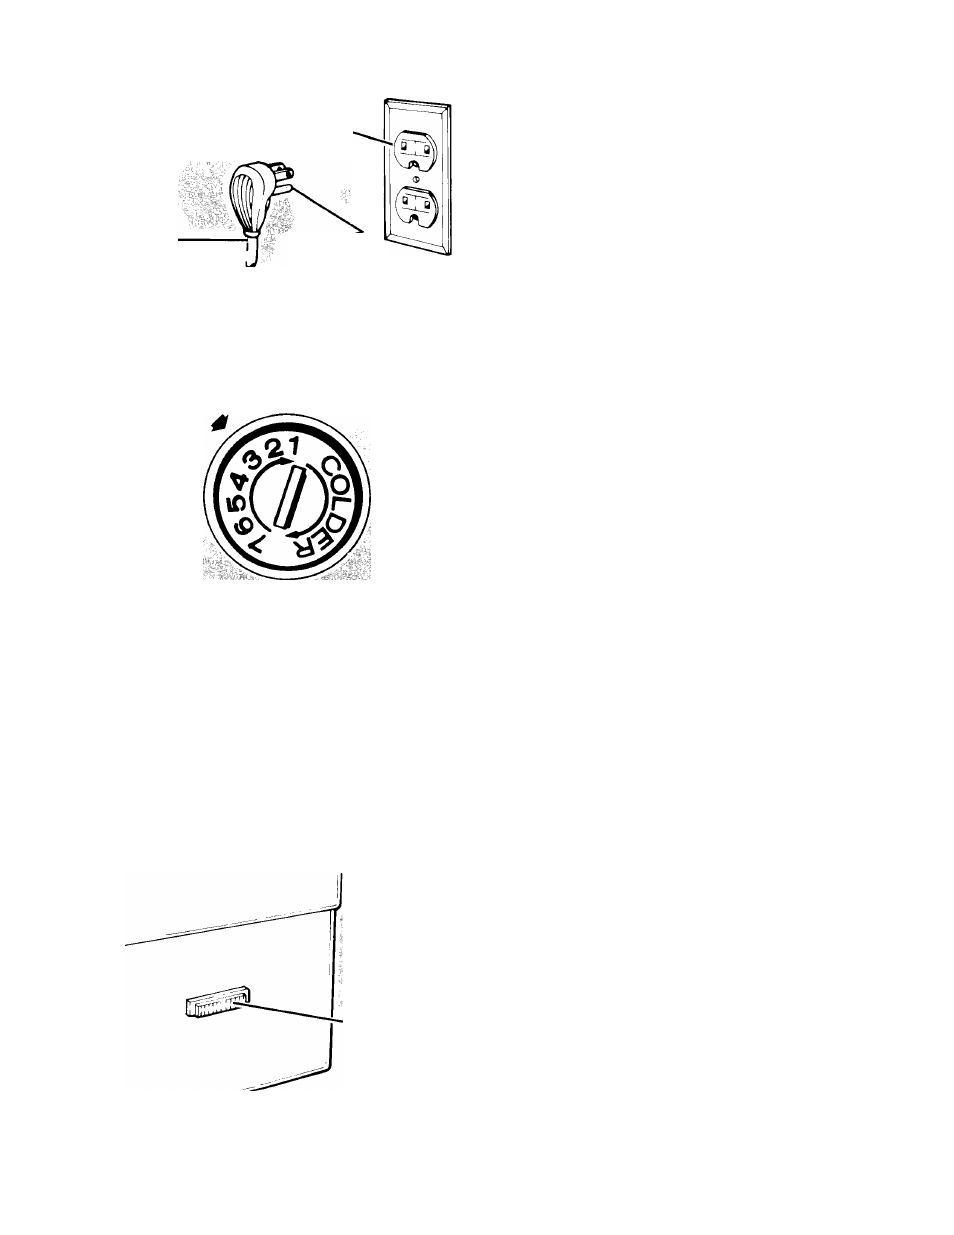
Plug It In.
Freezer
3-prong grounding
type wall receptacle
3-prong
grounding plug
power cord
/ 1
Recommended Grounding Method
A 120 Volt, 60 Hz., AC only, 15 ampere fused
electrical supply is required. It is recommended
that a separate circuit serving only this appli
ance be provided. The receptacle should not
be controlled by a wall switch or pull chain.
Attach retaining clip over power cord plug
from the literature package inside your freezer.
Do not use an extension cord.
Using your freezer
Setting the Cold Control...
1. Insert a coin in the slot of the Cold Control to
turn it.
2. Turn control to Number 3. This setting will main
tain zero zone temperatures under normal op
erating conditions.
Adjusting Cold Control...
• Turn control to higher number for colder
temperatures.
• Turn to lower number for less cold temperatures.
Cooling Freezer First...
• Allow freezer to cool 6 to 8 hours before filling
with frczen food.
• Let it cool overnight before adding large
amount of unfrozen food.
Note: When freezer is first started the compressor
will run constantly until the cabinet is cooled. It
may take up to 6 to 8 hours or longer, depending
on room temperature and the number of times
the freezer lid is opened.
After the cabinet is cooled the compressor will
turn on and off as needed to keep freezer at
proper temperature.
The outside of your freezer may feel warm. This
is normal. The freezer’s design and main function
is to remove heat from packages and air space
inside the freezer. This heat is transferred to the
room air so the walls of the freezer may be warm.
Exterior Signal Light...
automatically warns of any unexpected power
failure.
Signal light cover
It the signal light is not glowing, immediately
check:
• for power interruption,
• the power plug; it may be disconnected from
the outlet,
• the warning light; it may be burned out.
To replace burned out signal light:
1. Unplug power cord from outlet.
2. Carefully snap out light cover and assembly
with a screwdriver by inserting it under the
end of metai edge of the light. Be carefui not
to chip finish on freezer.
3. Unplug burned out signal light and replace
with a new one. Signal light can be ordered
from your Whirlpool dealer.
4. Then, snap light assembly into place.
5. Plug cord into outlet.
3