Set up, Assembly, Attach rails – Bullet Tools 213-SID User Manual
Page 3: Attach tail, Hardware kit, Welcome! your ez shear comes ready to assemble
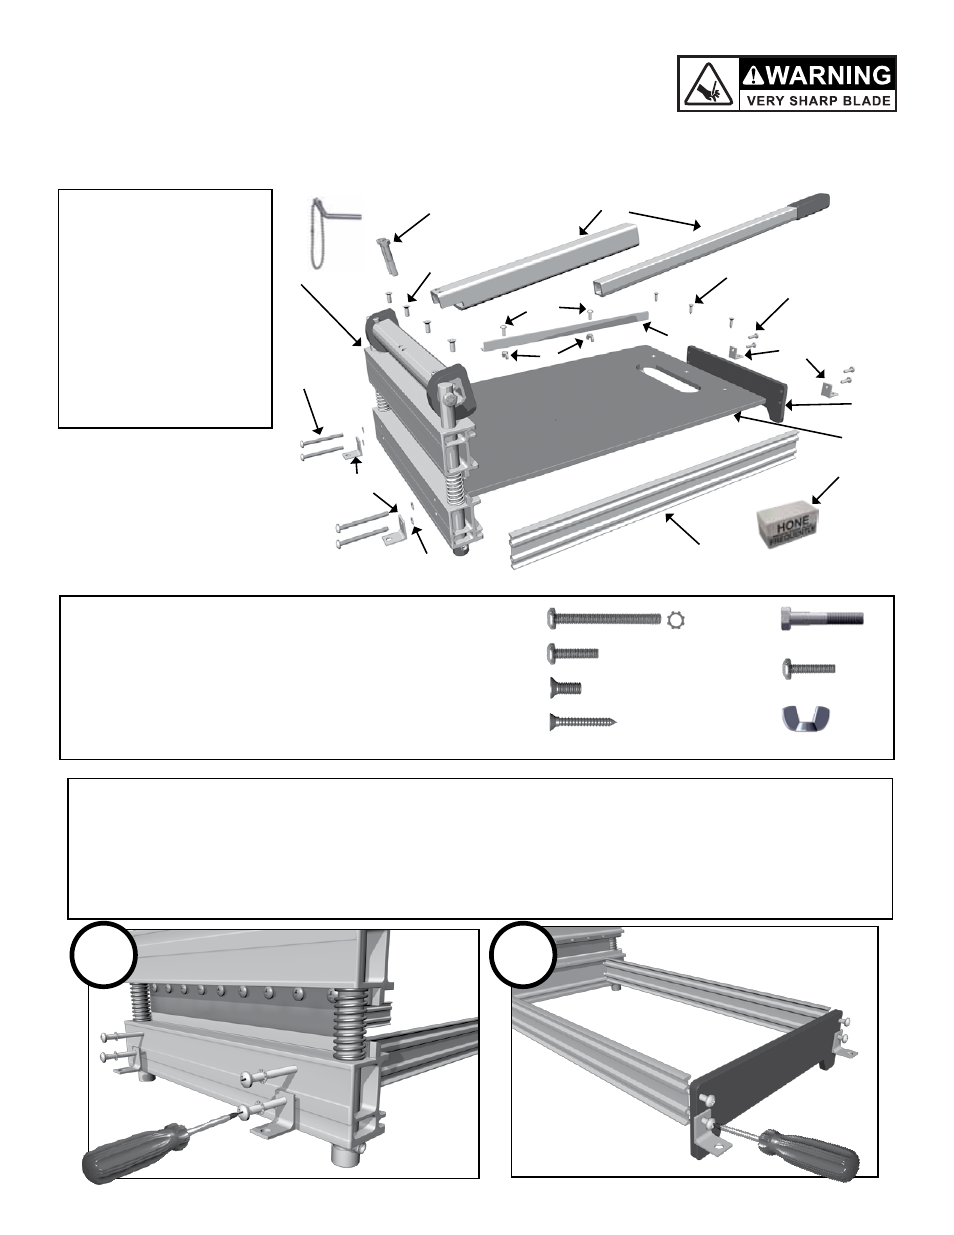
3
SEt Up
WElcOmE! YOUR EZ SHEAR cOmES READY TO ASSEmblE.
*
*You will need #2 & #3 Phillips head screwdrivers
and a 1/2” (13mm) socket or wrench.
Please Review and Verify Parts Included in Box:
ASSEmbly
1. ATTAcH RAIlS
Attach rails and mounting bracket to Power Assembly
base using Item A machine screws, fitted with Item B
star washers.
2. ATTAcH TAIl
Attach tail and mounting bracket to rails using
Item C machine screws. Make sure holes in tail are
facing up.
2
1
F.
6.
1.
8.
8.
1a.
A.
B.
D.
E.
G.
H.
C.
2.
3.
4.
7.
5.
Item A. (4) 6mm x 60mm PH Phillips Machine Screws
Item B. (4) M6 Star Washers
Item C. (4) 6mm x 25mm PH Phillips Machine Screws
Item D. (5) M6 x 16mm FH Phillips Machine Screws
Item E. (4) #10 x 1 FH Phillips Self Tapping Screws
Item F. (2) M8 x 50mm Hex Bolts
Item G. (2) 6mm x 25mm PH Phillips Machine Screws
Item H. (2) M6 Wing Nuts
HARDWARE kIT:
A.
C.
D.
E.
F.
B.
G.
H.
1. Power Assembly
1a. Safety Lock pin
2. Handle Assembly
3. Fence
4. Table
5. Tail
6. Rails (2)
7. Hone Stone
8. Mounting Brackets (4)
9.
Hardware Kit
*The Hardware Kit is used in multiple
models. Your Shear may not use all of
the items listed.