AquaCraft Miss Vegas Deuce User Manual
Page 5
5
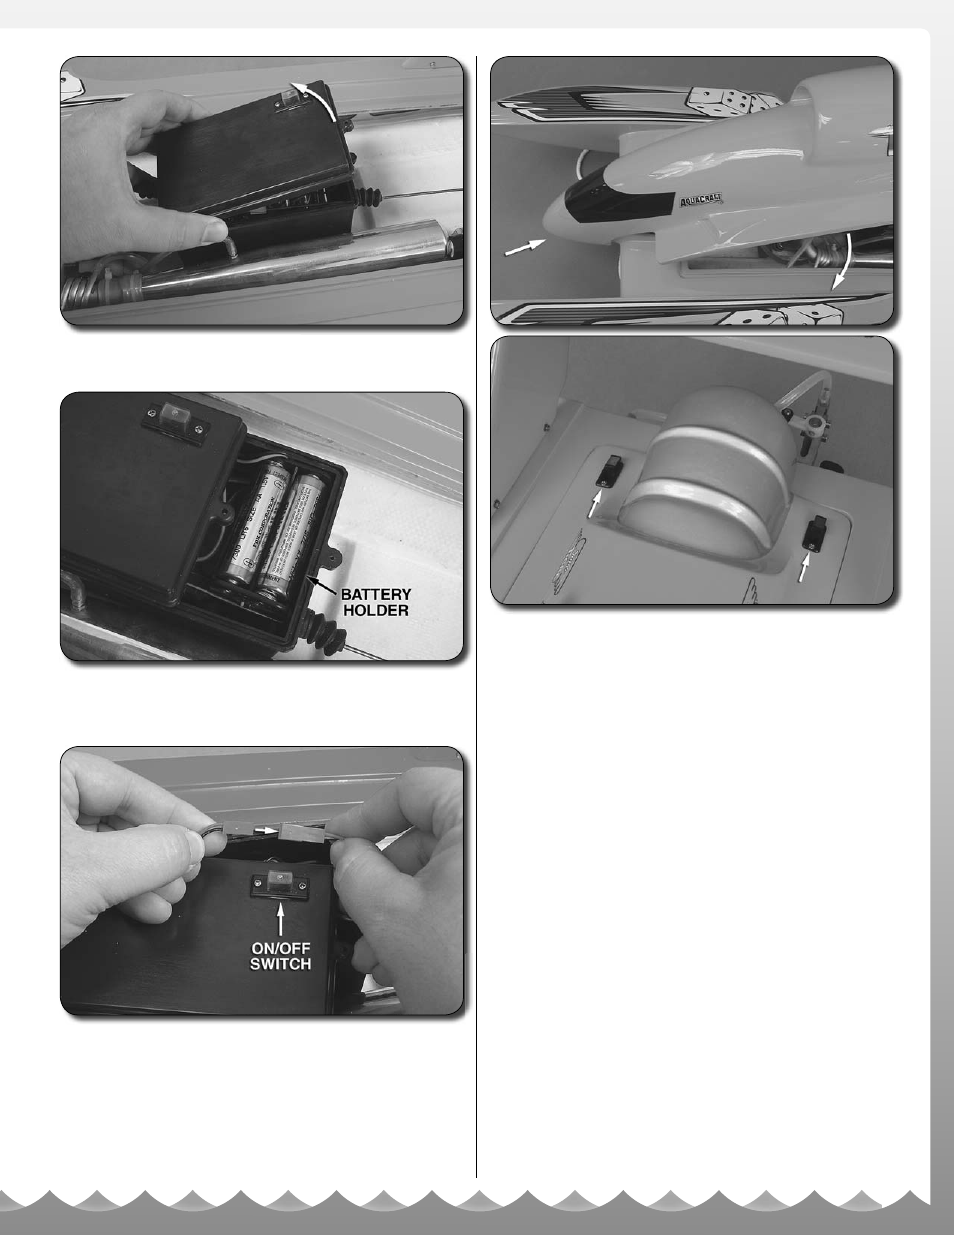
3. Remove the two 2 x 12mm screws that secure the radio
box lid and gently lift the lid from the battery box.
4. Install four fresh “AA” batteries in the battery holder. Be
sure to follow the polarity confi guration molded into the
battery holder.
5. Plug the battery box connector into the ON/OFF switch
connector. Do not force them together; they are designed
to fi t together only one way.
6. Replace the radio box lid and secure it with the two
2 x 12mm screws.
7. Replace the canopy by fi rst sliding it over the “nose” of the
boat and then lowering the rear section to meet the hull. Secure
it by sliding the two cowl locks toward the rear of the boat.
See also other documents in the category AquaCraft Water equipment:
- Air Force (15 pages)
- Alligator Tours (12 pages)
- Atlantic (8 pages)
- Atlantic II (8 pages)
- Bristol Bay (8 pages)
- Hammer (8 pages)
- King's Ransom (12 pages)
- Mini Alligator Tours (8 pages)
- Mini Rio (12 pages)
- Mini Thunder (12 pages)
- Mini Wildcat (12 pages)
- Miss Vegas (12 pages)
- Miss Seattle (8 pages)
- Minimono (12 pages)
- Motley Crew (8 pages)
- Nitro Hammer (8 pages)
- P-27 Gunslinger (8 pages)
- Paradise (12 pages)
- Pro Fisherman (8 pages)
- Reef Racer (8 pages)
- Reef Racer 2 (8 pages)
- Reef Racer 2 Charger (2 pages)
- Rescue 17 (8 pages)
- Revolt 30 (12 pages)
- Rio 51 (24 pages)
- Rio 51Z (16 pages)
- Rio EP (16 pages)
- SuperVee 27 (11 pages)
- SuperVee 27R (16 pages)
- SuperVee 27 Nitro (12 pages)
- Top Speed 2 (20 pages)
- Top Speed 3 (24 pages)
- UL-1 Superior (12 pages)
- VS1 (20 pages)
- V24 One-Design (16 pages)
- Vela One Meter (16 pages)
- Wildcat (8 pages)
- 15 Marine Engine (4 pages)
- 18 Marine Engine (4 pages)
- 27 Rear Exhaust Airboat Engine (8 pages)
- 46 BB Marine Engine (6 pages)
- EP1 Electric Outboard Motor (4 pages)
- GrimRacer Precision Prop Balancer (4 pages)
- AQUB9540 Water Jacket Installation Procedure (4 pages)