Understanding your transmitter, Assembly sequence – AquaCraft Miss Seattle User Manual
Page 4
4
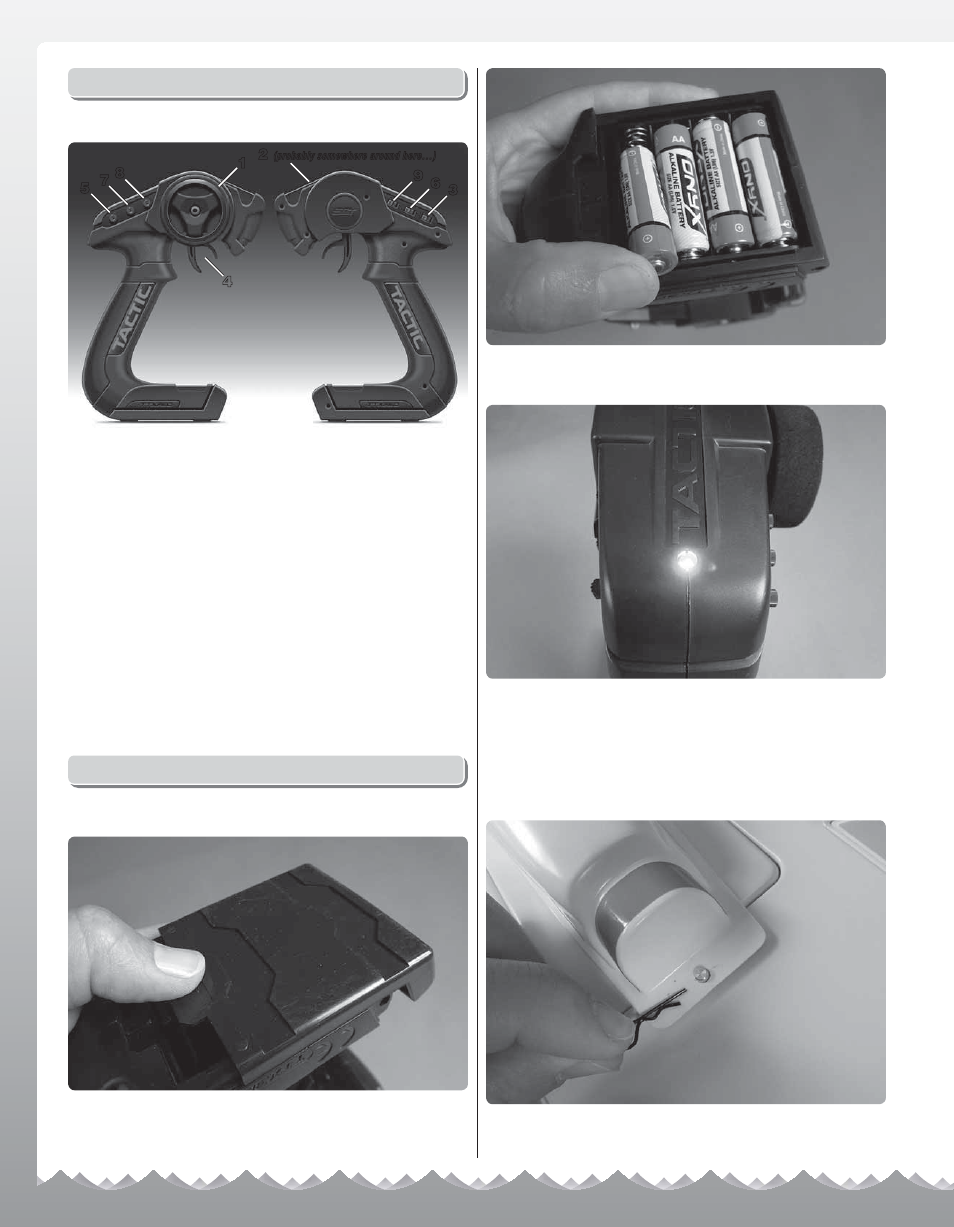
Understanding Your Transmitter
1
2
(probably somewhere around here...)
3
4
5
6
7
8
9
1
Steering Wheel
2
LED Power Indicator
3
Power ON/OFF Button
4
Throttle Trigger
5
Steering Rate Adjustment (this is used to increase
or decrease the turning radius of the boat)
6
Throttle Reversing Switch (“R” is the position the
switch needs to be in for your Miss Seattle Hydro)
7
Throttle Trim Dial (this should be in the12:00 to 3:00
o’clock position for your Miss Seattle Hydro)
8
Steering Trim (this is used to adjust the tracking of
the boat)
9
Steering Reversing Switch (this should be in the “R”
position to operate your Miss Seattle Hydro)
Assembly Sequence
INSTALLING THE TRANSMITTER BATTERIES
Slide off the battery door from the bottom of the transmitter.
Install 4 “AA” batteries into the transmitter in the configuration
molded into the battery floor and reinstall the battery door.
Turn the transmitter on by pressing the “Power” button on the
right side of the transmitter. The battery indicator light (LED)
should glow green. If the light is flashing, the batteries are
low and need to be replaced.
INSTALLING THE BATTERY PACK
Turn on your transmitter. Remove the main canopy by pulling
the pin on the back of the cowl.