American Diagnostic Corporation (ADC) Diagnostix 2.5v User Manual
Page 3
(including internal liners) can NOT be cleaned or disinfected and should be safely discarded if contaminated.
Do not carry the case into a contaminated environment.
WARNING: When replacing lamp, allow lamp to cool for five minutes before handling.
WARNING: No form of sterilization has been validated for this device or its corresponding components
and sterilization may compromise the safety and effectiveness of this device. (This includes steam ster-
ilization.)
WARNING: Do NOT place devices or accessories back into carrying case after use on a patient without
first cleaning/disinfecting the device/accessories as described in the cleaning and disinfection section
of this manual. Carry case liners can NOT be cleaned or disinfected and should be discarded if contam-
inated.
WARNING: Use of any accessories or materials not indicated in the user's manual can degrade the
minimum safety of the equipment.
WARNING: Only replace listed accessories (attachments), lamps, or batteries for the device.
WARNING: During use metal components near instrument head can become warm. This is especially true
if device is on for extended periods of time. Do not leave device on when not in use.
Otoscope Parts and Assembly
The Pocket Otoscope consists of a “AA” battery handle (#5160N), fiberoptic Otoscope Instrument Head
(5120N), with attached movable viewing lens, and disposable specula (2.75mm and 4.25mm).
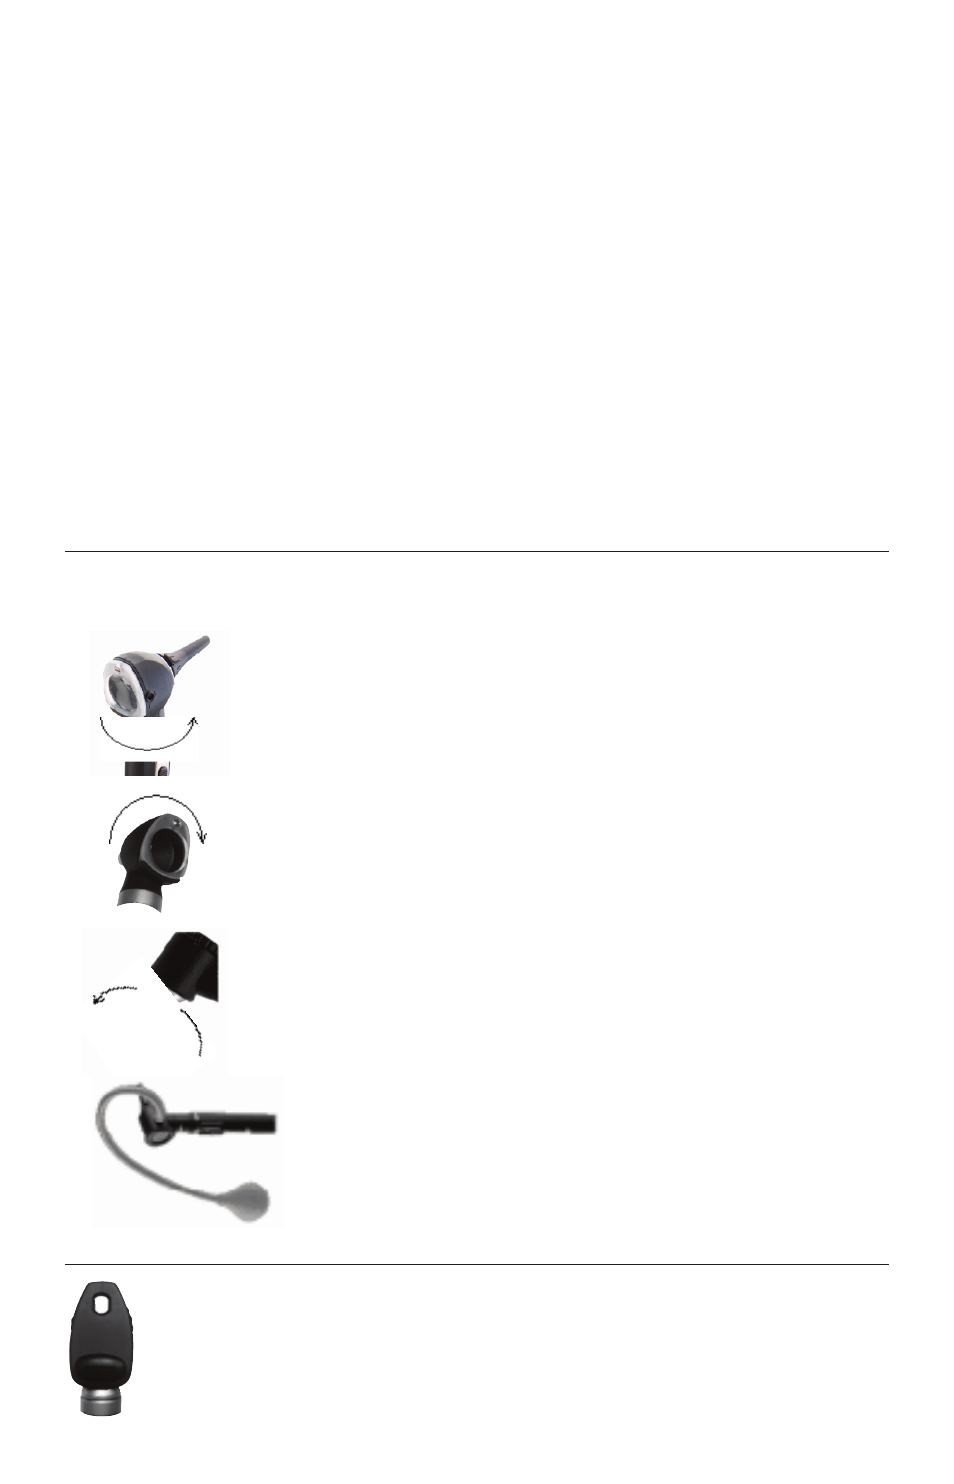
Removing and Attaching the Instrument Head
Pocket otoscope heads are threaded and can be removed by rotating the threaded
connection counterclockwise, or attached by rotating the threaded connection clock-
wise.
Viewing Lens
To move during an examination, turn the lens bezel clockwise to lift up. To reposition,
reverse procedure.
Attaching the Disposable Specula
Push the flanged end of the desired speculum onto the chrome socket and twist
counterclockwise to engage. Reverse procedure to remove and discard after each
use.
Pneumatic Otoscope
To perform, insert tapered end of insufflator fitting (5121N) sold separately,
into hole on side of Otoscope head. Attach optional bulb assembly (5122N)
sold separately.
Ophthalmoscope Parts and Assembly
The Pocket Ophthalmoscope consists of a “AA” battery handle (5160N) and Ophthalmoscope
instrument head (5140N) with xenon illumination.
Aperture Selection
This unit is equipped with 5 internal apertures - small, large, semi-circle, red-free, and fix-