Maintenance – Caldera Highland Series User Manual
Page 12
FILTER MAINTENANCE
At least once a week, check and clean the skimmer bas-
ket an weir to ensure proper filter flow. Remove leaves,
foreign matter and debris. It is very important to keep
your spa filter cartridge clean and free of particles to
ensure proper water flow.
A clean filter permits the
hydrotherapy system to function properly and also allows
more efficient filter cycles. Depending on how frequently
your spa is used, we recommend cleaning the spa filter
cartridge every four to six weeks. If this is not done, the
filter may clog and restrict water flow, which causes
improper filtration and poor jet performance.
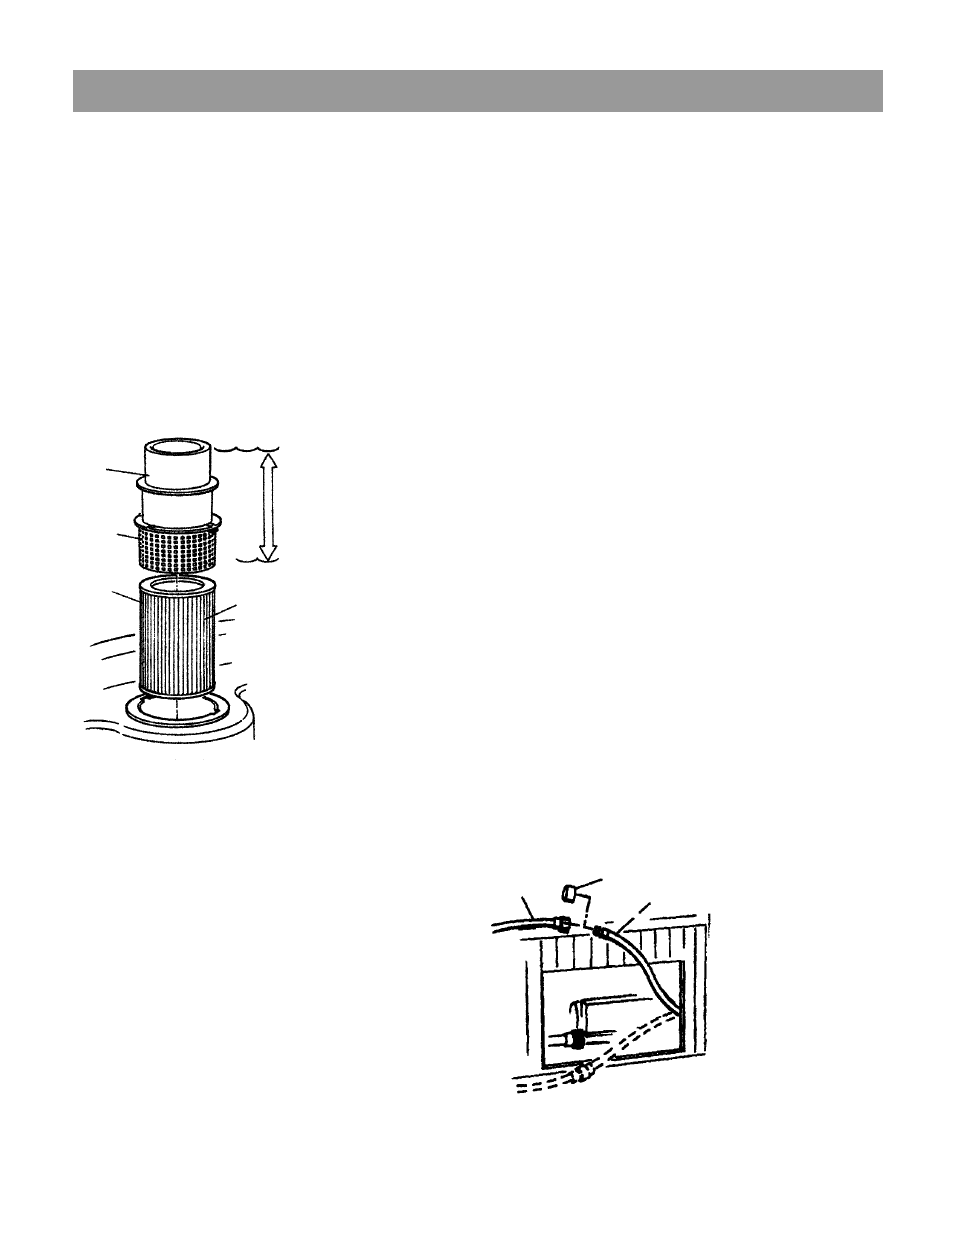
FILTER CARTRIDGE REMOVAL AND CLEANING
Turn the spa OFF or turn
the power to the spa
OFF, then proceed as
follows:
1. Push down slightly
and turn filter basket
counterclockwise to
unlock, then pull the
basket and weir out.
2. Carefully pull up the
filter cartridge and bring
it out of the spa.
3. Rinse cartridge using
a garden hose. Rotate
and separate filter pleats
while spraying water to
remove all debris possi-
ble. Let the filter dry and
then look for calcium deposits (scaling) or an oil film. If
you find these, you will need to deep clean your filter
cartridge with a “spa filter cleaning” solution to break
down and remove mineral deposits and oils. The filter
cartridge should be replaced with a new cartridge every
12 months.
4. To return basket and weir, insert and rotate clock-
wise to lock into position.
FILTER CARTRIDGE REPLACEMENT
The 50 sq. ft. filter cartridge should be replaced approxi-
mately every 12 months. Replacement cartridges are
available from your Caldera dealer.
SPA LIGHT LENS INSTALLATION
Colored lenses are included for the spa light. To install or
remove lenses, simply push ON or pull OFF of the spa
light.
SPA LIGHT BULB REPLACEMENT
To replace the spa light bulb turn all power to the equip-
ment module OFF. Locate the rear of the spa light and
remove the bulb socket by turning it counterclockwise 1/4
turn. Pull the bulb from the socket and replace by revers-
ing the above steps.
CAUTION: The replacement bulb must be the same rat-
ing as the factory-installed bulb or standard automotive
type #912.
SPA COVER CARE
CLEANING AND VINYL CARE Keep the cover clean. As
often as is necessary wash with mild soap and rinse with
clean water.
DO NOT USE SOLVENTS, PETROLEUM
PRODUCTS, ABRASIVE CLEANERS OR STRONG
DETERGENTS. All vinyls contain plasticizers which migrate
out and escape naturally over time. Sun and cold speed up
this process. Applications of vinyl cleaner and conditioner,
when used according to the manufacturers instructions, can
retard this type of deterioration. DO NOT USE PRODUCTS
THAT CONTAIN SILICONE OR ALCOHOL.
CARE OF SEWING HOLDS AND THREAD The sewing
holds and thread are the greatest potential weakness in a
cover. Vinyl is a soft, leather-like material which the thread
can cut if the cover is roughly handled. This is especially
true when the vinyl has been exposed to hot sun. The han-
dles, tie-downs and hinge are double reinforced with thick,
vinyl-coated, rip-stop, polyester webbing. However, mis-
treatment by sudden jerking motions can damage them.
Stretching or pulling one half against the other may rip the
cover at the thread holes. To prevent damage, any han-
dling of the cover should be done in a gentle manner.
Note: Fading and discoloration will occur naturally with
extended exposure to the sun.
DRAINING YOUR SPA
MAINTENANCE
Page 10
Floating
Weir
Basket
Filter
Cartridge
Water
Level
Pleats
Garden
hose
Drain Cap
Drain Hose
1. Turn off or discon-
nect power from the
spa.
2. Remove the equip-
ment compartment
access door.
3. Locate the drain cap.
Lift drain hose above
the water level.
(requires
cutting plastic tie the first
time.)
4.Unscrew and remove
the drain cap.