Big country 4 x 2 – Cub Cadet 4 x 2 Big Country - Steel Bed User Manual
Page 9
Big Country 4 x 2
5
NOTE: If the friction material is contaminated
with oil, identify the source, repair the leak, and
replace the shoes.
NOTE: The friction material on the brake
shoes should not be worn to a thickness of less
than 3/32”. The friction material should not be
contaminated with oil. The friction material
should not show any signs of separating from
the steel portion of the brake shoe. If any of
these conditions exist, replace the brake shoes.
NOTE: If drums are reused at the time of reline,
they should be turned if the depth of scoring
exceeds .010"; if the inside diameter at the open
end of the drum exceeds the inside diameter at
the closed end by more than .010: (bellmouth
condition); if the drum rubbing surface is con-
cave or convex by more than .005"; if they are
heat checked; and if they are out of round by
more than .010 total indicator reading or if pedal
pulsations or brake roughness is noticed. The
rebore limit is .060" over the original maximum
drum diameter of 7.005". If reboring to .060”
maximum does not correct any of these condi-
tions, then the drum should be replaced. New
drums have a #50 grit blast applied to the rub-
bing surface. Drum surface finish is 40-125
micro-inches friction surface of the drum should
be smooth and true within .003 “.
3.17. Remove the cotter pins and clevis pins securing
the brake cables to the actuators on each brake.
The brake pedal may be carefully depressed
while the cable is disconnected from the actua-
tor. This will confirm that the cable and linkage
move without binding. See Figure 3.17.
Figure 3.17
Clevis
Brake Actuator
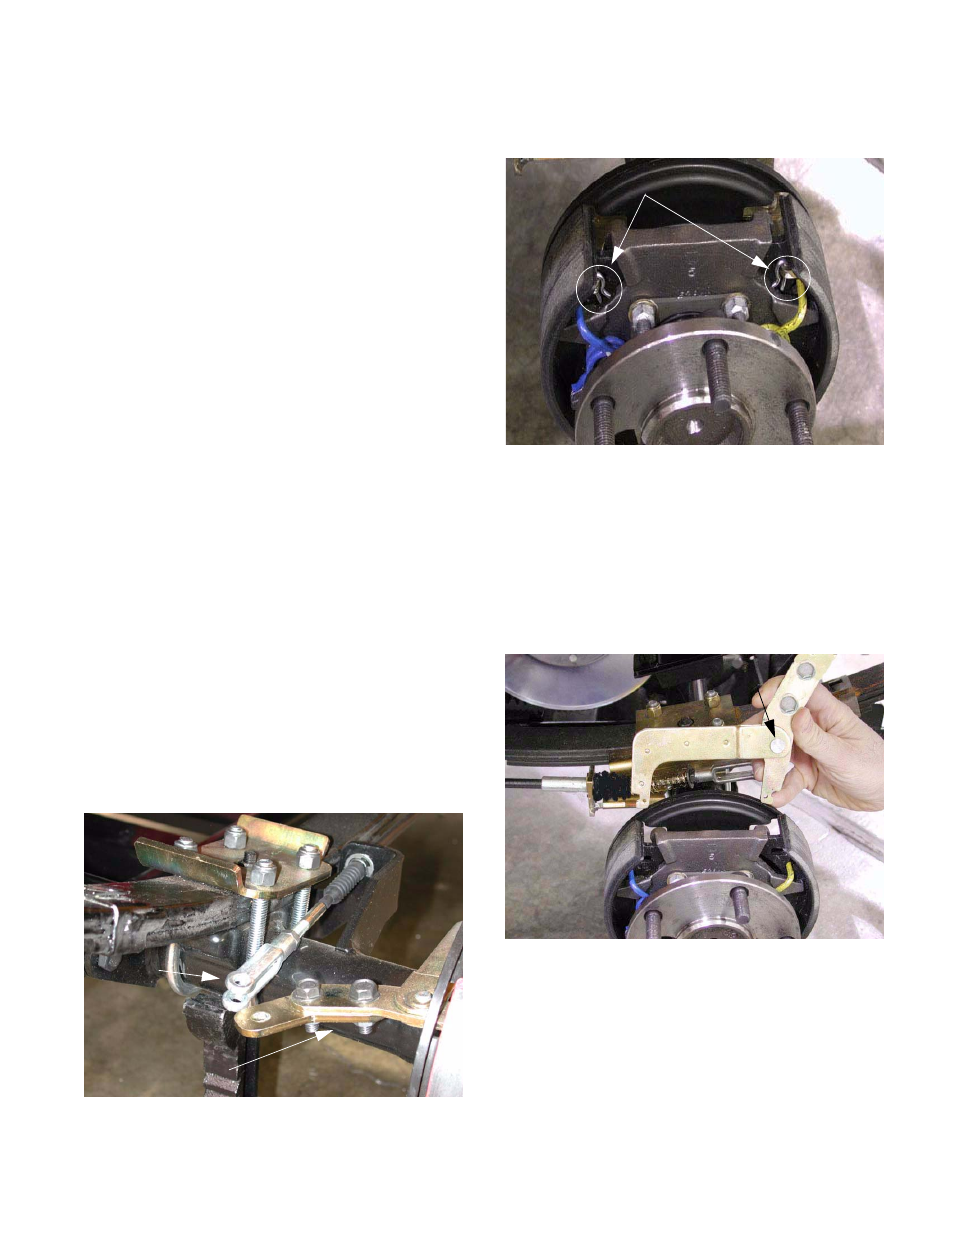
3.18. Remove the “R” shaped clips securing the brake
actuator to the brake shoes. See Figure 3.18.
3.19. Remove the brake actuator.
NOTE: The clevis pin is installed in the hole fur-
thest from the pivot pin. The head of the pivot is
facing. The Pivot pin is secured to the actuator
by a C-clip and wave washer.
3.20. Inspect the actuator for any binding at the pivot
3.21. Rotate the star wheel on the adjuster to shorten
the adjuster to the end of its travel.
Figure 3.18
“R” Shaped clips
Figure 3.20
Check for binding
and wear