Warning – Cub Cadet 7 Fabricated Deck User Manual
Page 15
15
d.
Detach the mower drive belt.
e.
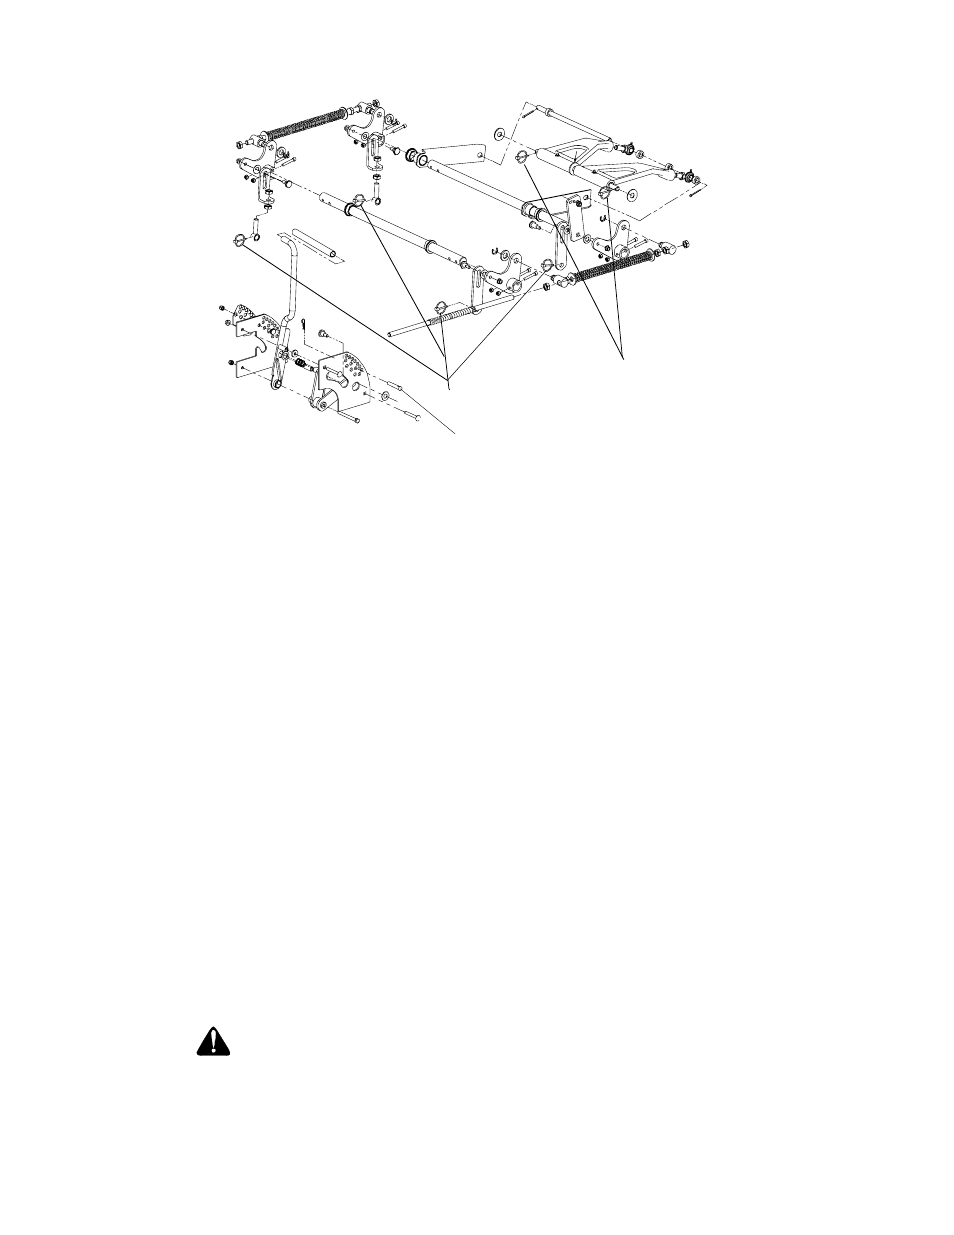
Remove six linchpins (See Fig. 6) (4) from
the deck and (2) from the front of the
mower. Remove the linchpins on the left
and right rear side of the cutter deck (2);
remove the linchpins on the left and right
front side of the cutter deck (2); and
remove the linchpins on the front of the
mower (2).
f.
Turn front caster wheels outward.
g.
Shift the deck toward the ignition switch
side of the mower and remove.
h.
To install reverse the process.
2.
Changing a Blade:
a.
Remove the Key from the ignition and dis-
connect the spark plug.
b.
Jack up the front of the mowing deck about
one foot and block it in that position.
c.
Wrap a rag around one end of the blade
and grasp it to prevent it from turning, or
secure the blade by placing a block of
wood between the blade and the deck
housing.
d.
Use a 1-1/8" socket wrench on the pulley
side of the spindle to secure.
e.
Remove the hex nut using a 1-1/8" wrench.
f.
Remove the hex nut.
g.
To replace the blade reverse the above
process and tighten nut to 100-120 lb-ft.
WARNING:
Never mow with dull blades! Blades that are
bent should be replaced! The cutting blades
are sharp and can cause severe injury. Wrap
the cutting surface of the blade with a rag to
avoid injury.
a. Set the parking brake.
b.
Clean any debris from the blades. Keep
blades sharp and free of build up at all
times.
c.
Sharpen blades evenly at the original 30°
angle to maintain balanced cutting blades.
Do not sharpen the underside of the
blades. Use a electric blade sharpener, a
conventional electric grinder or a hand file
to sharpen the blades.
d. Replace any blade with severe nicks or
dents that cannot be removed by filing.
e.
Check the balance of the blade after
sharpening by placing it on a blade bal-
ancer. Do not use un-balanced blades.
f.
If the blade dips on one end, file stock off
of the cutting surface on that end.
Note:
Blades that cannot be easily bal-
anced—REPLACE.
3.
Changing the Blade Drive Belts:
a.
Set the parking brake. Remove ignition key
and both spark plug caps.
b.
Unscrew the wing nuts from the deck cov-
ers and remove both covers.
c.
Using a 1/2" socket breaker bar or socket
rachet insert the male end into the 1/2"
opening in the lower idler arm assembly
and pull the idler arm clockwise. While
holding the idler arm back, loosen the
blade drive belt from the pulley and slide
the belt away from the pulley.
d.
Remove tension of the PTO belt by moving
the belt tensioning rod. Loosen the belt
retaining bolt.
Linch Pins
Figure. 6
Height of Cut Clevis Pin
Linch Pins