Operating your lawn mower, Warning – Cub Cadet 990 User Manual
Page 9
4
Operating
Your Lawn
Mower
WARNING
The operation of any
lawn mower can result
in foreign objects
being thrown into
the eyes, which can
damage your eyes
severely. Always wear
safety glasses while
operating the mower,
or while performing
any adjustments or
repairs on it.
Be sure no one other
than the operator is
standing near the lawn
mower while starting
engine or operating
mower. Never run
engine indoors or
in enclosed, poorly
ventilated areas. En-
gine exhaust contains
carbon monoxide, an
odorless and deadly
gas. Keep hands, feet,
hair and loose clothing
away from any moving
parts on engine and
lawn mower.
Starting Engine
WARNING: Be sure no one other than
the operator is standing near the lawn
mower while starting engine or operat-
ing mower. Never run engine indoors or
in enclosed, poorly ventilated areas. Engine exhaust
contains carbon monoxide, an odorless and deadly
gas. Keep hands, feet, hair and loose clothing away
from any moving parts on engine and lawn mower.
Refer to engine manual for help with the engine.
1. Push primer once. Do not prime to restart a warm
engine after a short shutdown.
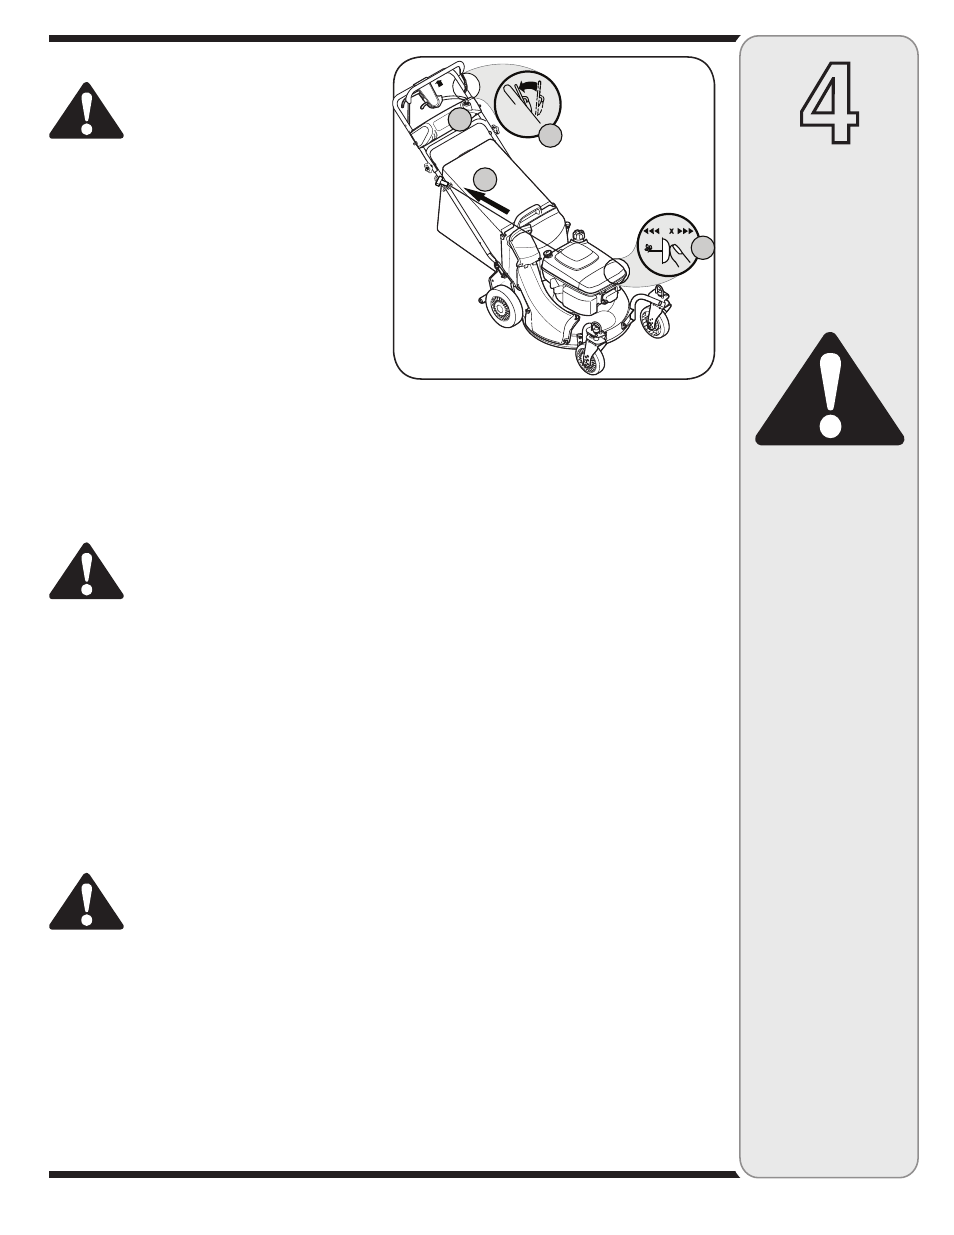
2. Standing behind the mower, depress the blade control
and hold it against the upper handle. See Figure 4-2.
3.
Recoil Start: Grasp starter handle and pull rope out
slowly until engine reaches start of compression cycle
(rope will pull slightly harder at this point). Let the rope
rewind slowly. Pull rope with a rapid, continuous, full
arm stroke. Keeping a firm grip on the starter handle,
let the rope rewind slowly.
Electric Start: Turn ignition key to the right to start
the engine. Release the key after the engine starts.
WARNING: Wait for the blade to stop
completely before performing any work
on the mower or to remove the grass
catcher.
Stopping Engine
1. Release blade control to stop the engine and blade.
2. Disconnect spark plug wire from spark plug and
ground against the engine.
Using Your Lawn Mower
Be sure lawn is clear of stones, sticks, wire, or other
objects which could damage lawn mower or engine.
Such objects could be accidently thrown by the mower
in any direction and cause serious personal injury to the
operator and others.
WARNING: If you strike a foreign object,
stop the engine. Remove wire from the
spark plug, thoroughly inspect mower
for any damage, and repair damage
before restarting and operating. Extensive vibra-
tion of mower during operation is an indication of
damage. The unit should be promptly inspected and
repaired.
Using as Mulcher
For mulching grass, remove the grass catcher and side
discharge chute from the mower. For effective mulching,
do not cut wet grass. If the grass has been allowed to
grow in excess of four inches, mulching is not recom-
mended. Use the grass catcher to bag clippings instead.
Using Grass Catcher
You can use the grass catcher bag to collect clippings
while you are operating the mower.
The grass bag is equipped with a bag-fill indicator to
add convenience to your work. While the mower is
running, air will flow through the bag and into the Grass
Gauge. If the grass catcher is empty, air flows through
easily pushing the gauge up. If the grass catcher is full,
air does not flow through it allowing the gauge to fall.
So the position of the gauge acts as a bag-fill indicator
signifying when to empty the grass bag.
1. Attach grass catcher following instructions in “Setup
and Adjustment”. Grass clippings will automatically
collect in the bag as you run the mower.
2. Operate the mower till the grass bag is full.
3. Stop engine completely by releasing the blade
control. Make sure that the unit has come to a
complete stop.
4. While holding the grass bag by both the rear handle
and the lower handle, lift the grass bag straight up
off the adapter. The chute door will move the rope
out of the way of the bag.
5. Continue to hold the lower handle and raise the rear
of the grass bag up toward your chest. The grass
bag will open and the grass clippings will disperse.
When replacing the grass bag, be sure the top of the
bag rests on the wire support between the handles.
Figure 4-2
2
1
1
3
3