Checkline DT-900 User Manual
Page 6
6
3.2 Internal Triggering Mode
To use the DT-900 stroboscope in the Internal Triggering Mode:
1. Turn power switch on. The power indicator LED will light up.
2. Press
the
Mode Control button. Unless a sensor is connected to the external
signal connector, the display will read EXT.Mode No Signal. Press Mode
again, the display will read TachMode. Press Mode again to enter the
Internal Triggering Mode (no mode indicator is shown on the display).
3. Aim the light beam at object under observation. The optimal distance
between the strobe and moving object is approximately 2 feet.
4. Measure RPM by turning the Adjustment Dial to adjust the flashing rate to
the rotational speed of the object.
NOTE: To achieve a particular RPM or FPM quickly, use the x2 or
÷2 switches first, and then the dial for fine-tuning.
3.3 External
Triggering
Mode
To use the DT-900 stroboscope in external triggering mode:
1. Firmly plug in external sensor.
This unit accepts TTL Logic,
high of +5V and low of 0V.
2. Turn power switch on. The power
indicator will light up and the strobe
will automatically search for the presence of an external signal.
If found, the LED power indicator will turn green. If not found, the
indicator will turn red to indicate the absence of an external signal
and the message no input will appear on the display.
3. Press
the
Mode Control button until Ext.Mode appears on the display.
FPM
Flash indicator will flash in correspondence with input signal. The input
signal will be displayed as FPM (Flash per Minute).
Maximum 12,500 FPM, Minimum 15 FPM. If the maximum value is
exceeded the strobe will stop flashing, but the clock source frequency
will continue to be displayed.
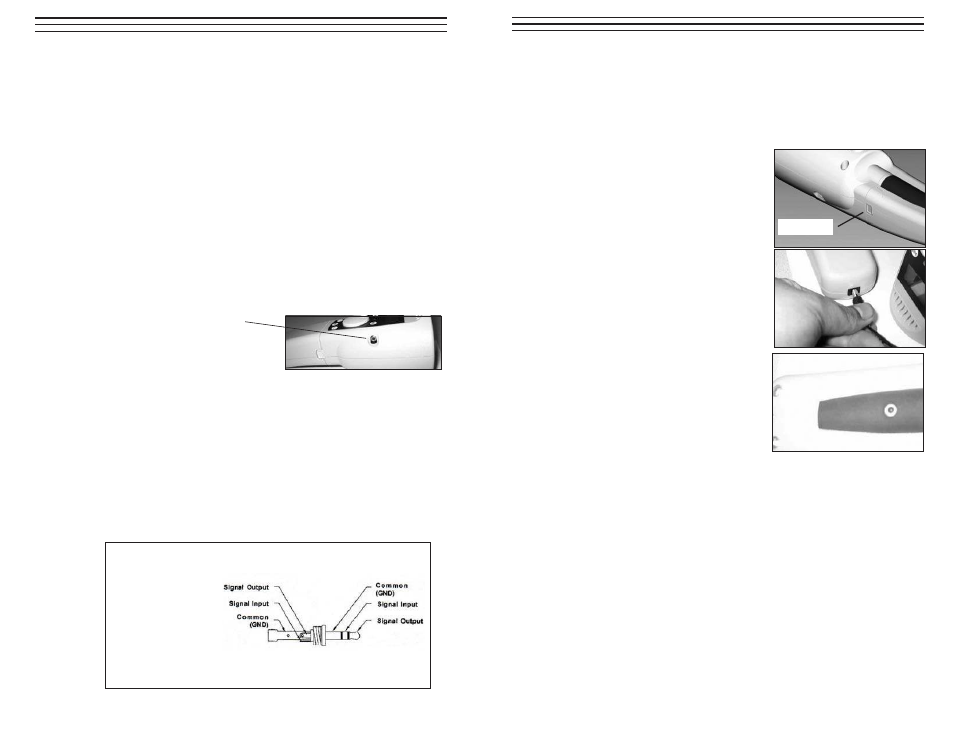
The phono connector is
3.5mm in diameter. The
tip is the signal output
from the strobe; and the
ring is the signal input to
the strobe. Electrically the
signals are TTL logic
levels, 0-5 V swing,
high impedance.
Stereo Jack Connector
11
6.0 C
HARGING THE
B
ATTERY
If the battery is low, the stroboscope will not turn on completely and the display will
eventually disappear.
It is recommended that you recharge the battery once the message “LOW BATT
flashes the display. Proceed as follows:
1. Turn power off.
2. Push the two tabs on the sides of the DT-900
to release the battery. Always remove the
battery from the DT-900 before charging.
3. Insert AC adapter/charger plug into the strobe
receptacle.
CAUTION: Charge the unit only with the
AC adapter/charger provided by
Electromatic.
4. The LED indicator on the handle will light up,
indicating the battery is charging. Normal
charging time is 2 to 4 hours. It is strongly
recommended to charge the battery fully
before using. The LED light will turn off
after the battery is fully charged.
NOTE: The adapter/charger may NOT be used as a power supply to power the strobe
continuously. If the LED is flashing when the charger is plugged into the battery, it
means that the battery has been discharged below its safe charging level. The charger
will attempt to recover the battery by trickle charging. If it is successful, the charger
will continue with the regular charge time, otherwise it will continue flashing. If this
happens you may need to replace your battery pack.
Tab Release