Setting up a talkswitch profile for the sip server – Talkswitch CT.TS005.002606 User Manual
Page 15
1 4
V O I P N E T W O R K C O N F I G U R A T I O N G U I D E
SETTING UP A TALKSWITCH PROFILE FOR THE SIP SERVER
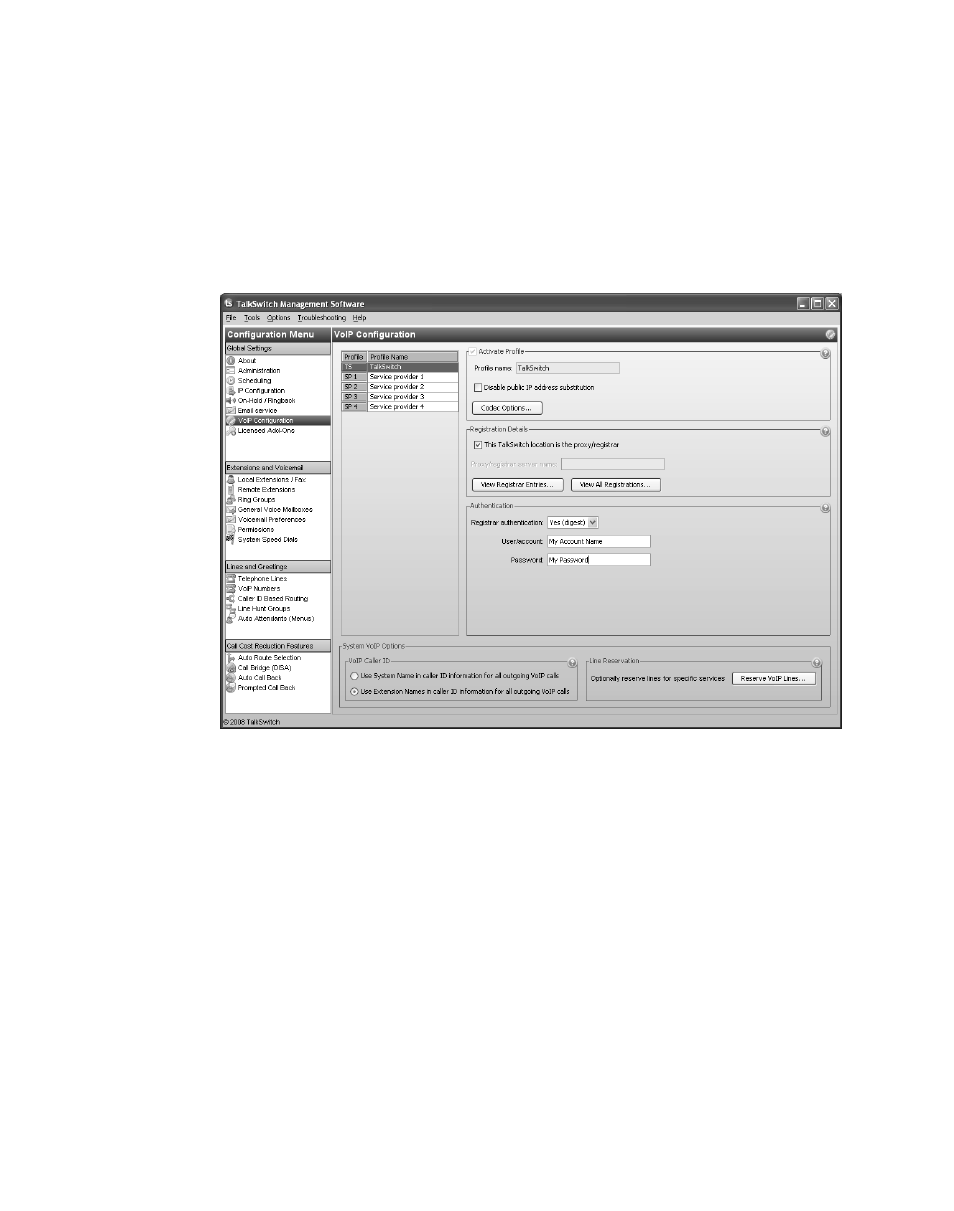
The TalkSwitch profile for the SIP server shows registration details and contains
authentication information.
1. Start the TalkSwitch management software, and connect to the TalkSwitch
system that will act as the SIP server.
2. Select the VoIP Configuration page.
3. Select Profile TS, which is for configuring the TalkSwitch profile.
4. Select the This TalkSwitch location is the proxy/registrar check box.
5. Set Registrar authentication to Yes (digest). This restricts access and allows
only authorized devices to connect.
6. Enter a User/account name. All SIP clients must use this name.
7. Enter a Password. All SIP clients must use this password.
8. If you configured the router with non-default ports:
a) Choose Options > VoIP Trunking. The VoIP Settings window appears.
b) Set the SIP Signalling Port and/or Starting RTP Port as required.
Y Z
[
\ ]
^
_