Warning, Replacing the agitator assembly – Panasonic MC-V6945 User Manual
Page 16
Attention! The text in this document has been recognized automatically. To view the original document, you can use the "Original mode".
A
WARNING
Electrical Shock or Personal Injury Hazard
Disconnect the electncal supply before servicing or cleaning the unit Failure to do so
could result in electncal shock or personal injury from the cleaner suddenly starting
REPLACING THE AGITATOR ASSEMBLY
1 When to replace the agitator assembly
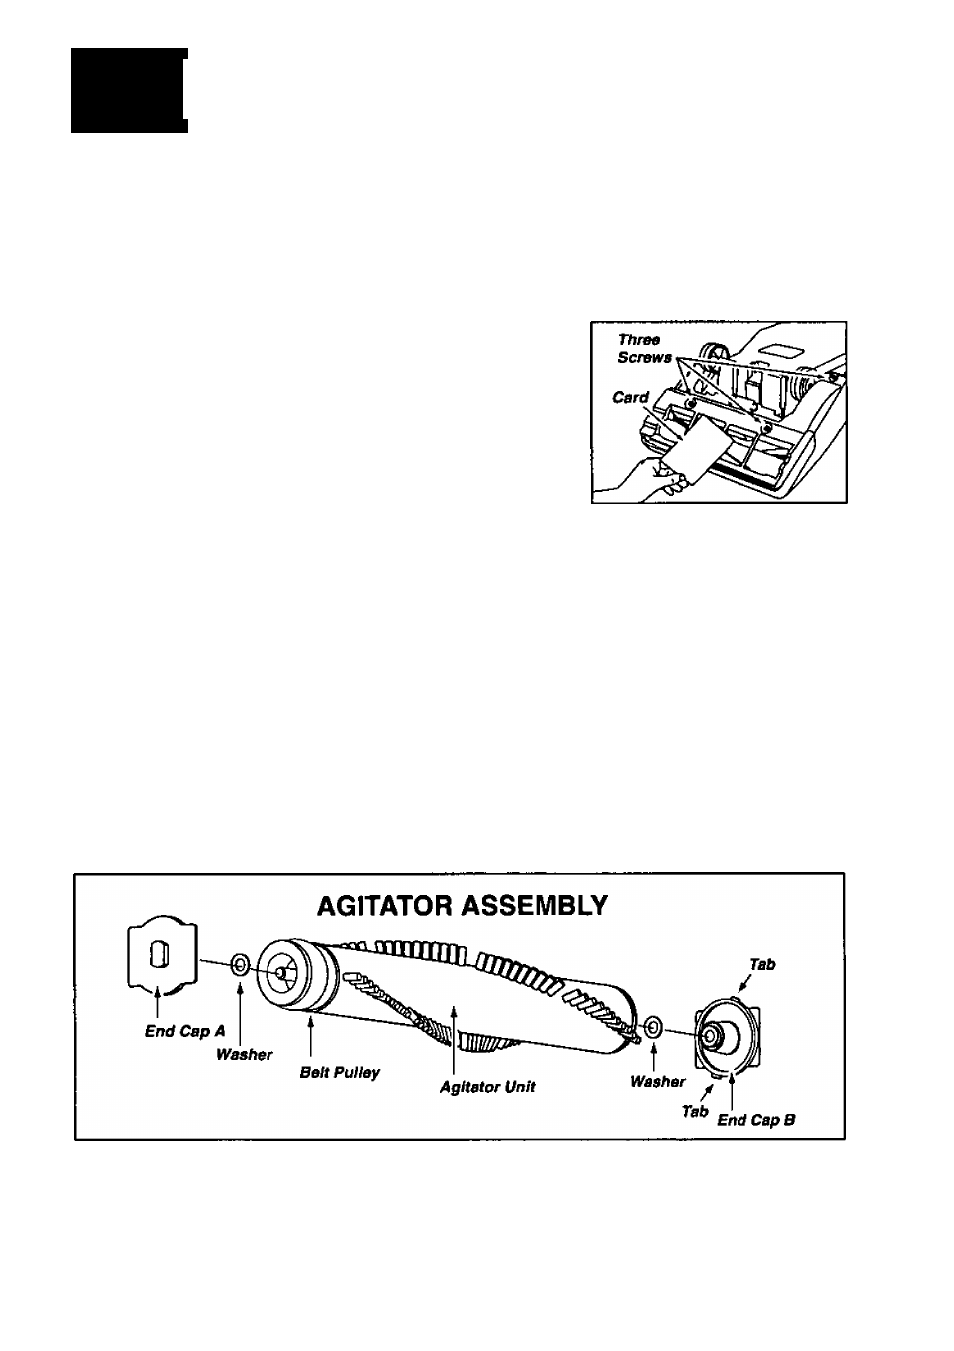
The agitator assembly should be replaced when the brushes
are worn Brushes should be checked by holding a card
across the bottom plate (see illustration) If the bnstles on
the agitator assembly
do not
touch the card you
should
replace the agitator assembly for best cleaning results
2 How to replace the agitator assembly
Place the vacuum cleaner handle in the low position (See
the Handle Adjustments section ) Remove the lower plate
as outlined in the Removing/lnstalling the Lower Plate section After the lower plate is
removed, carefully lift up the agitator assembly until it clears both sides of the nozzle
housing While holding the agitator assembly up, remove the belt
CAUTION The two end caps may come off along with the two washers as you lift the
agitator assembly out
Do not
lose the two small washers Look at the exploded view of
the agitator assembly below for correct assembly of the parts
3 To replace the agitator assembly
Place the belt over the belt pulley on the agitator unit (NOTE There is a place for the belt
to fit on one end of the agitator assembly only) Replace both washers and end caps (see
illustration below for correct assembly) After assembling the belt, washers and end caps
place the agitator assembly back into the nozzle housing by aligning each end cap
After completing the assembly, rotate the brush, turning it by hand to assure that
it rotates smoothly and the part is assembled correctly
Replace the lower plate as outlined in the Removing/lnstalling the Lower Plate section
- 1 6 -