Level calibration, Source setup – Cambridge Audio Azur 540R V3 User Manual
Page 14
14
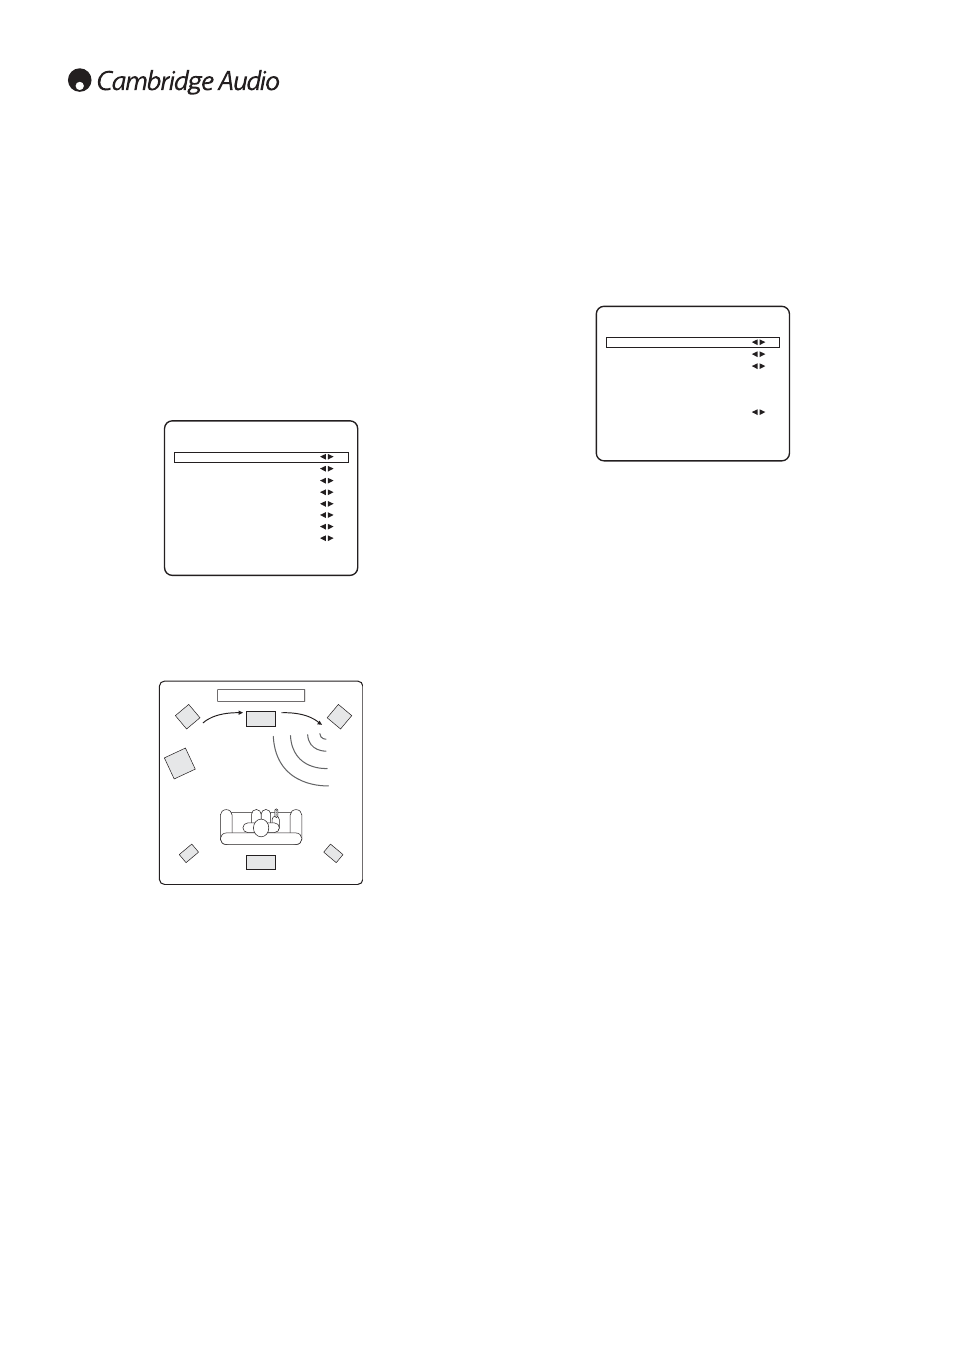
The 540R v3 allows level calibration to match the acoustic level
between different types/sizes or even manufacturers of speaker that
may be being used for each channel. This is achieved by adjusting the
relative level of each speaker through the ‘Level Calibration’ menu in the
OSD.
The basic process is to listen to or measure with an SPL meter (more
accurate and recommended but not essential) the level of sound
produced by each speaker and set relative levels for each speaker so
that they all sound the same loudness at the normal listening position.
The 540R v3 incorporates a Test Signal Generator (broad-band white
noise) to facilitate this.
Set the unit to a normal listening level or half maximum volume
approximately. Press the OSD button on the remote control then select
the ‘Level Calibration’ menu. Now turn on the test signal by highlighting
this item and pressing the Left or Right arrows:
A “rushing” or “hissy” sound should be heard, initially through the Front
Left Speaker.
You can now move up and down the channels using Volume Up/Down
on the remote. Each time a new channel is selected the test signal will
be heard to move to that channel. Compare the loudness of all channels
as heard at the listening position.
Now adjust the channels so they all sound the same (in terms of
loudness only, channels of different frequency responses can sound
different in terms of the “tone” of the sound i.e. more or less hissy).
Pick the channel that sounds most different and select it to listen to the
test signal. Now adjust the relative level in dB (using Arrow left/right on
the remote) and continue comparing it to other channels until it is of
equal loudness. The level can be adjusted up to + or - 10dB in 1dB
steps. Repeat the process with the next loudest channel etc. Once all
channels sound the same in terms of loudness, press the OSD button
again to save the settings and exit the menu.
3. Level calibration
Level Calibration
Test Signal : On
Front L : 0dB
Front R : 0dB
Surround L : 0dB
Surround R : 0dB
Center : 0dB
Subwoofer : 0dB
Surr. Back : 0dB
Return to Menu : [OSD]
The next step is to select each source input in turn on the 540R v3 and
tell the unit the type of audio connection you want to use for that source
(Analog or Digital input).
The 540R v3 remembers this setting individually for every source input
and automatically recalls it as and when you change source input.
Select the ‘Input Setup’ menu. Highlight each source in turn and select
either analog or digital input types (use the Left and Right arrows):
Analog inputs will require a stereo phono/RCA to phono/RCA cable
connection to the 540R v3. Digital inputs will require either a 75ohm
digital type phono/RCA to phono/RCA co-axial cable (SPDIF) or an
optical fibre cable (TOSLINK). The 540R v3 will automatically use
whichever is connected. Do not make connections to both the Optical
and Co-axial inputs for a source.
Note: Video 3, Tuner, Tape and 6.1 Direct only have analog connections
and so are not selectable in this menu.
Once you have set the audio types exit the OSD to save.
This setting can also be changed at any time without using the OSD by
pressing the Input Mode button on the front panel (or Audio In Type
button on the remote). This will then cycle between analog or digital
input types for the currently selected source; as usual they will then be
remembered the next time you return to that source.
4. Source setup
Input Setup Menu
DVD : Digital
Video1 : Analog
Video2 : Analog
Video3 : Analog
Tuner : Analog
Tape : Analog
CD/Aux : Analog
6.1 Direct : Analog
Return to Menu : [OSD]