Dillon U Force Gauge User Manual
Dillon universal force gauge

The Dillon Universal Force Gauge bears a serial number stamped on a
permanent nameplate. Please refer to this number and mention capacity of
the instrument should it ever be necessary to contact your supplier.
To adjust for precise zero, loosen the knurled screw on the side of the
indicator bezel slightly and rotate the bezel in either direction as required.
Then retighten the knurled screw. It may be necessary to repeat this opera-
tion several times to secure exact zero setting.
If the gauge is to be used for setting electrode pressure in resistance welders,
be sure to disconnect power before making measurements. A warning
sticker to this effect is on the end of the Force Gauge.
All units with a flat bottom surface may be placed on any flat surface with the
load applied to a single pressure fitting on the top of the deflection beam. It is
important to apply force only at the center of the loading points as shown in
Figure 2. Standard instruments with a recess on the bottom surface will
produce readings on a flat surface but such readings will not be accurate.
Larger capacity gauges have a mounting hole in the bottom to accept cus-
tomer jigs.
Dillon Universal Force Gauges are carefully machined and are calibrated with
certified laboratory testing equipment or weights. With reasonable care, they
will provide many years of satisfactory service.
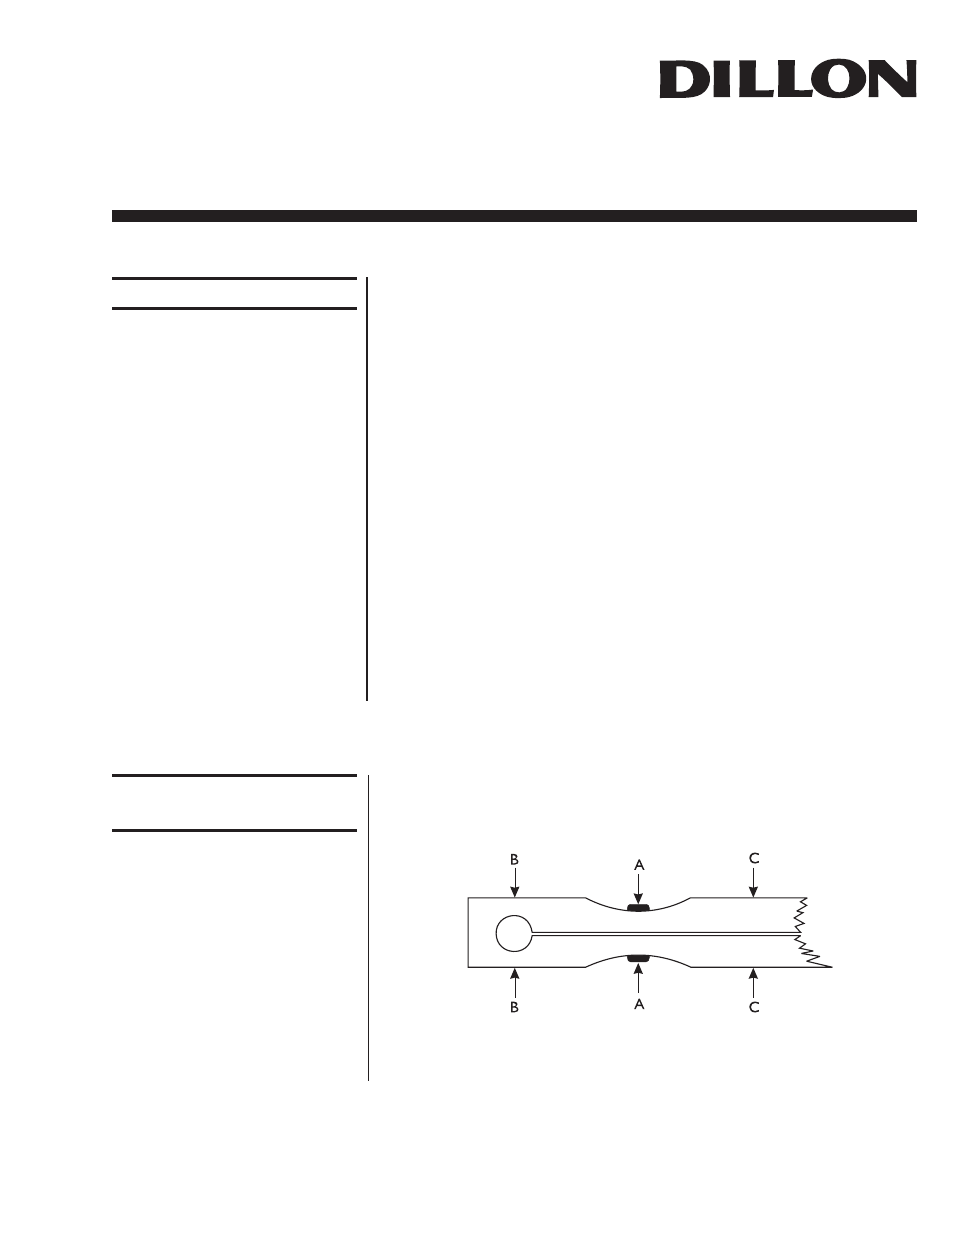
Load must be applied to the Dillon Universal Force Gauge ONLY at point "A"
shown in Figure 1. Inaccurate readings will result at "B" or "C". Be sure force
is applied in a straight line as shown by the arrows.
Figure 1
Recessed bottom gauges
Dillon Universal Force Gauge
Correct Methods of
Applying Load
Operation
