Step by step installation procedure – Beckett LineGuardian User Manual
Page 4
4
5
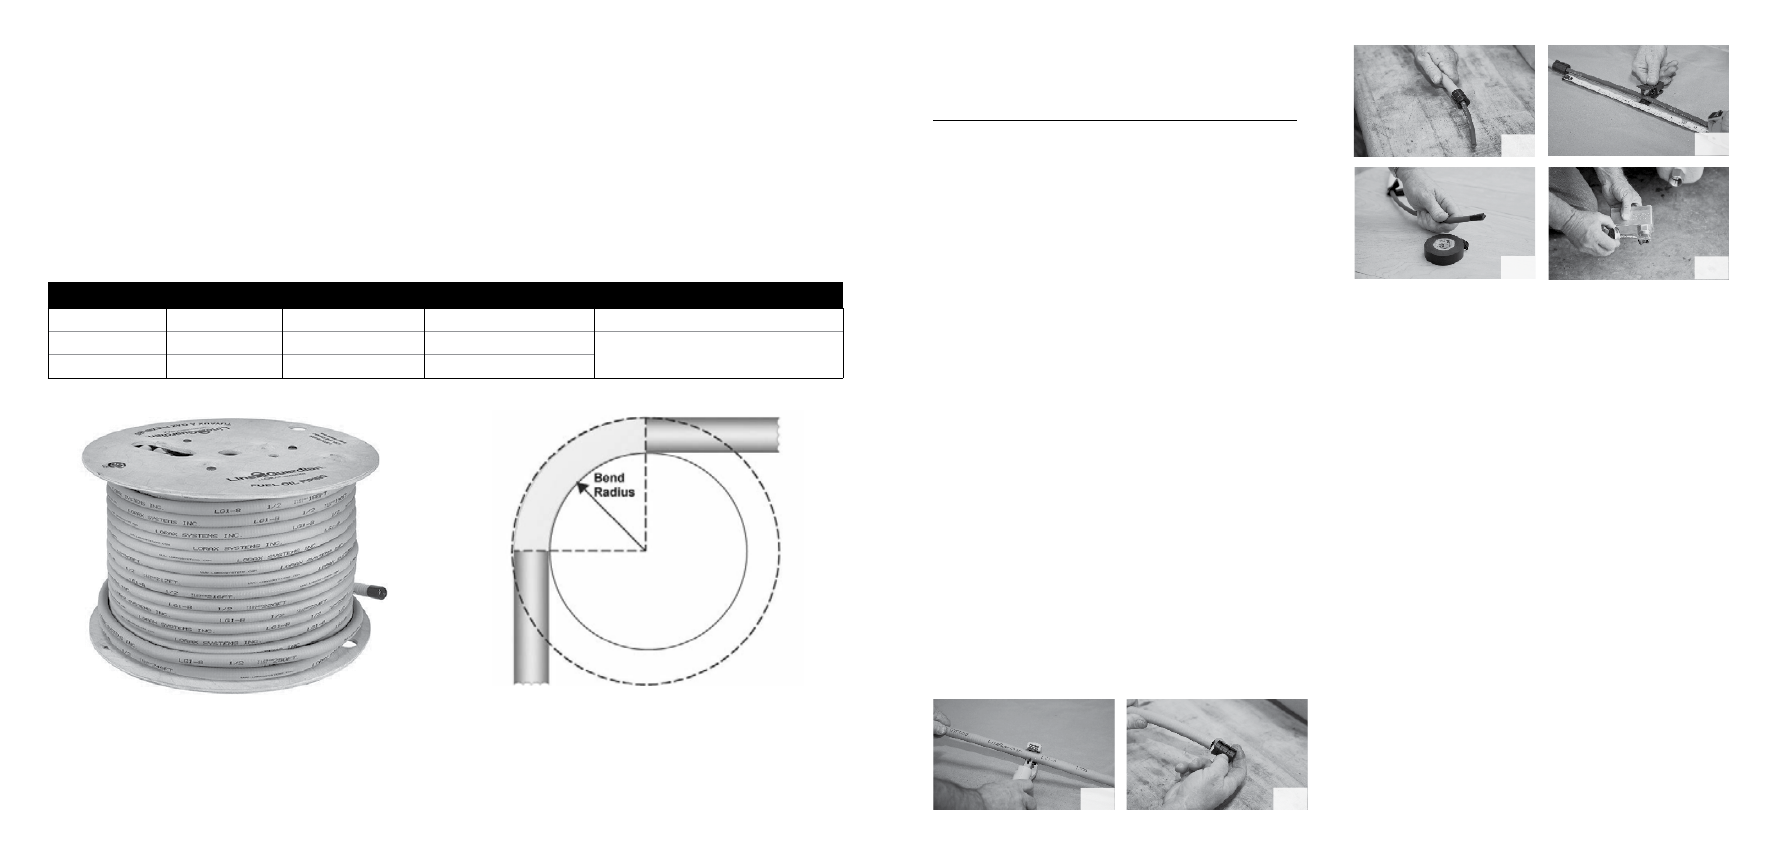
FIGURE 4.1 – LG CSST AND POLYAMIDE MINIMUM BEND RADIUS
Part#
Tubing
Diameter
Minimum bend radius
System minimum bend radius
LG1-8
CSST
1/2"
3"
3"
LG2-6
Polyamide
3/8"
1.5"
•
Lorax LineGuardian CSST shall be supported in a workmanlike
manner with pipe straps, bands or hangers suitable for the
size and weight of the CSST, at intervals not to exceed six feet
vertical or horizontal. A proper support is one which is designed
as a pipe hanger, does not damage the tubing during installation,
and provides full support .
•
“J” hooks shall not be used as they may damage the Lorax
LineGuardian CSST. Zip ties/cable ties shall not be used as a
primary support but may be used to organize or bundle Lorax
CSST. When supporting Lorax LineGuardian CSST runs, the
use of other conductive metallic systems such as metallic
appliance vents,metallic ducting and piping, and electrical
cables must be avoided.
•
Lorax LineGuardian CSST must be rigidly terminated with a
Lorax LineGuardian CSST termination fitting. This is achieved by
terminating to a rigidly mounted connection point (i.e. appliance).
•
Please see detailed instructions in the installation guide section
of this document for information regarding the proper handling
and installation of the Lorax LG polyamide internal tubing.
Step by step
installation procedure
STEP 1: CUT LINEGUARDIAN CSST
TUBING TO LENGTH
1 Generously estimate the total run length required to route
flexible tube from tank outlet to appliance inlet.
2 Base routing requirements on best practices for flexible oil
line installation. Please ensure you adhere to all regulatory
requirements for your jurisdiction.
3 Include approximately three extra meters for a stress loop at
each end (if required).
4 Unroll and uncurl this length of 1/2" Lorax corrugated stainless
steel tubing (CSST) by referring to the measurement markings
on the tubing jacket.
5 Cut using a CSST cutter (fig. 1) leaving approximately
one inch for fitting attachment. The cut should be centered
between two corrugations and the result should be a clean
and round cut end. Please note: when cutting CSST,
please ensure the section being cut is as straight as possible.
Cutting on a bend or curve will render the newly cut ends
unusable. To ensure a quality flare, all cuts should be made
on a straight section of tubing.
6 Attach end guide tools on each end of CSST as shown
in (fig. 2). Failure to attach these end fittings WILL result in
damage to the Parflex tubing. If this occurs, you will need
to replace all of the Parflex tubing.
STEP 2: CUT LG POLYAMIDE TUBING
1 Feed the 3/8" LG tubing through the length of the CSST (fig. 3).
2 Use a poly tube cutter (fig. 4) to cut the tube cleanly and
squarely, such that at least 200 mm or 8" extend out each
end of the CSST.
3 Leaving the end guide in place, use electrical tape (fig. 5)
to seal off the leading end of the tubes if they will need
to be threaded through openings or areas with potential
contamination. For an example of a suitable poly tube
cutter, please see the next page (fig. 10).
STEP 3: CSST/POLYAMIDE ROUTING
1 Form an approximately 18" diameter stress relieving loop
at a convenient distance (no less than 300 mm/18") from
the tank end of the line, if required.
2 NOTE: Lorax Systems recommends the use of a stress relieving
loop at the tank connection end, however, it may not be
required or recommended by local authorities and is dependent
on installer best practices and jurisdictional requirements.
3 Route and secure the combined tubing from the tank outlet to
the appliance inlet in accordance with industry best practices,
and all regulatory and local compliance requirements.
STEP 4: INSTALL VALVE
1 Carefully apply thread sealant to the external threads on the
inlet of the LineGuardian valve (fig. 6) and install into the tank
outlet using a wrench on the integrated nut flats.
fig. 1
fig. 2
fig. 5
fig. 6
fig. 3
fig. 4