Vernier Spectrum Tube Single Power Supply User Manual
Page 3
Operation
CAUTION: This unit is suitable for operation in dry locations only. The tube becomes hot in
operation. Do not touch the hot tube.
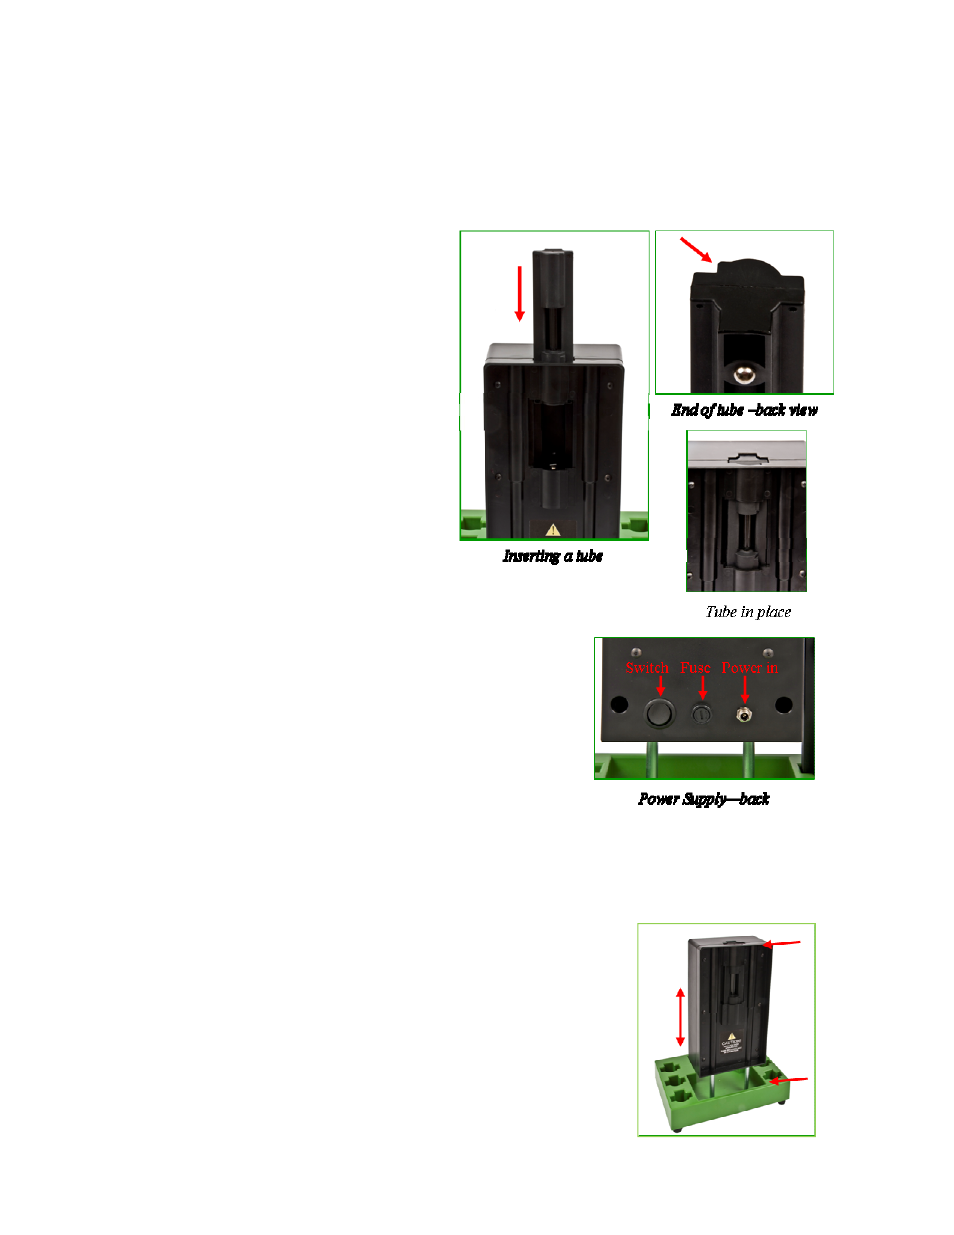
Inserting a tube
To ensure correct orientation of the tube in the tube
well, the tube shell has a ridge along the front right
side (see picture).
1. Match the ridge on the tube shell to the insertion
aperture on the top of the power supply. The
round magnet cover on the rear of the shell should
be facing down.
2. Insert the lower end of the tube into the insertion
aperture and slide the tube all the way down into
the well so that it seats at the bottom of the well
(see picture).
Apply Power
The back of the power supply carries the power input
socket, the fuse, and the on/off switch (see picture).
1. Insert the output connector of the wall mount
power supply into the main power supply input
socket.
2. Insert the wall mount power supply into a 120VAC
electrical outlet.
3. Turn on the power switch.
The discharge will now strike and run.
Adjusting the height of the tube
Various models of spectrometers have the entry slit at different heights.
The power supply can be adjusted to bring the light emitting region of the
tube to the appropriate height.
Grasp the base and top ledge of the power supply and raise the unit as
needed.
Changing the tube
The tube can be removed by placing a finger under the top ledge of the
illuminated area and lifting the unit until its top can be grasped from above
and lifted out (see picture).
Although tubes can be changed with the power turned on without damaging the tubes or risking electrical shock,
because the supply voltage contacts (see picture) are automatically disconnected when the tube is lifted from its
engaged position, this is not recommended, because of the risk of touching the hot tube.