Assembly, Tiller setup – Cub Cadet Series 390 User Manual
Page 6
6
3
Assembly
NOTE: Stand behind
the tiller as if you were
going to operate it. Your
right hand corresponds
to right side of
tiller; your left hand
corresponds to
left side of tiller.
IMPORTANT
This unit is shipped
without gasoline or
oil in the engine. Fill
up gasoline and oil
as instructed in the
accompanying engine
manual
BEFORE
operating your tiller.
Tiller Setup
References to right and left side of tiller are determined
from behind the unit in the operating position.
Handle Attachment
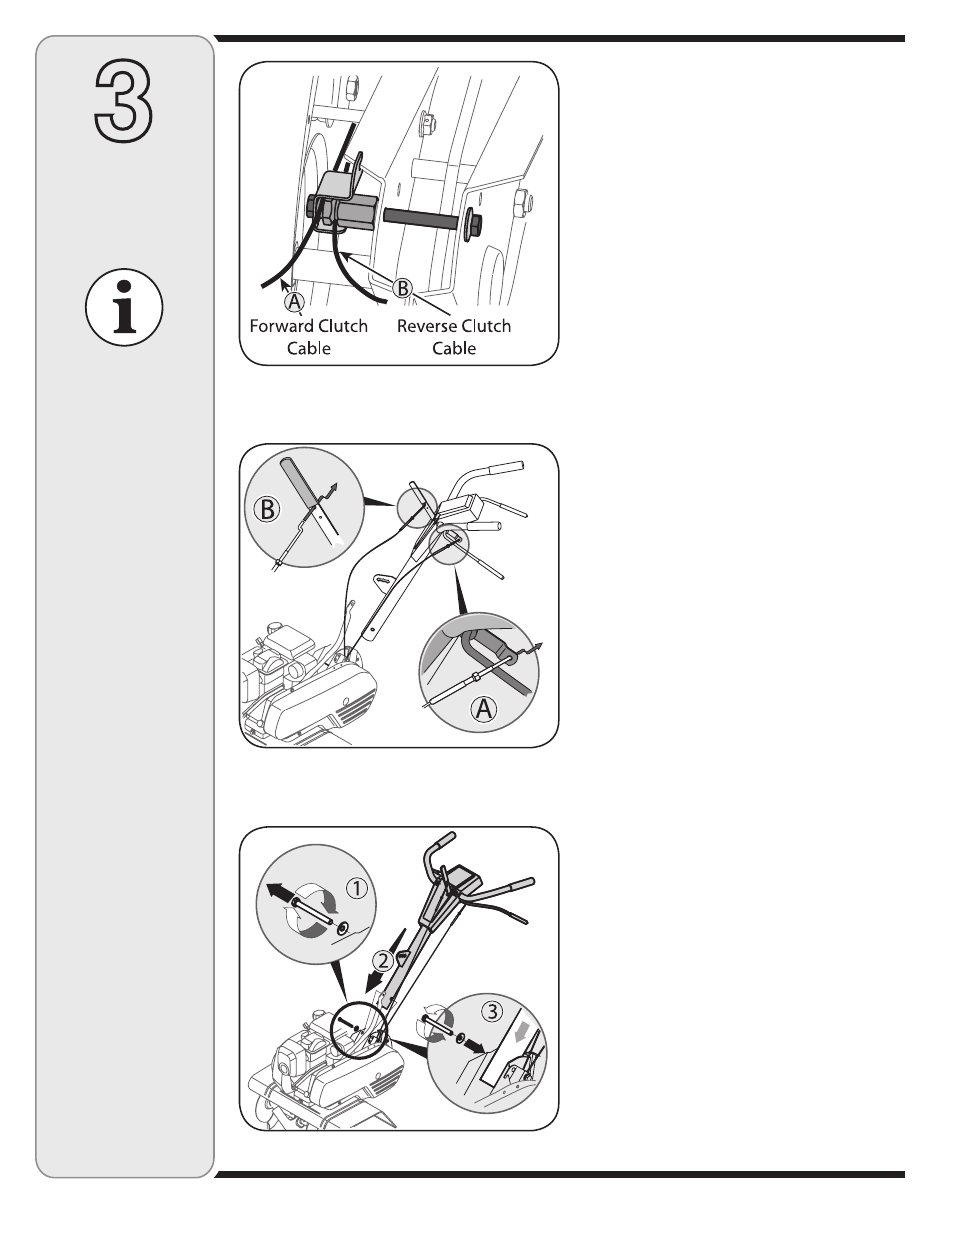
1. Identify forward clutch cable (A) and reverse
clutch cables (B). Figure 3–1.
Figure 3–1: Identify Cables.
Figure 3–3: Insert handle into frame.
Figure 3–2: Insert cables into levers.
Be sure not to kink cables while attaching.
2. Hook the “Z” end of the forward clutch cable
(A) into the forward tine engagement lever
Figure 3–2.
3. Hook the “Z” end of the reverse clutch cable
(B) into the reverse tine engagement lever
Figure 3–2.
4. Remove the hex bolt and cupped washer from
the right side of the frame. Hold the cable
guide bracket on the left side of frame as it
will fall when the bolt is removed.
Figure 3–3 Step 1.
5. Insert handle into tiller frame as shown. See
Figure 3–3 Step 2.
6. Insert bolt through the cupped washer, frame,
handle and into the cable guide bracket (note
the notch in the cable guide bracket goes
over the flange on the frame.) See Figure
3–3 Step 3. Tighten the bolt securely after
securing handle brace as seen in Figure 3–4.