Sd-70 lap dog trainer quick start guide, Step 1, Step 2 – Petsafe Innotek Lap Dog Remote Trainer User Manual
Page 3: Step 3
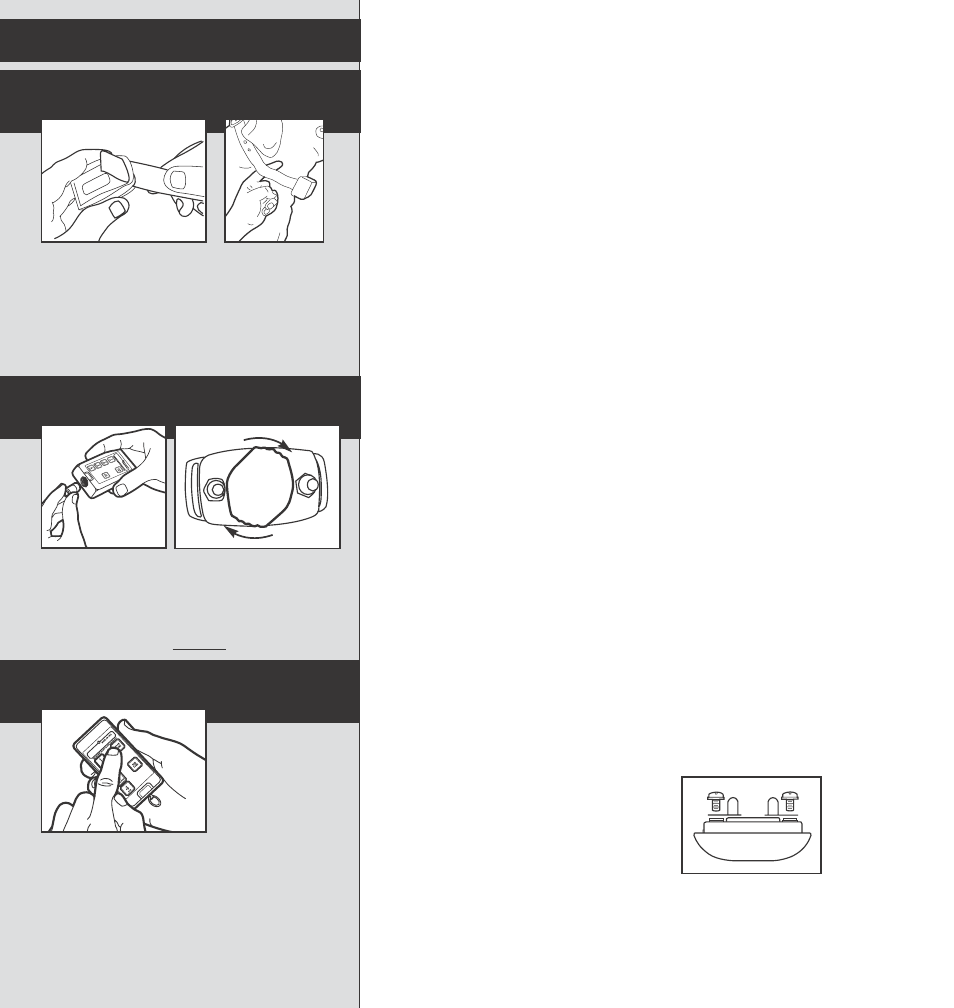
Thread the included collar strap through the channels
on the receiver. With the collar turned OFF, place on
dog and adjust to fit. The collar fit should be snug, yet
loose enough to allow one finger to fit between the
strap and the dog’s neck. Fit is important because a
loose collar may cause inconsistent performance. It’s
okay to trim any excess strap length.
Understanding the Transmitter
The handheld device signals the collar receiver to
produce stimulation and/or tone. The transmitter is
water-resistant and should not be immersed in water
or placed in a dishwasher.
Transmitter Buttons:
1-LOW to 4-HIGH. – Select any of 4 stimulation lev-
els instantly. We recommend that you always start
training your dog with the lowest stimulation, and
increase to a higher level if necessary. You will know
when you’ve reached the right level when your dog
responds by twitching his head, neck or shoulders or
by perking up his ears. If the dog vocalizes, you need
to go to a lower level.
You control the length of the stimulation by how long
you press the button. For a short stimulation, press
and release the button. For a longer stimulation, hold
the button down. A maximum of 10 seconds may be
applied before the safety feature to prevent over-cor-
rection engages. After 10 seconds, stimulation will be
locked out for another 10 seconds. During the lock-
out period a solid tone will sound.
GOOD Tone Button
Simply press the GOOD tone button when your dog
does something good and follow up immediately with
a favorite treat and plenty of praise. Your dog will
quickly learn to associate the GOOD tone with prop-
er behavior.
BAD Tone Button
The BAD tone followed by the stimulation is used for
inappropriate behavior. Your dog will quickly learn to
associate the BAD tone with inappropriate behavior.
You can then use the BAD tone alone to discourage
misbehaviors.
PROGRAM – used in tandem with buttons on the
transmitter face to change ID Codes or set tone-with-
correction options.
Your transmitter has an LED light:
• Pulsating green light – unit is transmitting
• Pulsating red light – low battery
Changing the ID Code
The SD-70 offers 2,048 ID codes in case you experi-
ence problems from other nearby training units. To
change codes:
• Turn the collar off.
• Press and hold the PROGRAM button on the back
of the transmitter.
• Continue pressing PROGRAM, while pressing 1-
LOW on the face of the transmitter.
• Release only the PROGRAM button, while continu-
ing to press 1-LOW.
• When the LED ceases flashing red-green, release
1-LOW.
Step 1
Fit Collar on Dog
SD-70 Lap Dog Trainer
Quick Start Guide
Step 2
Power Up
Transmitter: Insert 12v alkaline battery in the trans-
mitter positive (+) side out. Replace metal cap.
Receiver: Your receiver comes ready to go with bat-
teries installed. Activate the collar by turning the
receiver’s battery cover clockwise to the ON position.
Step 3
Match Components
Press GOOD Tone button on the transmitter within
30 seconds of turning ON the receiver. The compo-
nents now work together.
You may wish to set tone mode before working with
your dog. See "Setting/Changing the tone mode."
When not in use, be sure to turn the receiver OF to
extend battery life.
• Rematch the components as shown in Quick Start
Step 2.
Setting/Changing the Tone Mode
Your can set the SD-70 to deliver the BAD tone auto-
matically when you push a stimulation button. Three
settings are possible – tone with the stimulation, tone
followed by delayed stimulation or stimulation only.
1. Press and hold the PROGRAM button on the back
of the transmitter.
2. Press and hold one of the following to select the
tone option:
• BUTTON 2 for tone ON with stimulation
• BUTTON 3 for tone OFF with stimulation
• BUTTON 4 for tone with a one-second delay
before stimulation
3. While continuing to hold BUTTON 2, 3, or 4,
release the PROGRAM button. The transmitter light
will stay solid for a couple of seconds, and then go
out.
4. As soon as the solid light goes out, release BUT-
TON 2, 3, or 4.
Understanding the Receiver
The collar receiver produces stimulation and/or tone.
The receiver is water-resistant and should not be
immersed in water or placed in a dishwasher.
Testing the Receiver
You may wish to test the collar from time to time. To
test:
• Hold the test light provided across the receiver’s
posts
• Press a stimulation button 1-LOW to 4-HIGH.
• Test light will illuminate.
• The intensity of the test light will increase as the
level increases.
Replacing Batteries
To replace batteries, twist the battery cover counter-
clockwise, to the OPEN position. Lift the cap out,
remove old batteries and insert new batteries with
positive (+) side down toward the battery cap lid.
Changing Posts
Your SD-70 receiver
comes with innovative
inset probes designed
to precisely fit the
smaller necks of toy
and lap-dog breeds.
To change the posts to the in-set design, simply
remove the contact posts, then assemble the in-set
posts using the Phillips head screws provided (see
illustration). Be sure that the post base lifts up and
away from the battery cap on/off switch.
ON
OFF
OPEN