Assembly instruction 2/3, Step 2, Step 1 – Home Styles 5000-89 User Manual
Page 2
IMPORTANT
* You should keep the Hex Wrench in a safe place as you may need to tighten up the Head Cap Bolts in the future.
* Use a soft cloth between these parts and the fl oor.
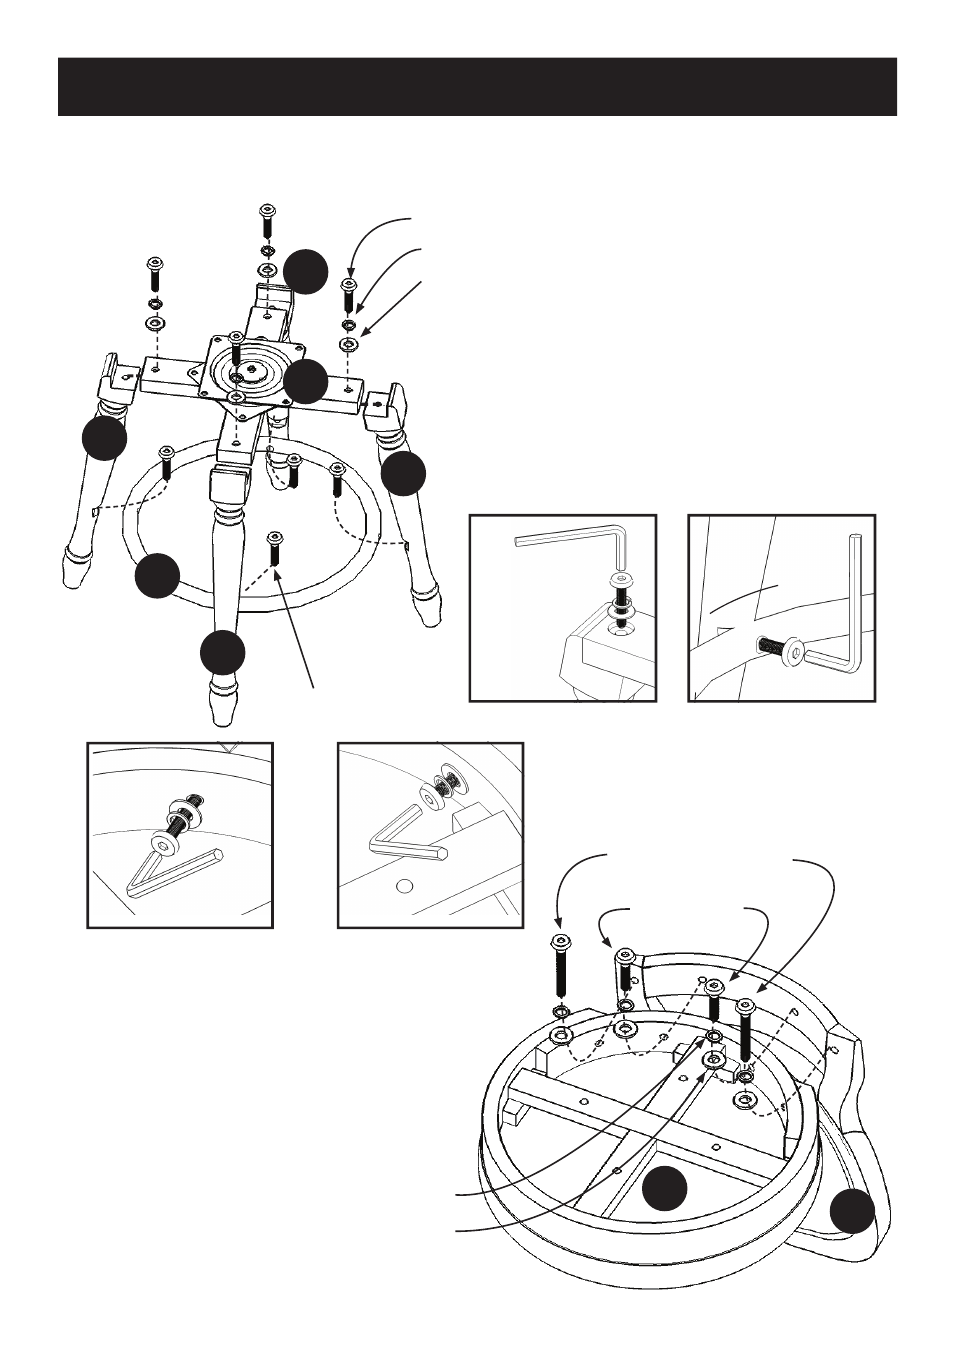
Assembly Instruction 2/3
STEP 2
Turning the Seat (A) upside down, attach Back
Seat (B) to Seat (A) with Large Flat Washers
(5/16” x 23 mm.), Spring Washers (5/16”), Head
Cap Bolts (5/16” x 2”) and Head Cap Bolts
(5/16” x 1 1/2”).
(see Figure 3), (see Figure 4)
Figure 4
Figure 1
Figure 3
E
D
C
B
E
E
E
A
Spring Washer (5/16”)
Mediume Flat Washer (5/16” x 16 mm.)
Head Cap Bolt (1/4” x 1 1/4”)
Head Cap Bolt (5/16” x 2”)
Head Cap Bolt (5/16” x 1 1/2”)
STEP 1
Attach Legs (E) to Base (D) and Foot Rest (C) with
Mediume Flat Washers (5/16” x 16 mm.), Spring
Washers (5/16”), Head Cap Bolts (5/16” x 1 1/2”)
and Head Cap Bolts (1/4” x 1 1/4”).
(see Figure 1), (see Figure 2)
Figure 2
Head Cap Bolt
(5/16” x 1 1/2”)
Spring Washer (5/16”)
Large Flat Washer (5/16” x 23 mm.)