Assembly instruction 2 / 2, Ag g, Step 1 – Home Styles 5516-88 User Manual
Page 2: Step 2, Step 3
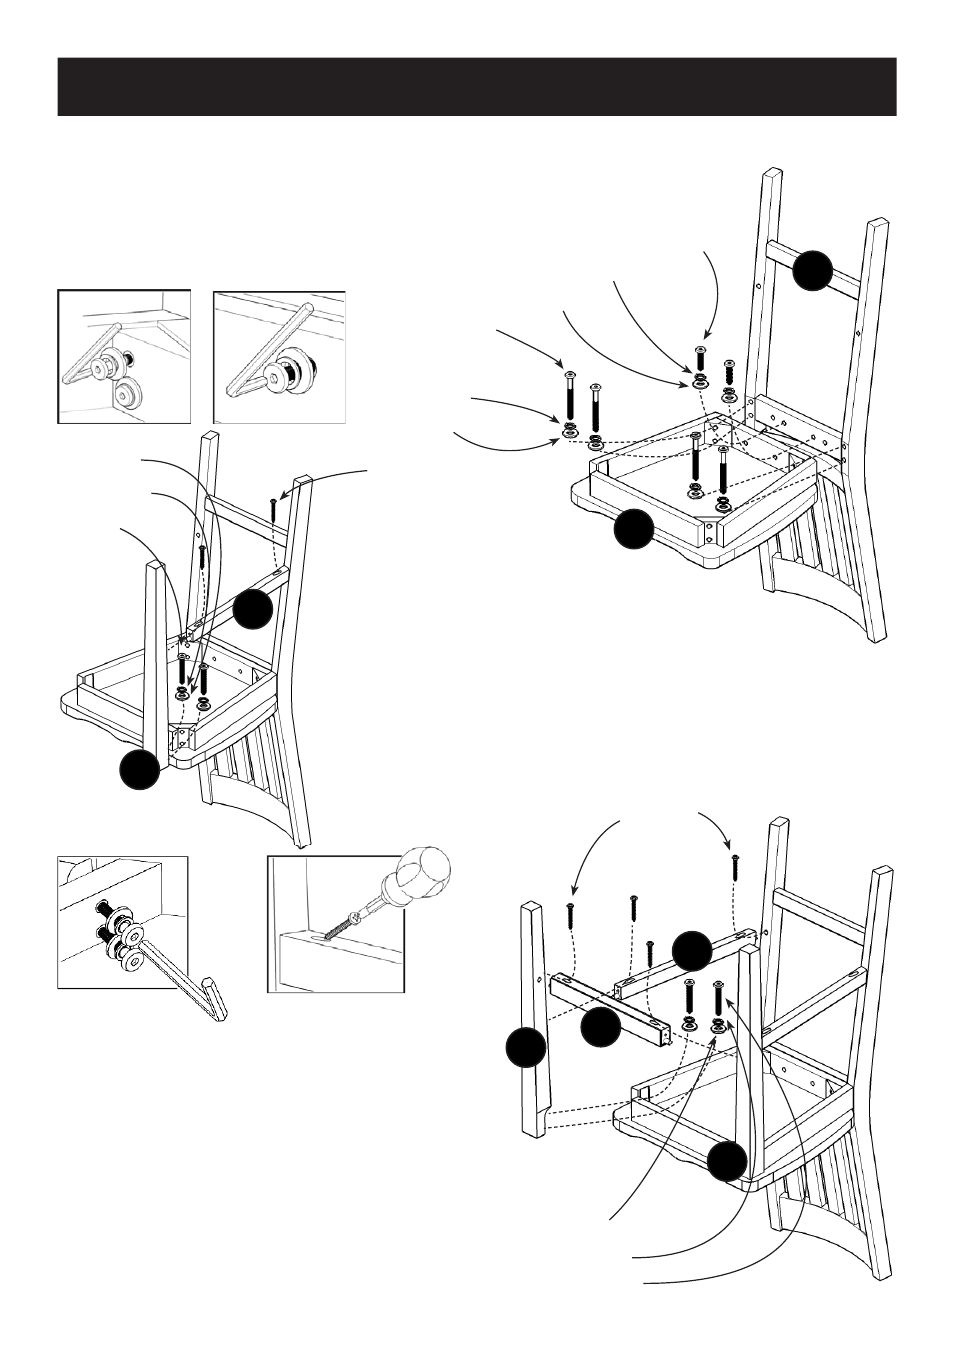
STEP 1
Attach Seat (A) to Back Frame (G) with Flat Washers,
Spring Washers, Head Cap Bolts (long) and Head Cap Bolts
(short). (see Figure 1), (see Figure 2)
IMPORTANT
* Do not tighten up all the screws until each part is properly assembled.
* You should keep Hex Wrench in a safe place as you may need to tighten up the Head Cap Bolts in the future.
Assembly Instruction 2 / 2
STEP 2
Put end of Stretcher (B) into hole in Back Frame.
Slide Leg (E) into position on the unit with other end of Stretcher (B) in
hole in Leg (E).
Attach Leg (E ) to unit with Flat Washers, Spring Washers and Head Cap
Bolts. (see Figure 3)
Attach Stretcher (B) to unit with Wood Screws. (see Figure 4)
Figure 3
A
A
G
G
Figure 1
Figure 4
Flat Washer
Wood Screw
Head Cap Bolt (short)
Head Cap Bolt
E
E
Figure 2
STEP 3
Put end of Stretcher (C) into hole in Back Frame and end of
Stretcher (D) in hole in Leg (E).
Slide Leg (F) into position on the unit with the other end of
Stretcher (C) and Stretcher (D) in holes in Leg (F).
Attach Leg F) to unit with Flat Washers, Spring Washers and
Head Cap Bolts.
Attach Stretchers (C), (D) to unit with Wood Screws.
Tighten up all Head Cap Bolts and Wood Screws.
C
C
D
D
F
F
B
B
Spring Washer
Spring Washer
Flat Washer
Head Cap Bolt (long)
Spring Washer
Flat Washer
Wood Screw
Head Cap Bolt
Spring Washer
Flat Washer
E
E