Drawer (j), Assembly instructions 10 part list – Home Styles 5549-18 User Manual
Page 9
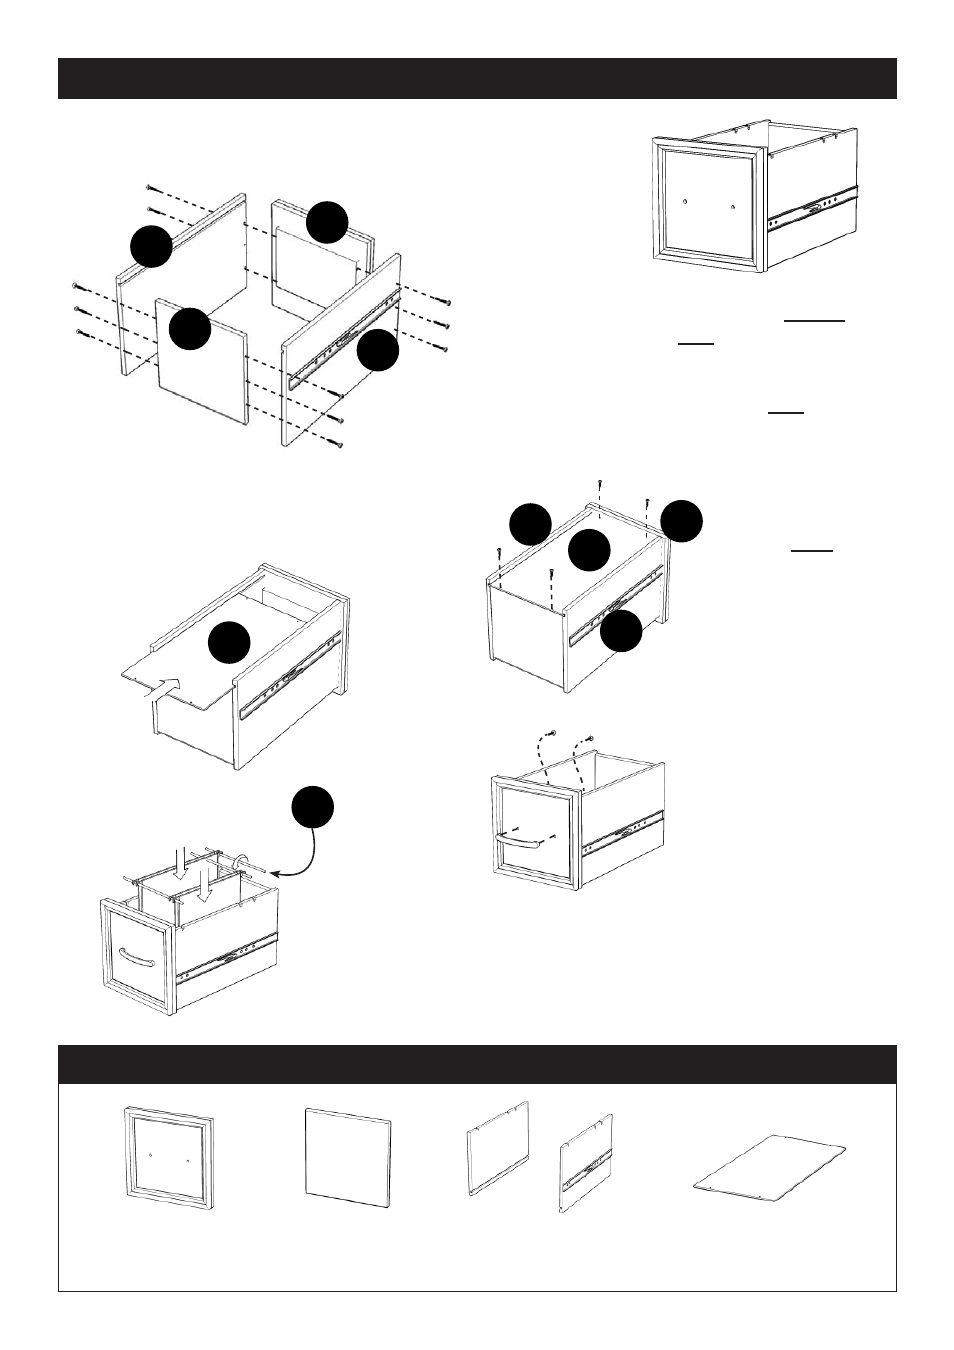
Assembly Instructions 10
Part List
Drawer (J)
J1.
Front Part
1 Pc.
J2.
Back Part
1 Pc.
J3.
Side Part
1 Pc.
J4.
Side Part
1 Pc.
J5.
Base Part
1 Pc.
STEP 1
Attach J1, J2 and J3 using a Phillips
screwdriver and long Wood Screws (6X),
tighten halfway.
Attach J1, J2 and J4 using long Wood
Screws (6X), tighten halfway.
(See Figure 1)
P
STEP 2
Slide J5 into grooves in J3 and J4. Be sure
to push J5 all the way forward so it meet J1.
(See Figure 2)
STEP 3
Insert short Wood
Screws (4X) into the
pre-drilled holes in J5,
tighten screws.
(See Figure 3)
Figure 1
Figure 2
Figure 3
Figure 4
Figure 5
STEP 4
Attach Pull Handle with
Machine Screws.
(See Figure 4)
STEP 5
Place Metal Strops (P) into position. (See Figure 5)
The Metal Strips can be adjusted for letter size or legal size fi les as
shown.
Tighten all screws used
in drawer assembly.
Legal Size
Legal Size
9/10
J1
J1
J2
J5
J5
J3
J3
J4
J4