Celestron Refractor 80ED User Manual
Page 5
5
6. Insert the chrome barrel of the eyepiece into the 45º Erect Image Diagonal.
7. Tighten the thumbscrew on the 45° Erect Image Diagonal to hold the eyepiece in place.
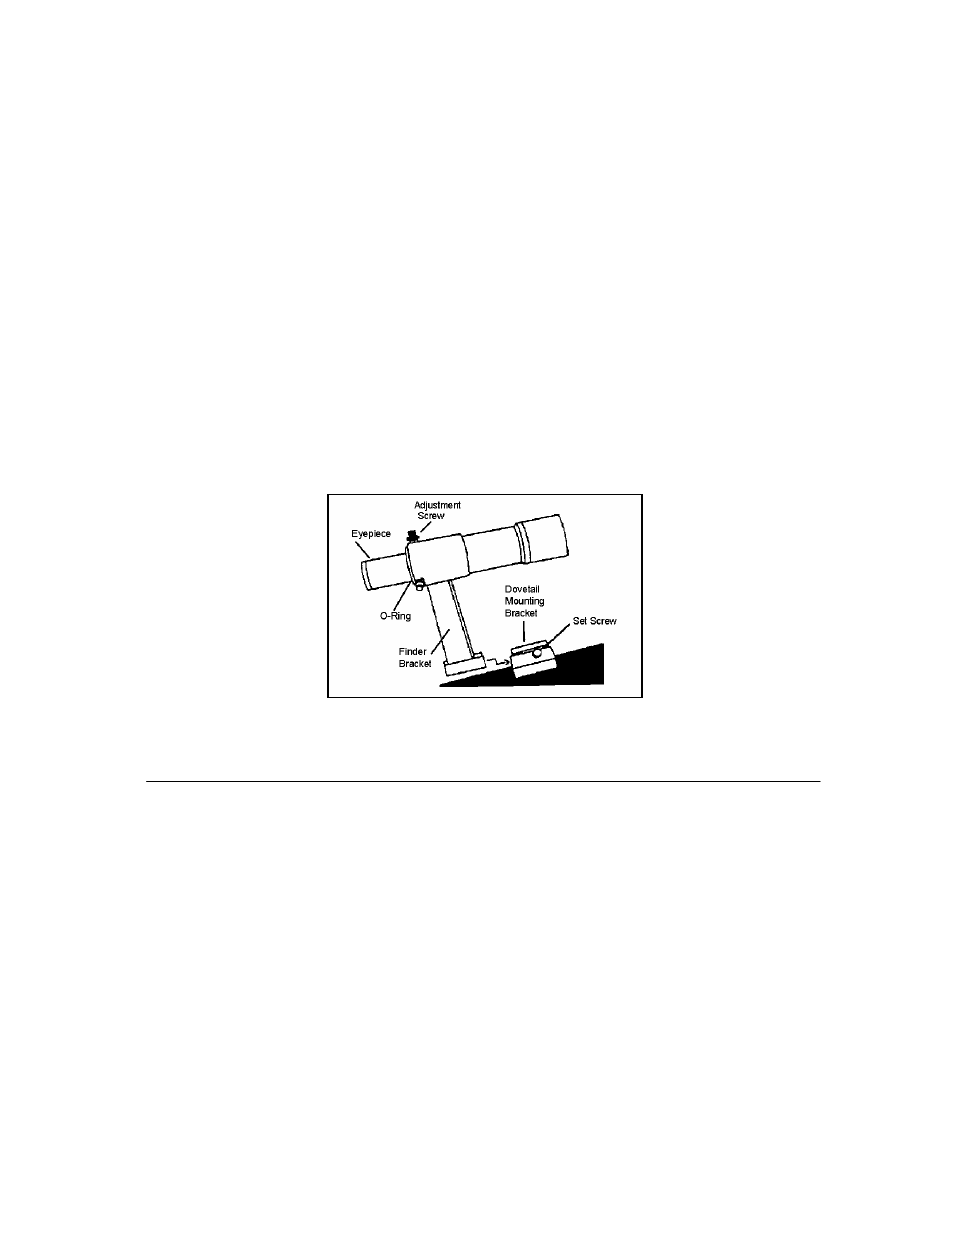
Attaching The Finderscope
Your spotting scope comes with a 6x30mm erect image finderscope to help you locate distant objects
that might be difficult to find in the narrow field of view of the main spotting scope.
1. Attach the finderscope and bracket by sliding the rubber O-ring over the eyepiece lens
(narrow) end of the finderscope and roll it 1/3 of the way up the finderscope body. Then
insert the eyepiece lens end of the finder through the rings in the bracket until the O-ring
presses tightly between the finderscope and the inside of the bracket. Tighten the two
adjustment screws until they make contact with the finderscope body.
2. Slide the finder bracket (attached to the finderscope) into the mounting bracket on the
spotting scope. Tighten the thumb screw on the mounting bracket to hold the finderscope in
place. See figure 3
Aligning the Finderscope
The 6x30mm finder is adjusted using two adjustment screws, located on the top and on the right
(when looking though the finder) of the finder bracket and a spring loaded pivot screw (located on the
left side of the bracket). This allows you to turn the top adjustment screw to move the finderscope up
and down, and turn the right adjustment screw to move the finderscope right to left. The spring
loaded pivot screw puts constant pressure on the finder so that the adjustment screws are always
making contact with the finder.
To align the finderscope:
1. Choose a target in excess of one mile away. This will eliminate any possible parallax effect.
2. Point the spotting scope at your target and center it in the eyepiece of the spotting scope.
3. Adjust the screws on the finder bracket until the cross hairs in the finder are centered on the
target.
Figure 3