Thetford 1210 Series AC - Through 09/07 User Manual
Page 16
Installation Manual 16
2. Make sure that the side trim pieces [127] are in the
correct position (See Art01649 and Art01650):
- Slide both side trim pieces up or down as neces-
sary so that the ends of the side trim pieces are
fully covered by the upper and lower trim pieces [40
and 128].
- Pull the left hand side trim piece toward the left as
far as it will go so that there is no gap between the
edge of the side trim piece and the upper and lower
trim pieces.
- Pull the right hand side trim piece toward the right
as far as it will go so that there is no gap between
the edge of the side trim piece and the upper and
lower trim pieces.
- Push the refrigerator completely into the enclosure.
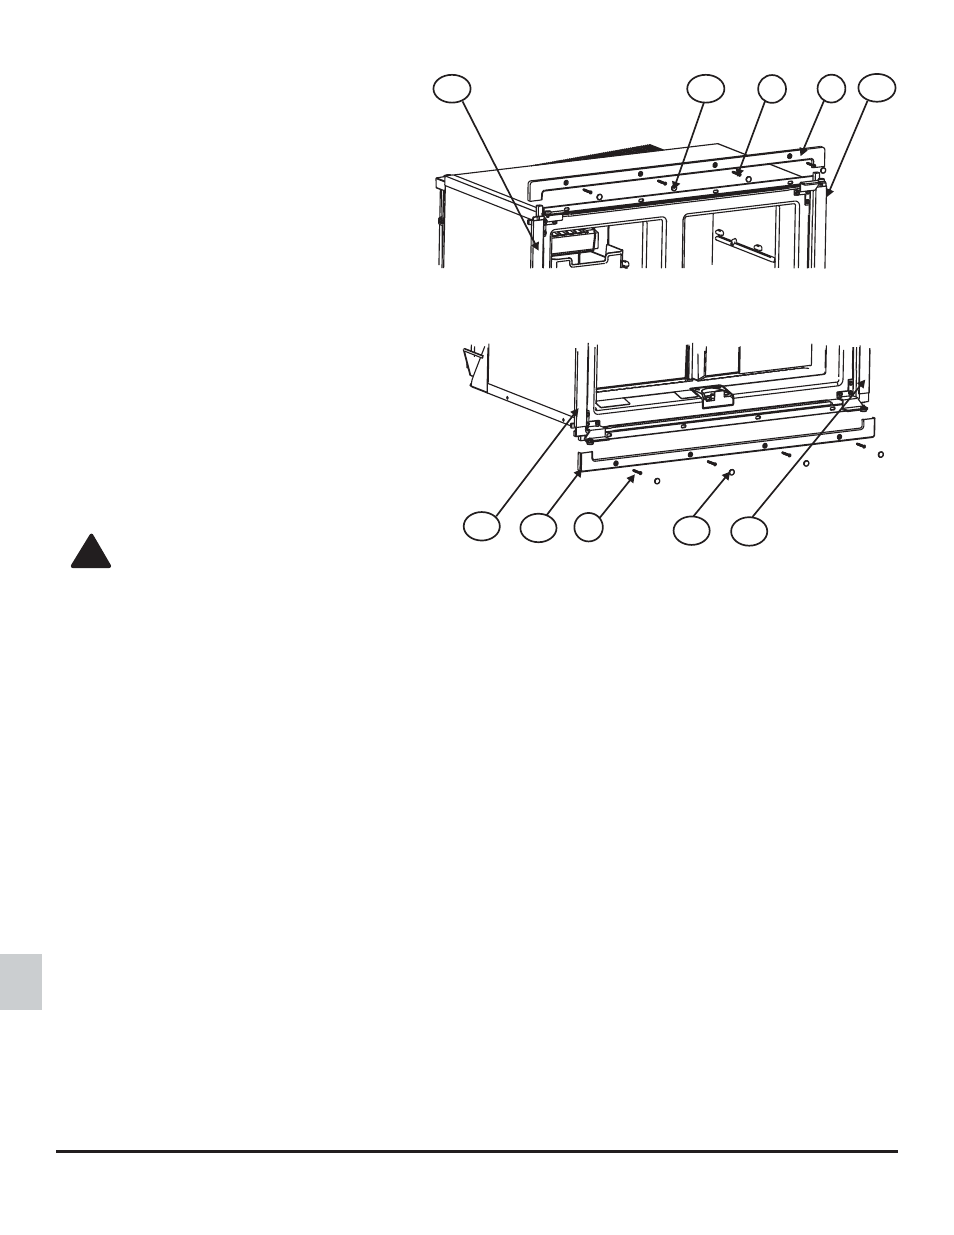
3. Install the mounting screws and trim:
- Put the upper trim piece [40] onto the front of the refrig-
erator (See Art01649).
- Put the four screws [41] through the mounting flange on
the front of the refrigerator and into the enclosure wall.
- Put a cap plug [129] on each of the screw holes in the
upper trim piece on the front of the refrigerator.
WARNING:
Do not omit the lower trim piece. This
piece is part of the combustion seal.
Push the lower trim piece [128] onto the front of the refrigerator (See Art01650).
- Put the four screws [41] through the mounting flange on the front of the refrigerator and into the enclosure wall.
- Put a cap plug [129] on each of the screw holes in the lower trim piece on the front of the refrigerator.
- Put two or more screws through the mounting flange on the rear of the refrigerator and into the floor.
4. On metal door models only, you may wish to remove the protective packaging from the doors.
NOTE: Be careful to not scratch or dent the metal doors. Do not use any abrasive cleaners, chemicals, or scouring pads because
they can damage the fininish of the doors.
Art01649
40
41
127
127
129
Art01650
4
127
128
129
127
!