Assembly, Operation, Connecting the upper and lower handles – Snow Joe MJ403E Mow Joe 17-Inch 13-Amp Electric Lawn Mower/Mulcher User Manual
Page 6: Starting and stopping
6
Assembly
Carefully follow the instructions below to assemble your
Mow Joe electric lawn mower.
NOTE: The packaging is made of recyclable materials.
Properly dispose of these materials in accordance with
regulations.
Connecting the Upper and Lower
Handles
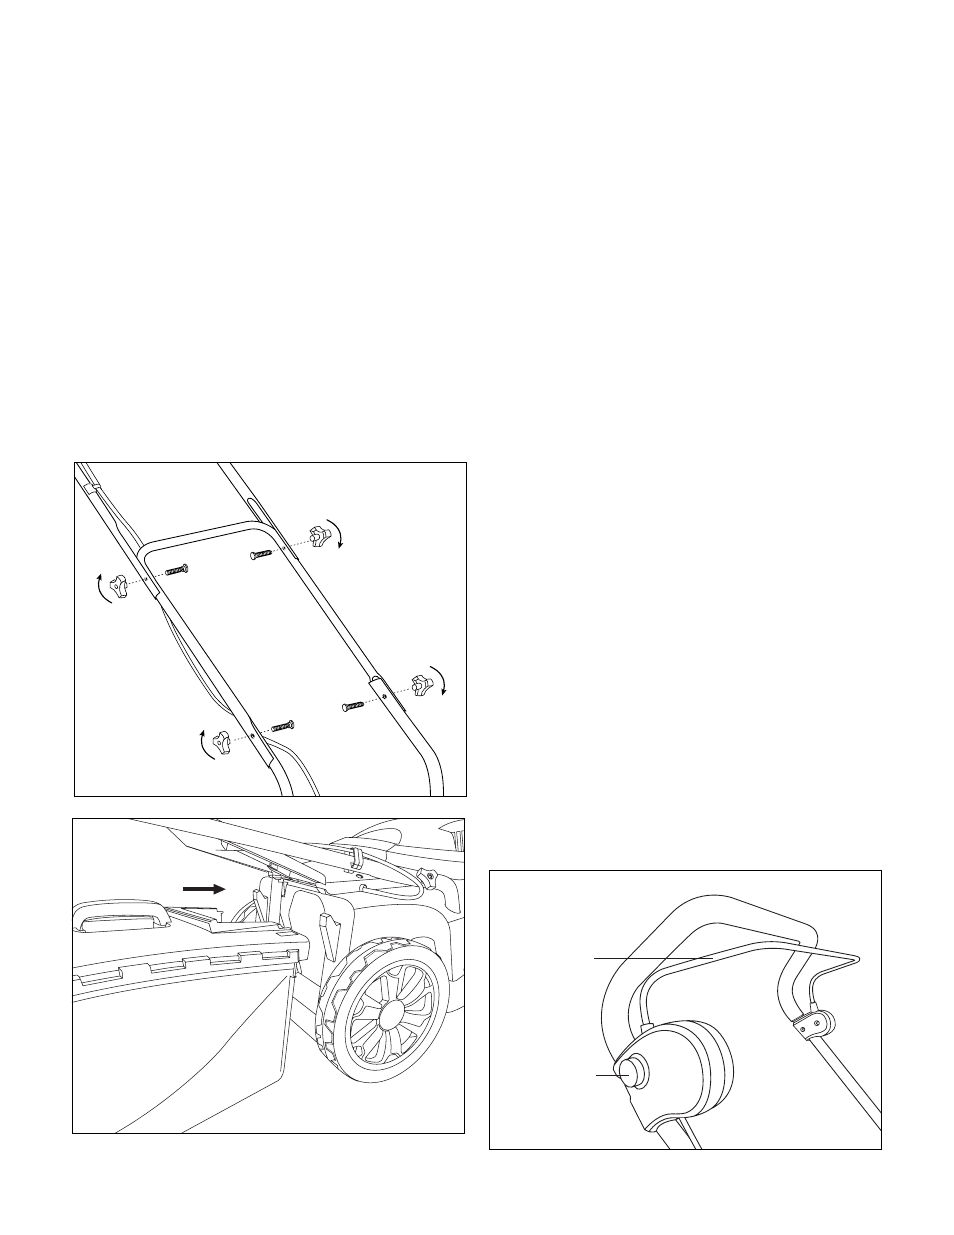
1. Secure the lower handle to the machine using the first set
of knobs and bolts (A). Tighten the knobs on each side to
ensure a secure fit (Fig. 1).
2. Connect the upper handle to the lower handle using the
second set of knobs and bolts (B). Tighten the knobs on
each side to ensure a secure fit (Fig. 1).
3. Hang the collection bag as shown (Fig. 2).
Operation
This lawn mower has been designed to cut grass. Do not use
this lawn mower for any application other than that for which it
was intended.
This lawn mower is suitable for private residential use to cut
grass in small to mid-size lawns and gardens. This lawn mower
is not intended to be used to cut grass in public parks, playing
fields, farms or forests.
Non-permitted users:
Persons who are not familiar with the operating manual,
children, young people under the age of 16 as well as persons
under the influence of alcohol, drugs or medication are not
permitted to operate the unit.
Switching on the unit
Do not switch on the unit until it has been completely
assembled. Before switching on the unit, always check
the connection cable for signs of damage; only an intact
connection cable may be used.
NOTE: Damaged connection cables pose a severe risk of
injury. Replace damaged cables immediately.
Power connection
1. Insert the appliance cord into a proper outdoor extension
cord (see Extension Cord Chart on page 2).
2. Secure the appliance cord to the extension cord as shown
in Table 1 (page 2).
Starting and Stopping
IMPORTANT: Do not start the mower in tall grass.
1. To start the electric lawn mower, press and hold the safety
lock button while pulling the switch bar lever toward you.
Once the machine powers on, release the safety lock
button and proceed with operation (Fig. 3).
2. To stop the lawn mower, release the switch bar lever
(Fig. 3).
Fig. 1
B
A
Fig. 2
Fig. 3
Switch bar
lever
Safety lock
button