Programming, Function, When drying... light bulb replacement – Cabela's Commercial Food Dehydrator 28-0301 User Manual
Page 8
-8-
-13-
PROGRAMMING
7.
TO SET THE TIME: Press the “TIME” Button on the Control Panel one time.
Use the
“UP” & “DOWN” Buttons on the right side of the Control Panel to set
the countdown timer hours (23 hour maximum). Press the
“TIME” Button again to
switch to minutes. Similarly set the minutes (5 minute increments).
8.
TO SET THE TEMPERATURE: Press the “TEMP” Button one time. Use the
“UP” & “DOWN” Buttons to set the temperature (160
o
F maximum, 50
o
F minimum,
5 degree increments).
NOTE: Set Temperature is the maximum temperature the Dehydrator could reach
during operation.
9. You do not need to push any other buttons. The
Dehydrator will automatically
start after a brief pause. NOTE: The
Dehydrator will start while you’re programming
if you delay. Don’t worry, this is normal. Just continue programming as instructed
above.
...PROCEED TO “FUNCTION”
FUNCTION
10. The
Digital Display on the Control Panel will continuously cycle while the unit
is operating. It will alternately display: the preset drying time
“SET TIME;” the
remaining drying time
“TIME REMAINING;” the preset temperature “SET TEMP;”
and the actual current temperature inside the
Dehydrator “ACTUAL TEMP”
(measured by the
Temperature Sensor on the back wall near the top).
NOTE: The “SET TEMP” is only the highest temperature reached during a heating
cycle. The
“SET TEMP” is NOT maintained.
11. The
Dehydrator will emit 8 beeps at startup and when the interior temperature
reaches the preset value.
12. The
Dehydrator automatically stops (Fan & Heater) when the countdown timer
reaches 0. Unit power will remain on, however.
...PROCEED TO “POST OPERATION”
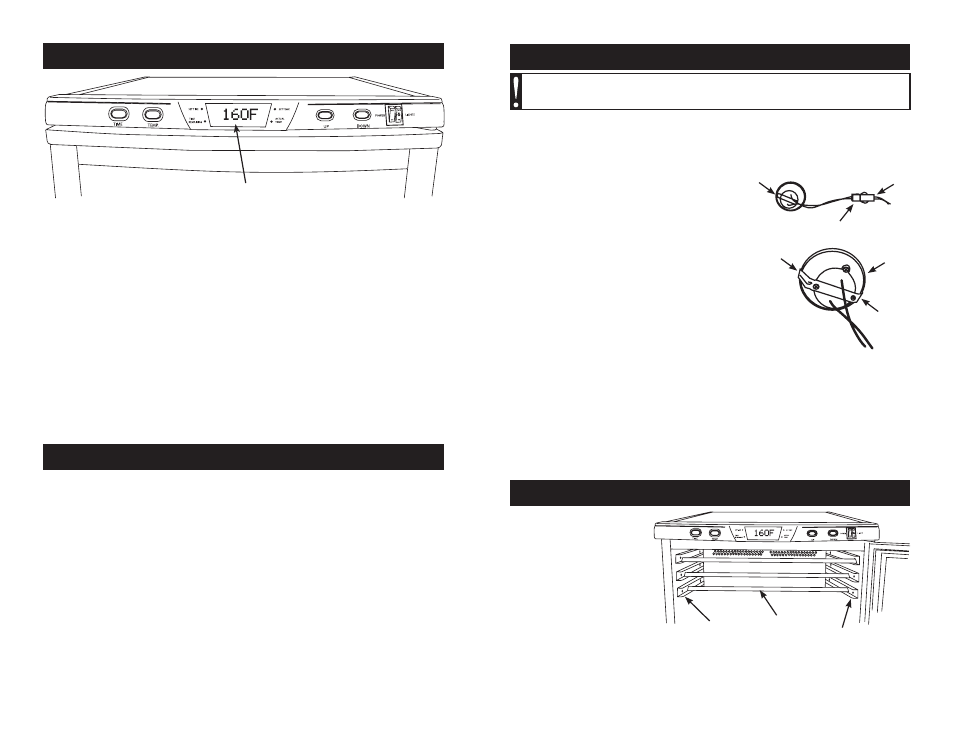
Digital Display
WHEN DRYING...
LIGHT BULB REPLACEMENT
1. Turn off the
Dehydrator Lights. Turn off and disconnect the Dehydrator from the
power outlet.
2. Let the
Dehydrator cool. DO NOT attempt to replace a Light Bulb while the
Dehydrator is hot.
3. Remove all of the
Racks.
4. Remove the
Back Panel of the Dehydrator.
5. Locate the
LED Light Fixture that you wish to
replace, and disconnect the wires from the
Light
Fixture from the white Wire Connector on the unit
by squeezing together the two clips on the
Wire
Connector.
6. Press together the two sides of the
Metal Clip on
the
Light Fixture to release it from the body of the
Dehydrator and then gently push the Light Fixture
into the
Cabinet of the unit, being sure to have a grip
on the wires connected to the
Light Fixture so it does
not drop into the
Dehydrator Cabinet. Discard the removed Light Fixture.
7. Insert the replacement
Light Fixture into the vacant hole where the old Light
Fixture was by first feeding the wire connected to the Light Fixture first.
8. Line up the
Light Fixture with the hole and push it back until the Metal Clips on the
back of the
Light Fixture lock into place.
9. Re-connect the
Wire Connector attached to the Light Fixture with the Wire Connector
the old
Light Fixture was connected to by pressing them together until they lock.
10. Line the
Back Panel of the Dehydrator up and re-install the removed screws to
mount the
Back Panel.
WARNING!
Before cleaning, assembling or disassembling the
Dehydrator, make sure the Dehydrator is OFF and the PLUG IS REMOVED
FROM THE OUTLET/POWER SOURCE!
SAUSAGE OR SNACK
STICKS: Use the Snack
Stick Hangers to hang
and dry sausage links and
snack sticks. After removing
all the
Racks from your
Dehydrator, simply drape
the links over the
Snack
Stick Hangers and slide
them into the top
Rack
Supports. Be sure not to
allow the links to rest on the bottom of the
Cabinet or on top of the Diffuser.
GROUND MEATS: Whenever making jerky from ground meats, you can use a
jerky gun or such tool to create perfect strips of jerky as well as snack sticks.
Snack Stick
Hangers
Rack Supports
Rack Supports
LED Light
Fixture
Wire
Connector
Wire
Connector
Push
Metal
Clip
Push
Metal
Clip
LED Light
Fixture