Step 3 (continued), Step 4 – Hybrid Racing HR Autotensioning AC and Power steering removal kit User Manual
Page 5
Step 3 (continued):
After all 3 alternator mounting bolts have been installed, first tighten all 3 alternator mounting
bolts. Finally, tighten the 2 black alternator bracket mounting bolts. For best results, use a ball-
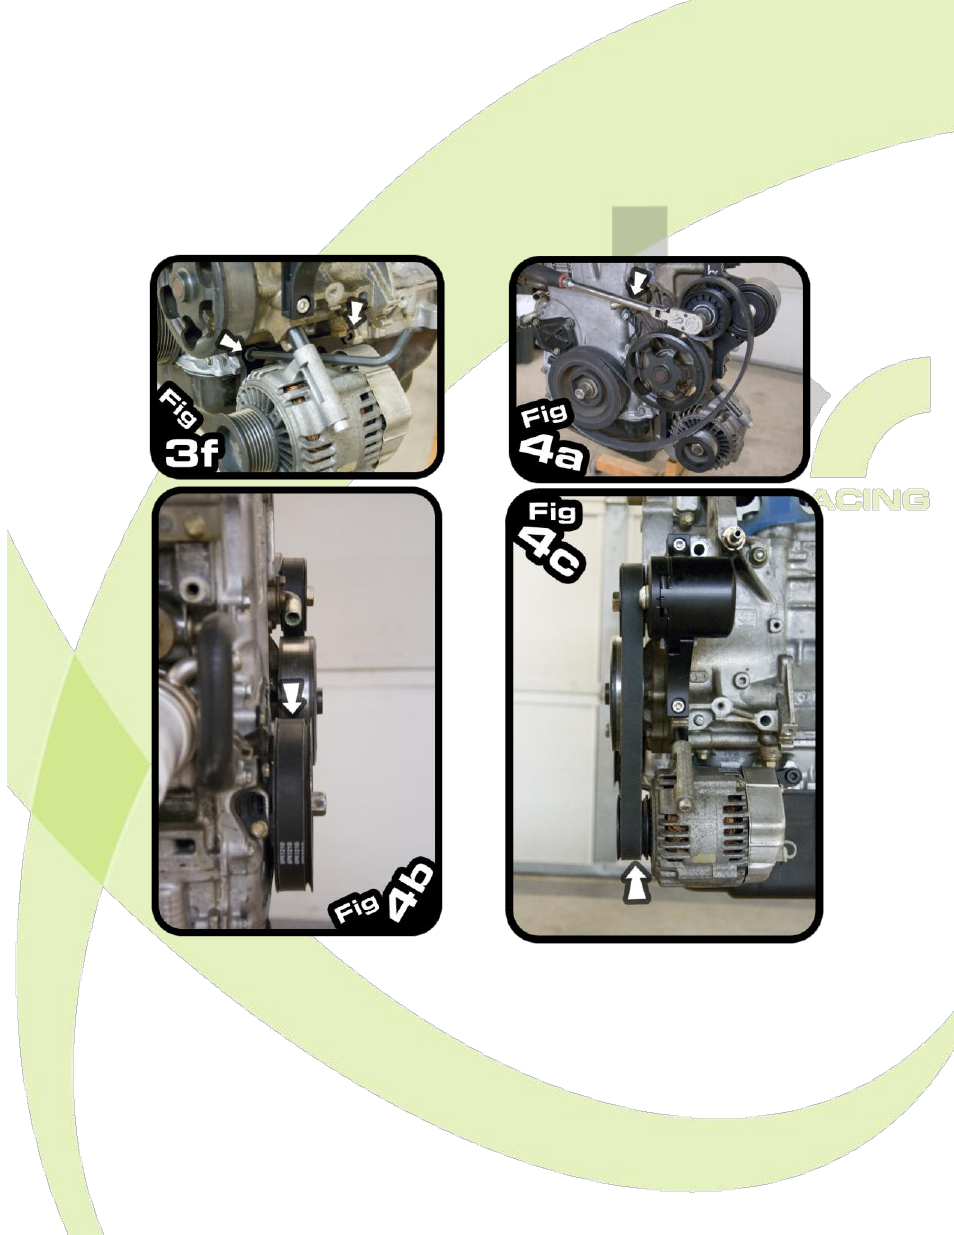
nose 8mm or 5/16” allen wrench as shown in Figure 3f. Torque all (3) M8 bolts to 35 lb-ft
(dry) or 28 lb-ft (lubricated with oil). Torque both M10 bolts to 70 lb-ft (dry) or 55 lb-ft
(lubricated with oil); a swivel joint is needed to access and properly torque these M10 bolts.
Failure to properly torque bolts can result in premature fatigue or loosening of the bolts.
(Note: color of bolts may vary)
Step 4:
Once the tensioner and alternator have been securely mounted, the supplied belt can be attached. The
belt is most easily installed by first wrapping it around the crank, water pump, and tensioner pulley as
shown in Figure 4a. To install the belt onto the alternator, put a breaker bar with a 19mm (or 3/4”)
socket on the bolt attaching the pulley to the autotensioner (see Figure 4a). In some cases, an
open=ended 19mm (or 3/4”) wrench may be preferred over a breaker bar. To rotate the pulley down,
apply force to the breaker bar or wrench in a counter-clockwise direction. With the pulley pivoted down,
place the belt onto the alternator pulley. If the tensioner is adjusted such that belt is particularly tight, it
may be necessary to install the belt onto the waterpump last, rather than the alternator. Because the
alternator pulley is shifted back in its new location, the belt should wrap around the 6 ribs on the crank
closest to the engine (see Figure 4bi and the 6-ribs on the alternator pulley furthest from the alternator
(see Figure 4c).