Step 2 (continued) – Hybrid Racing HR Autotensioning AC and Power steering removal kit User Manual
Page 3
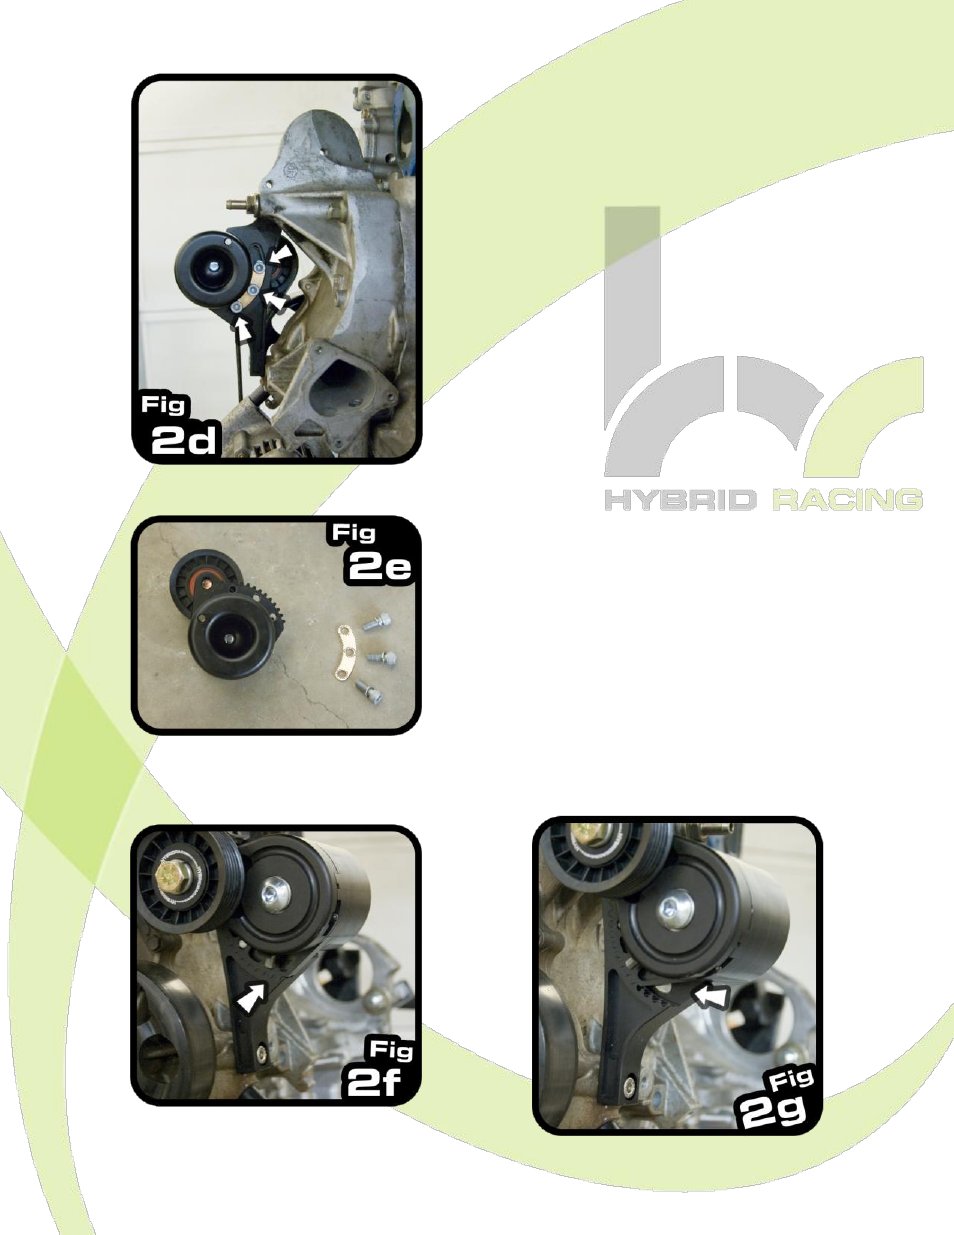
Step 2 (continued):
One of the unique features about this autoten-
sioner is that it’s designed to use different belt
sizes without compromising performance by main-
taining proper belt tension through an adjustable
spring housing.
Figure 2d shows the 3 bolts that must be re-
moved to adjust the spring housing. The bolts are
an M8x1.25 thread and can be removed using a
6mm allen driver. Figure 2e shows the parts that
should be loose once the spring housing has been
removed. Shown from left to right is (1) spring
housing, (1) bolt backing plate, and (3) M8 bolts
and M8 lock washers. Torque all three M8 bolts
to 35 lb-ft (dry) or 28 lb-ft (lubricated with oil).
Failure to properly torque bolts can result in pre-
mature fatigue or loosening of the bolts.
The autotensioner is supplied in its lowest position.
Figure 2f shows how no open grooves are visible
at the lower portion of the autotensioner. Figure
2g shows the autotensioner adjusted to its highest
setting, where 4 grooves are showing. In the case
of a k24, typically 2-3 grooves will need to show if
the supplied belt is used. In the case of a k20,
typically 3-4 grooves will need to show if the sup-
plied belt is used. The supplied belt is a 48.5” long
6-rib belt. Note that between the lowest and high-
est settings, there is enough adjustment to com-
pensate for about a 2” variation in belt length. This
allows some flexibility when it comes time to re-
place your belt.