Home Legend Uniclick Zero User Manual
Page 5
Doc. ID: 131
Rev: 3
Effective: 1/25/2014
Page | 5
Floating Installation Procedure
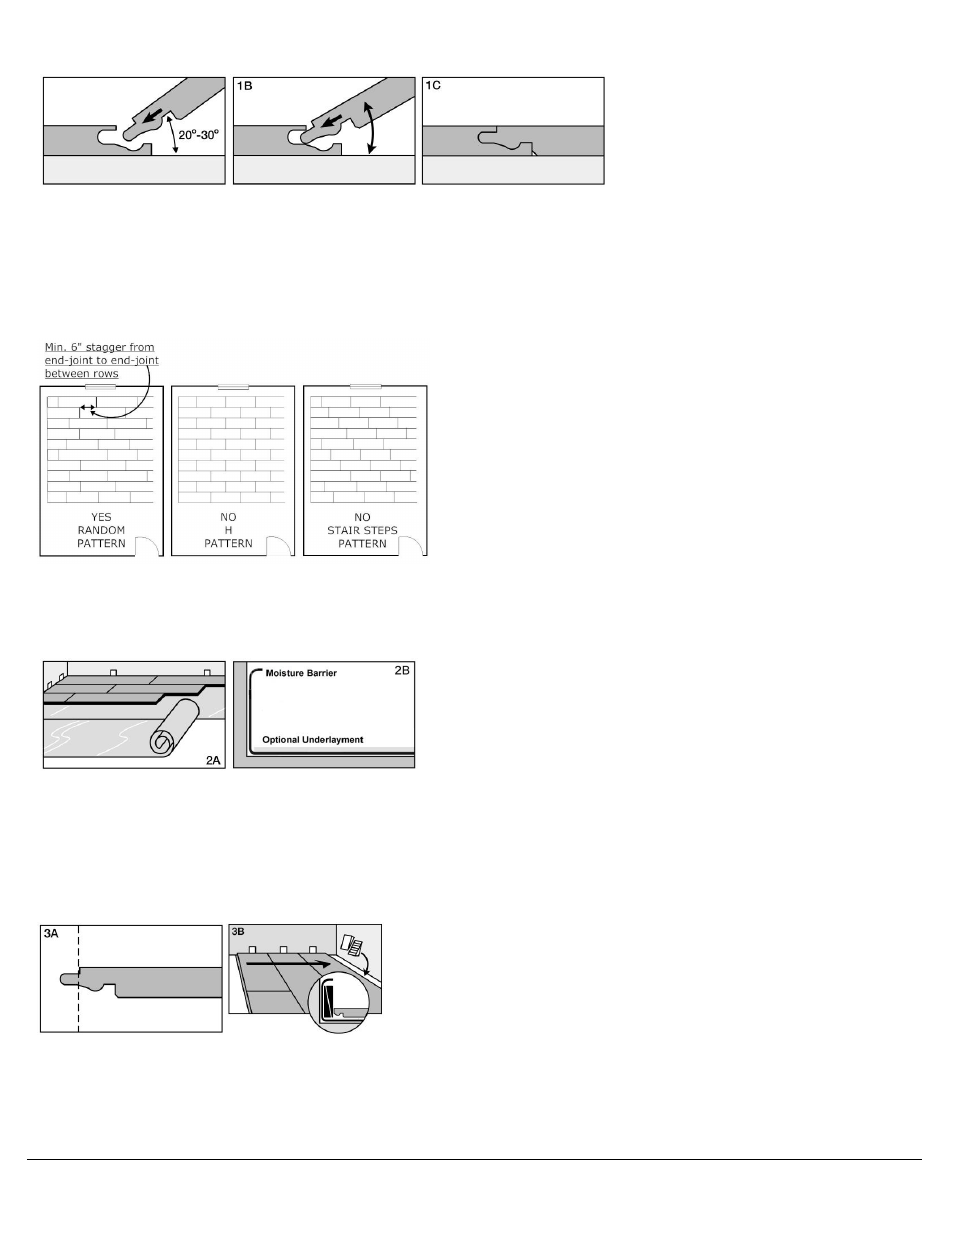
Step 1 - Pre-install Activities
•
Rack up planks from several boxes.
•
Ensure ensure that the end joints are staggered at least 6” between the rows. See diagram below.
•
Inspect product for defects. If material is questionable, contact the retailer immediately. Do not proceed with installation
Step 2 – Install Moisture Barrier (if on concrete) and Optional Underlayment if selected.
•
For concrete, let the moisture barrier run up the wall a bit before cutting to size.
•
Install the underlayment on top of the moisture barrier. Cut 1 inch from the wall. See diagrams below.
Step3 – Install the First Row
•
Saw off the tongue from the lengt and width of the first plank. Create expansion gap by placing spacers be-tween the planks and the
walls for expansion.
•
Saw off the tongues from only the length of the remaining planks to be installed in the first row.
•
Use the angling method to connect and lock the joints between the planks. Remember to use the spacer for maintaining expansion
gap. See diagrams below.
Step 4 – Install the Remaining Rows
•
Stagger the end joints by at least 6 inches. Use angling method to lock the joint along the long edge.
•
Use the angling technique to lock the long edge together.
•
Use either the tapping block or pull bar to drive the next plank toward the first plank until the end joints are locked.
•
Repeat the steps until the row is complete. See diagrams below.