Home Legend Solid T&G User Manual
Page 7
Doc. ID: 124
Rev: 2
Effective: 2/24/2014
Page | 7
Glue-Down Installation
PLEASE NOTE:
ANY EXCESS GLUE WHICH GETS ONTO THE SURFACE OF THE FLOOR MUST BE REMOVED IMMEDIATELY WITH ADHESIVE REMOVER.
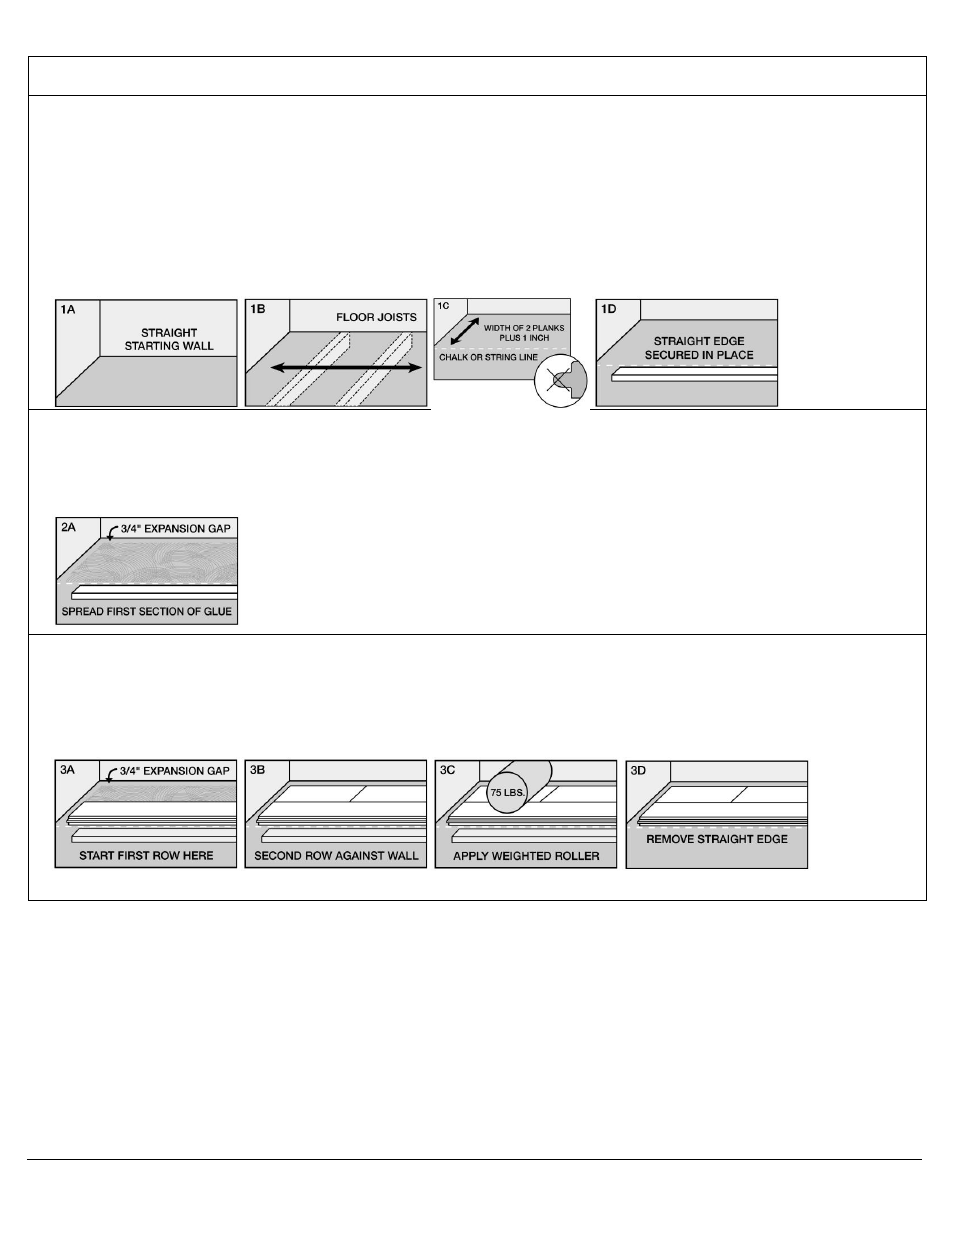
Step 1 – Establish a Starting Line
• Lay out the direction of the floor. Install flooring perpendicular to joists. If it is to be in parallel to the joist, reinforce subfloor with a
layer of 1/2” CDX ply.
• Select a straight starter wall.
• Mark the starting line using a chalk line or a string between two nails. This distance between the wall and the line should equal the
width of 2 floor planks (face width only) plus 1” (3/4” expansion gap plus 1/4” standard tongue width = 1”). Install a straight edge
parallel to the starter wall to ensure straight alignment of starter rows.
Step 2 – Spreading the Glue
• Spread the glue from the straight edge or chalk line out in the direction of the starting wall. Spread only enough glue to install what
can be set within 45 minutes (15 minutes of OPEN TIME and an additional 30 minutes for actual installation. Usually about two rows
width coverage). Different manufacturer may require different open time and set time.
• You will repeat the same procedure with each succeeding rows.
Step 3 – Install the Starter Rows (first two rows)
• Installation begins from the straight edge with tongue facing away from the starter wall. Allow expansion gap between the wall and
the edge of the board.
• Install the second starter row.
• Use 75 pound roller or weigh them down while the glue sets. Allow the glue to set.
• Remove the straight edge.