Dyras CLSS-430 User Manual
Page 5
EN
CLSS-430
CLSS-430
8
9
WHat to Do before StartINg to USe tHe eqUIpMeNt
1. Unpack the appliance and remove all the packing materials.
Never leave the nylon packing bag, which is part of the package, within the reach of children who
could play with it.
2. Carefully check the appliance to ensure it is complete and undamaged. You should only use the appliance if it
is complete and has not suffered any damage.
poWer SUppLy
The equipment is operated by integrated battery. You must not remove the battery cell from the
equipment, not even for charging. Only use the factory supplied charging adapter for charging the
battery cell. You must only connect the network charging adapter of the equipment to a 230 V ~, 50
Hz alternating current network. Note the network voltage to which you intend to connect the charging
adapter of the equipment.
HoW to CHarge tHe battery
In order to have the built in cells of the vacuum therapy equipment operate to their full capacity, they must be
„formatted” before starting regular use.
In the case of new equipment, battery cells are charged to a certain level. First, let the equipment batteries
go completely flat by running them. Operate the equipment until its engine stops then turn it off. (OFF switch
position.) Following this, connect the battery charging adapter plug to the charger connector equipment at the
bottom of the equipment and also to the electricity network. Charge the battery for 12 hours. During the charging
process, the charging indicator lamp light is continuously on. Following the first charging, formatting – complete
running down and 12-hour charging – must be repeated at least two more times. After this, an 8-hour charging
time is sufficient, even in the case of totally flat batteries. For these further chargings, it is not always necessary
to let the batteries go totally flat. You may also leave the battery charger on the equipment for over 8 hours.
However, do not leave the battery charger on the equipment for longer than 24 hours as this may damage the
batteries.
Note! The charge storing capacity of the massage equipment batteries reduces with time, even if they are used in
normal conditions and carefully re-charged. In this case you must replace the battery unit at a specialised service
centre.
USINg of appLIaNCe
Note! Never use the equipment on sensitive or injured skin. Never use the equipment near
your eyes, mouth, nose or ears. the equipment has a sucking interruption button (4). If
you press this button, you can stop the vacuum effect and easily remove the equipment
from your skin.
1. If necessary, charge the battery before use as described above.
2. If you have charged the battery, remove the charger from the mains electricity network, then remove its plug
from the equipment.
3. Fit the vacuum cup (6) to the vacuum cup connector (5). The cup tabs must fit into the connector on the
equipment. Then turn the cup clockwise. Take care that the cup stands upright, as turning it in an angle could
result in it breaking.
4. Set the minimum sucking force by moving the sucking button (3) downwards.
5. Turn on the equipment by moving the on/off button (2) upwards from the OFF switch position.
6. Fit the vacuum cup to the area of the body to be massaged (thigh, abdomen, arm, bottom), then set the
desired force using the sucking force controller button.
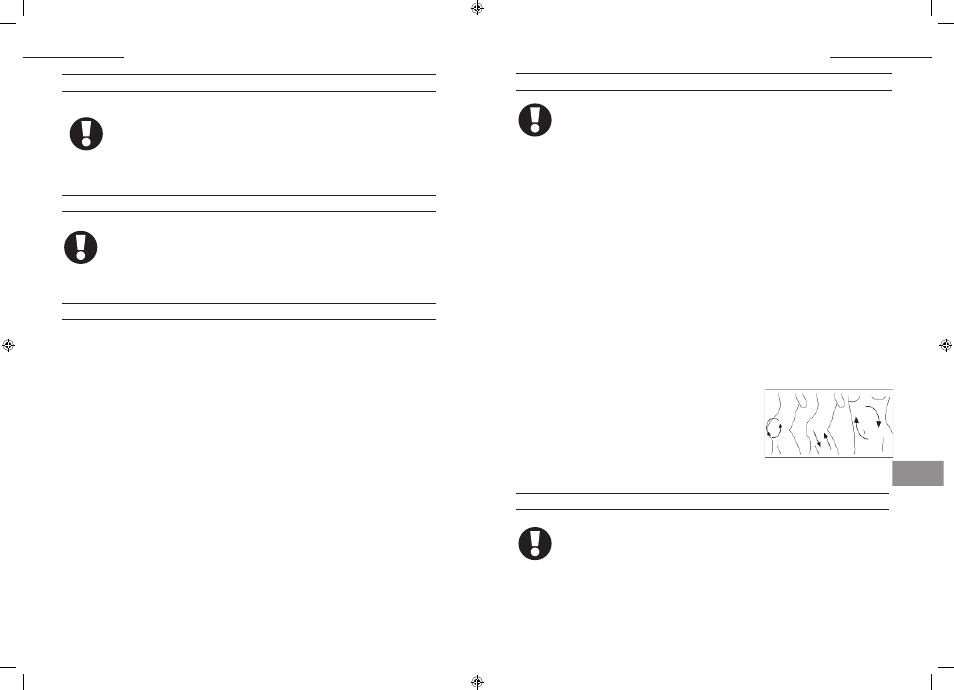
7. Use the equipment on the different body parts as follows:
On the thigh: Move upwards with circular movements to stimulate
micro-circulation of the skin.
On the abdomen: Massage anti-clockwise, making large circles.
On the bottom: Massage upwards with circular movements, in the
direction of your waist.
On the arm: Massage moving from your elbow to your shoulders,
especially concentrating on the inner side of your arm.
MaINteNaNCe aND CLeaNINg
always turn off the equipment while cleaning it, and remove the battery charger from
the wall socket and massage equipment. Never dip either the equipment or the battery
charger into water. Do not hold it under running water.
• Before starting cleaning, remove the vacuum cup from the equipment and clean it with cold water. Following
this, ensure that the vacuum cup is fully dry before placing it in its storage place. Never mount the cup back
onto the machine if it is wet; always allow it to dry.