Installation – Brondell Swash 550 User Manual
Page 4
�
�
�
3
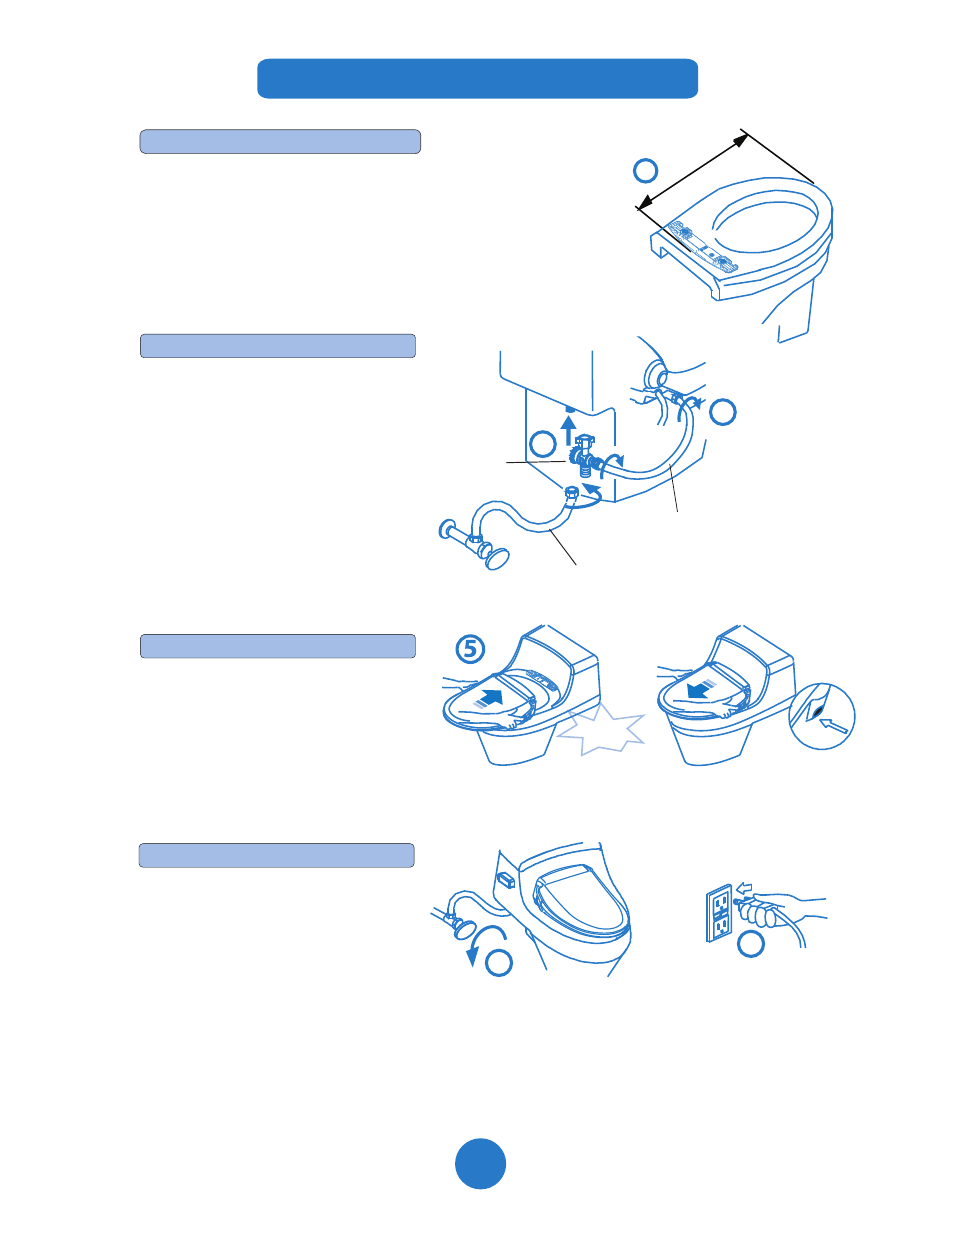
4) Connect T-Valve and Hoses
5) Attach the Swash 450 / 550
6) Turn On Water and Connect Power
3) Install Mounting Plate (continued)
c) Adjust mounting plate so length (L) between the front of the
toilet bowl and the back of the mounting plate is as follows:
Round (S450 / S550 - RW or RB): L = 18 1/4” (465 mm)
Elongated (S450 / S550 - EW or EB):
L = 20 1/2” (495 mm)
d) Tighten Mounting Bolts with screwdriver until the
mounting plate is securely fastened to the toilet.
If your water supply line is rigid, you may need to replace
it before continuing. See page 2 for further details.
a) Install the T-Valve between the water
supply line & the toilet tank.
b) Place the Swash 450 / 550 on or
beside the toilet and connect the
Bidet Hose to the Swash 450 / 550.
IMPORTANT! Use wrench to tighten
all connections before continuing.
Failure to do so could result in flooding,
leaking, or damage to the Swash 450 / 550.
a) Turn the water valve back on slowly.
Ensure the connections are not
leaking before continuing.
b) Make sure hands are dry.
Insert the power plug into a grounded
GFI outlet. The blue power LED will illuminate.
Slide the Swash 450 / 550 onto the
mounting plate.
You will hear a "click" indicating the
seat has been properly attached.
T � � � �� �
� �� � � �� � � �
�
� �
� �
Water Supply Line
�
�
� �
To release the Swash 450 / 550: push
the button located on the right hand
corner of the seat and gently pull.
3c
LL
� �
Installation
(continued)
CAUTION: Only use a
grounded GFI outlet!
CLICK
Press to
Release