Assembly – Craftsman 315.21234 User Manual
Page 16
16
17
ASSEMBLY
DUST GUIDE
EXHAUST
PORT
DUST GUIDE
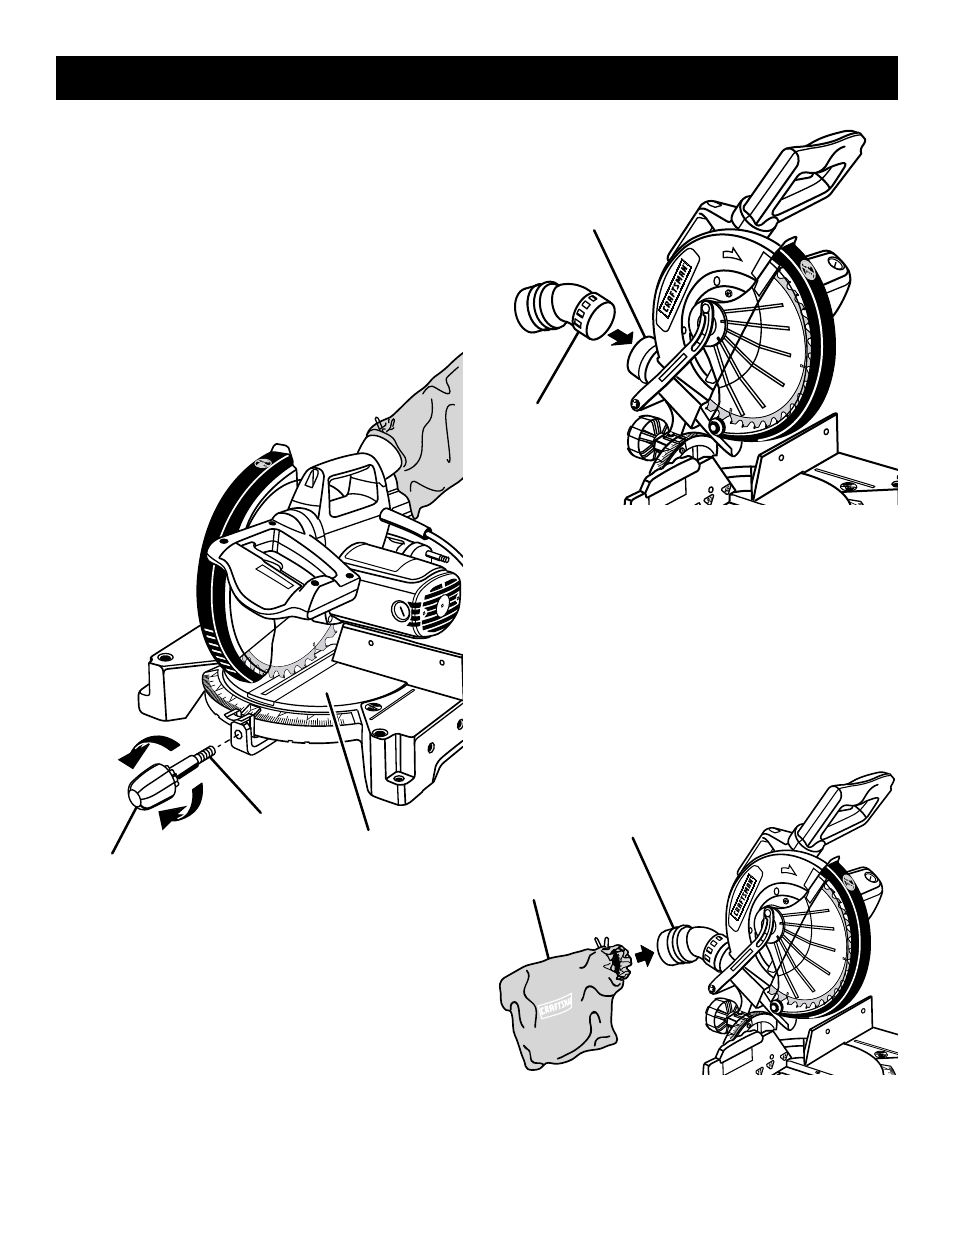
See Figure 10.
To install the dust guide, place the end marked
INSERT
over the exhaust port in the upper blade guard. Turn the
guide so that the open end is facing down or toward the
rear of the saw.
Fig. 11
DUST BAG
DUST GUIDE
DUST BAG
See Figure 11.
A dust bag is provided for use on this miter saw. It fits
over the dust guide on the upper blade guard. To install,
squeeze the two metal clips to open the mouth of the bag
and slide it on to the dust guide. Release the clips. The
metal ring in the bag should lock in between the grooves
on the dust guide.
To remove the dust bag for emptying, simply reverse the
above procedure.
Fig. 10
As mentioned previously, the saw has been factory
assembled and adjusted. The miter lock handle, dust
guide, and blade are the only parts that have to be
installed.
MITER LOCK HANDLE
See Figure 9.
Cut the tie-wraps holding the saw arm and the miter lock
in place. To install the miter lock handle, place the thread-
ed stud into the threaded hole in the control arm. Turn
clockwise to tighten.
Fig. 9
TO
LOOSEN
TO
TIGHTEN
CONTROL
ARM
MITER
TABLE
MITER
LOCK HANDLE