Alumax 750D User Manual
Page 5
EPH-N00-06060
12-10-04
Page 5 of 8
4
6
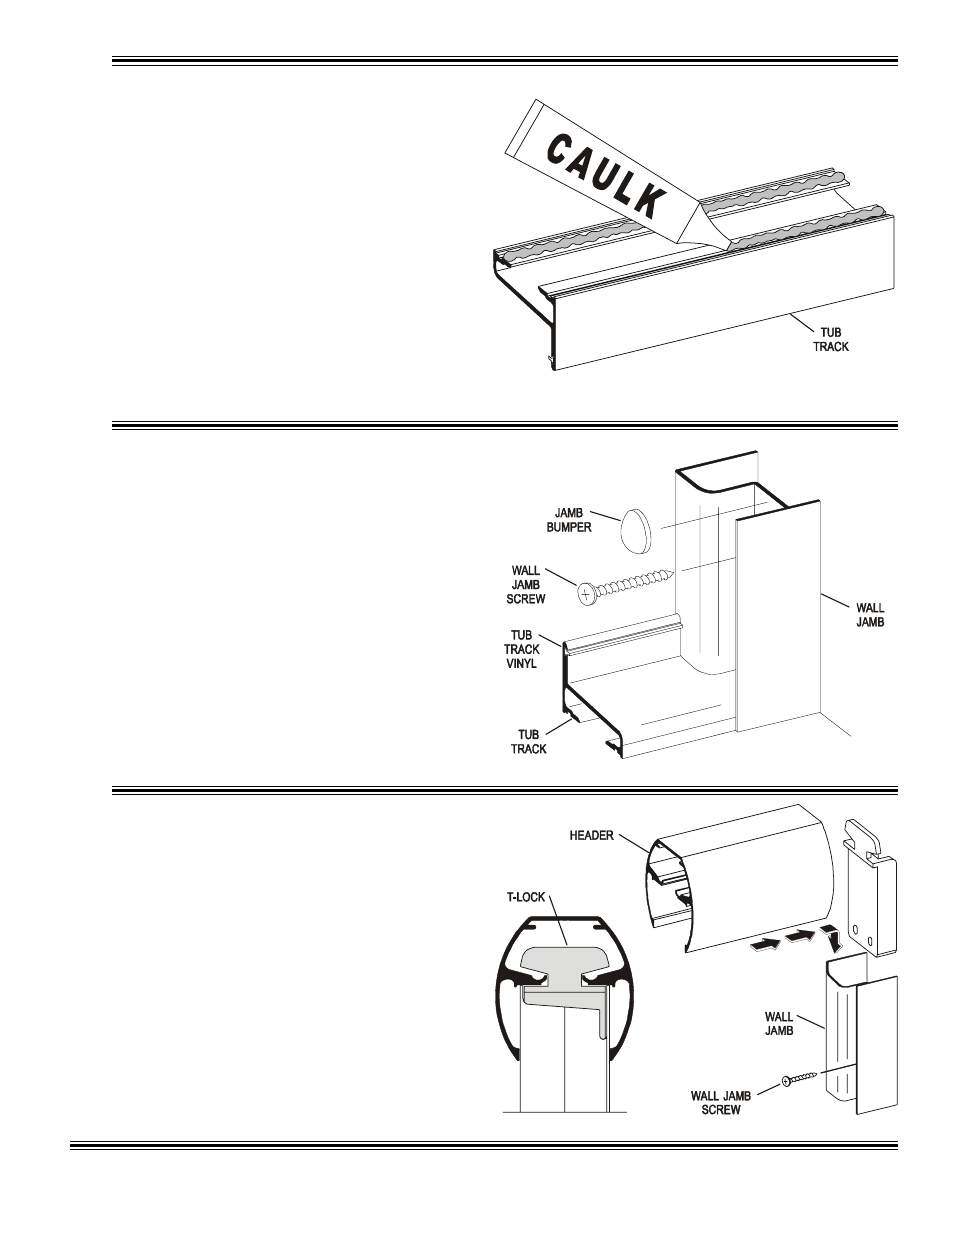
Before replacing the tub track [B], force a slight
downward bow in the extrusion. This will ensure the track
fits tight to the sill. Run a bead of caulk on both flat
surfaces on the bottom of the tub track. Then replace the
track on the bath sill in the exact position marked in Step
#3 and with the tall leg to the exterior of the bath. Seat the
tub track firmly.
NOTE: Improper caulking will result in leaks.
5
Replace one wall jamb [A] and attach it to the
wall with three #8 x 1 1/2" truss head screws [D].
Check the jamb for plumb and tighten the screws.
Repeat for the other wall jamb.
NOTE: Do not overtighten the jamb screws.
Peel the backing from the four clear vinyl jamb
bumpers [E] and attach them in the pockets of the
wall jambs. Place the bumpers approximately 1"
below the upper screw and 1" above the lower
screw.
This bath enclosure is equipped with molded
nylon T-locks [F] for safety. When properly
installed, the header [H] is locked to the wall
jambs [A] and cannot be accidentally dislodged.
Measure the wall-to-wall opening at the top of the
wall jambs and cut the header 1/16" short of this
dimension. Check the header for fit.
Slide the two T-locks into each end of the header as
shown. Set the header down onto the wall jambs
with the T-locks fitting into the space behind the
wall jamb. Remove the top wall jamb screws [D].
Pull the header and T-locks downward until the
top wall jamb screws can be reinstalled and
t i g h t e n e d .