Alumax 394 User Manual
Page 4
EPH-N00-06012
5-20-97
Page 4 of 11
1
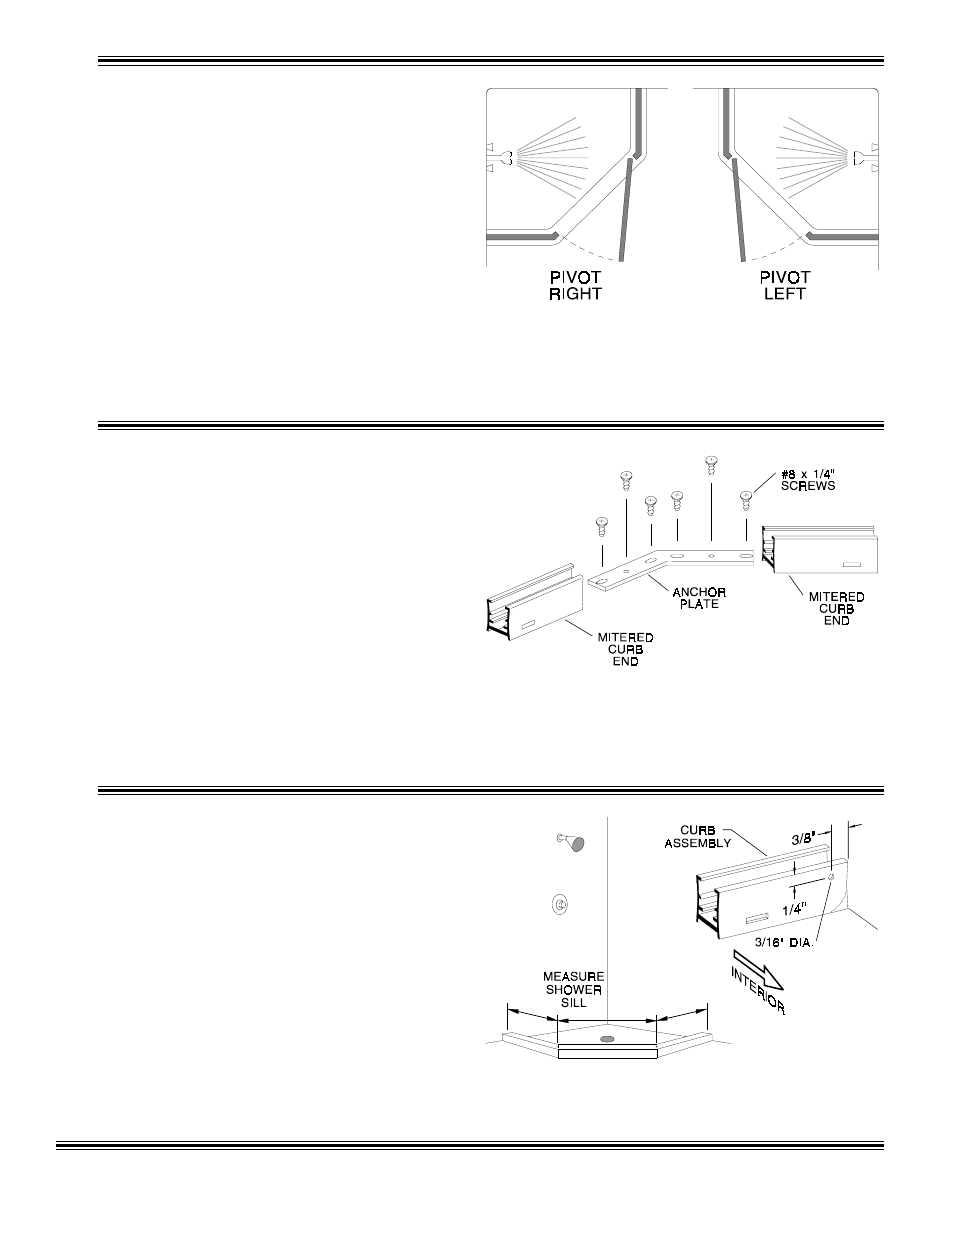
The A
LUMAX
394 S
TIK
S
TALL
Shower Enclo-
sure is completely reversible and may be installed
pivot-left or pivot-right. For maximum water-
proofing, the pivot jamb should always be opposite
the shower head. Using the illustration, deter-
mine the correct position for the door in your
particular S
TIK
S
TALL
installation. This instruc-
tion sheet depicts a pivot-right installation.
NOTE: Fixed glass panel sizes should be deter-
mined by formulas shown on A
LUMAX
detail sheets.
CAUTION: For safety reasons, the door panel
must always open outward.
2
Assemble the three curb sections [A] (with
weep slots) by sliding two 135° anchor plates [B]
into the mitered ends and forcing the sections
together. The weep slots in the curbs must be to
the inside. Using the slotted holes in the anchor
plates as a guide, drill matching 1/8" holes into the
curbs. Secure the anchor plates to the curb assem-
bly with eight #8 x 1/4" truss head screws [C]. As
you tighten the screws, be sure the miters are
forced tightly together. To increase the rigidity of
the mitered joint, drill and install two more screws
through the round holes in the bracket.
Assemble the three header sections [D] in the
same manner and set the header assembly aside.
3
Measure the opening at the bottom of the
shower stall and trim the ends of the curb assem-
bly [A] (with weep slots) to fit the shower sill. The
curb should sit near the centerline of the sill. If
required, use a file to round the lower ends of the
curb assembly to fit the shower sill properly.
Using a 3/16" drill bit, drill the interior face of the
curb assembly on both ends as shown.
Reposition the curb assembly on the shower sill
and mark its position with a pencil line along the
interior and exterior base.