Alumax 393 User Manual
Page 6
EPH-N00-06011
5-20-97
Page 6 of 11
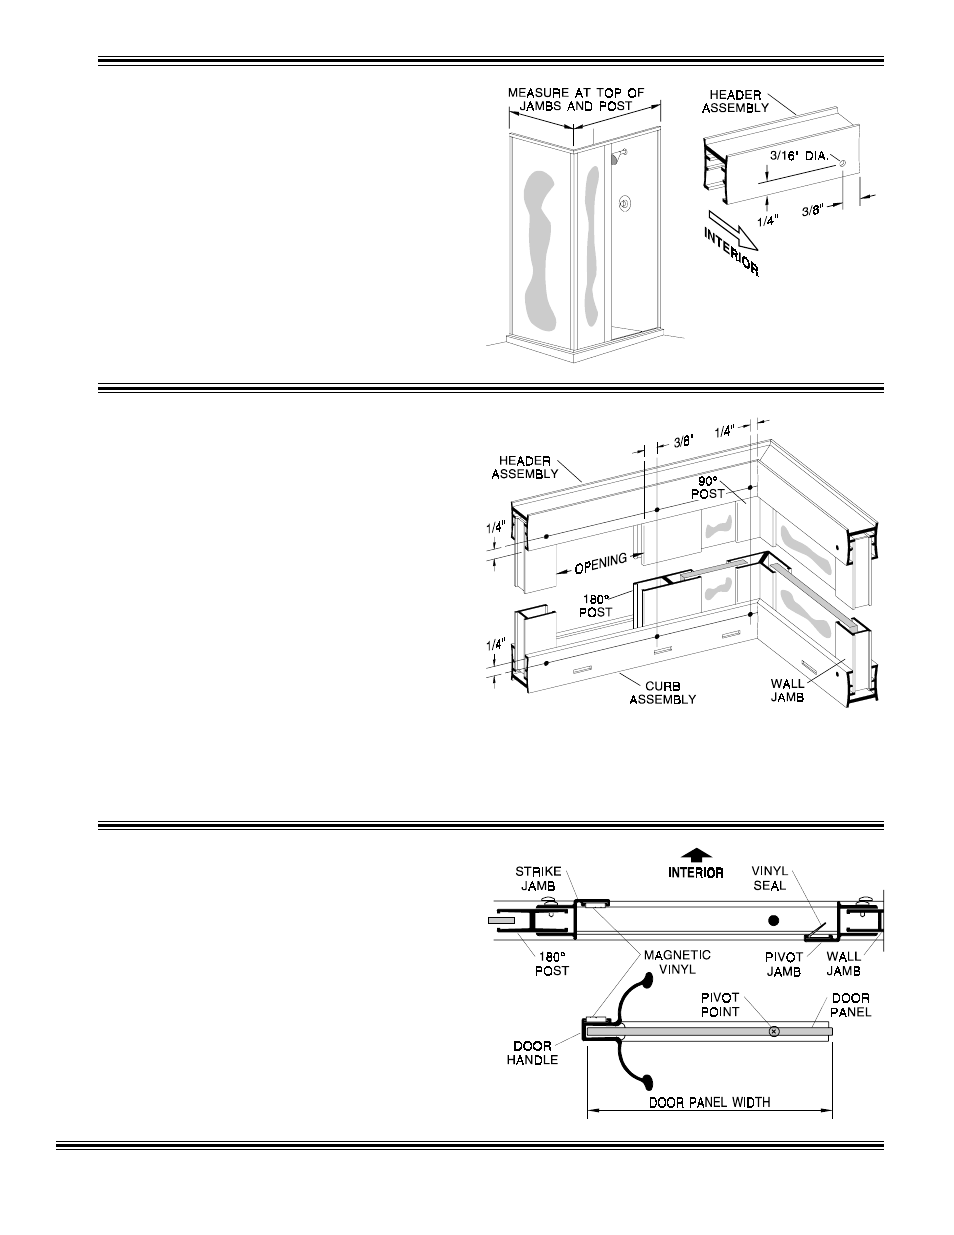
7
Hold the 90° post [K] plumb and carefully
measure horizontally from the top of each wall
jamb [E] to the outside edge of the post. Add 3/16"
to each measurement to find the corresponding
dimension on the header assembly [D] (from the
outside mitered edge to the squared ends) and
trim the header assembly to fit.
Using a 3/16" drill bit, drill the interior face of the
header assembly on both ends as shown.
9
Slide the clear vinyl jamb seal [M] into the
pivot jamb [N] and trim flush at both ends. The
vinyl should be turned to trap water from the
shower head. Secure the vinyl with a small quan-
tity of glue or caulk at each end or by carefully
crimping the vinyl pocket.
Press the pivot jamb and the strike jamb assembly
[P] (with magnetic strip) over the wall jamb [E]
and 180° post [L]. Refer to Step #1 for the proper
handing of the door.
NOTE: The magnetic strip on the strike jamb
must face the exterior and the clear vinyl jamb
seal on the pivot jamb must face inward.
Press the header assembly [D] over the wall
jambs [E], 90° post [K] and 180° post [L]. Check the
posts for plumb. Adjust as required by varying the
overlap of the header over the wall jambs. You may
need to trim the ends of the header where it meets the
wall. The minimum horizontal dimension for the door
opening is the door panel width (see the graphic in Step
#9) plus 1/2", maximum is the door panel width plus 1
3/4".
Using the holes in the ends of the header and curb as
a guide, drill four 1/8" holes into the wall jambs. Drill
four holes thru the header and curb into the two posts
as shown, then enlarge the outer holes with a 3/16" drill
for clearance on the self-tapping screws. Secure the
header and curb to the wall jambs and posts with eight
#8 x 1/4" truss head screws [C].
CAUTION: Slide glass panels [J] away from the jamb
or posts before drilling to prevent damage or breakage.
8