Alumax 350 Deluxe User Manual
Page 7
G03711139
6-9-2014
Page 6
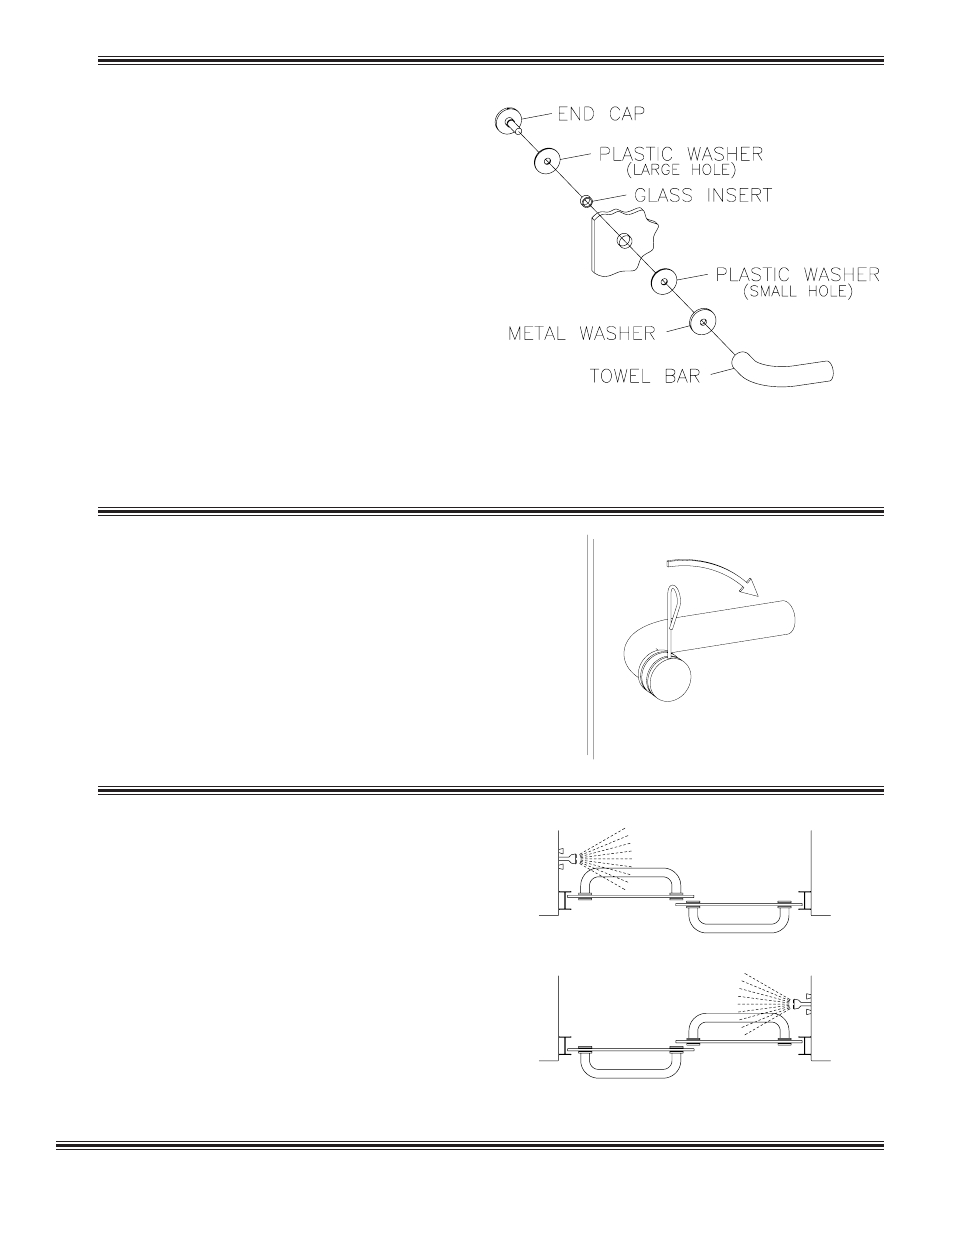
7
Locate the four, large hole, plastic washers [
J] and
place them over the threads and flush with the four end
caps [
I]. Next, place the four glass inserts [L] onto the
four end caps [
I] and flush with the plastic washers [J].
In step 6 the interior and exterior panels were determined
by setting the orientation of the hanger brackets [
H]. The
towel bars [
N] will be installed on the same side of the
panels as the rollers in the hanger brackets [
H]. Insert
the threaded portion of an end cap [
I] through one of the
holes in a glass panel [
G], making sure that it is located on
the opposite side from the rollers on the hanger brackets
[
H]. Place a, small hole, plastic washer [K] and a metal
washer on the end cap [
J] threads. Now, loosely, thread
the towel bar [
N] onto the exposed threads of the end
cap [
J]. Make another end cap assembly, and thread
into the other end of the towel bar [
N ]. Repeat this
process for the other glass panel [
G], making sure that
the towel bar is located on the same side as the rollers
in the hanger brackets [
H].
Before installing the door panels, the proper orienta-
tion should be determined. For maximum water-proofing,
the interior panel should always be positioned closest to
the shower head, as shown in this illustration.
9
Insert the wrench [
T] into the small hole on the edge
of an end cap [
I] and rotate in a clockwise direction until
tight. Repeat for all remaining end caps.
8