Intake port cap and hose assembly, Awarning, Warning – Craftsman 152.213351 User Manual
Page 12
Attention! The text in this document has been recognized automatically. To view the original document, you can use the "Original mode".
Insert two 5/16-18 x 5/8" button head carriage bolts
through the inside of the intake funnel and intake
support brace.
Place a 5/16-18 flange hex nut onto the button
head carriage bolts and tighten securely.
Fig. 12
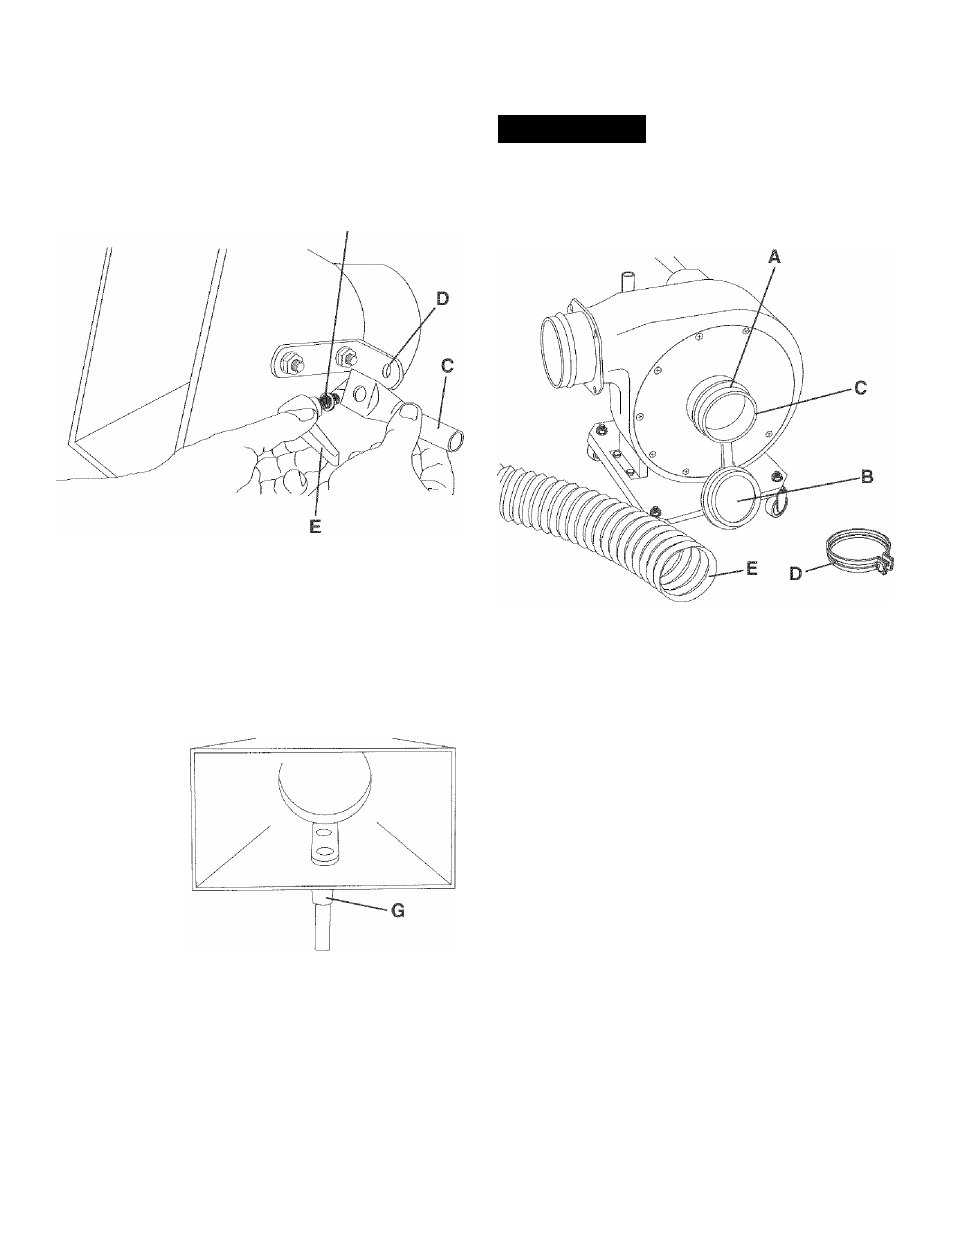
Attach the upper support bracket (C) to the hole (D)
in the intake support brace with the adjustable lock
ing lever (E). Place a 5/16" lock washer (F) onto
locking lever bolt before attaching to the intake
support brace. See figure 12.
INTAKE PORT CAP AND
HOSE ASSEMBLY
A
warning
MAKE CERTAIN THE DUST COLLECTOR IS
DISCONNECTED FROM THE POWER SOURCE.
Fig. 14
Slide the collar (A) of the intake port cap (B) over
intake port (C). Make sure the collar is position to
the back if you intend to attach the hose at this
time. See figure 14.
Fig. 13
H
2. Place 4-inch hose clamp (D) onto the end of 4-inch
flexible hose (E). See figure 14.
3. Slide end of 4-inch flexible hose with 4-inch hose
clamp onto intake port and tighten securely.
IMPORTANT: When connecting a flexible hose to
intake port, DO NOT REMOVE THE INTAKE PORT
CAP COLLAR FROM THE INTAKE PORT. Slide the
collar further back when attaching a flexible hose.
5. Place intake funnel assembly (G) onto lower sup
port tube (H) and tighten tube clamp (I) securely.
See figure 13.
12