Steps, Step 5, Step 4 – Craftsman 486.246212 User Manual
Page 4
Attention! The text in this document has been recognized automatically. To view the original document, you can use the "Original mode".
STEPS:
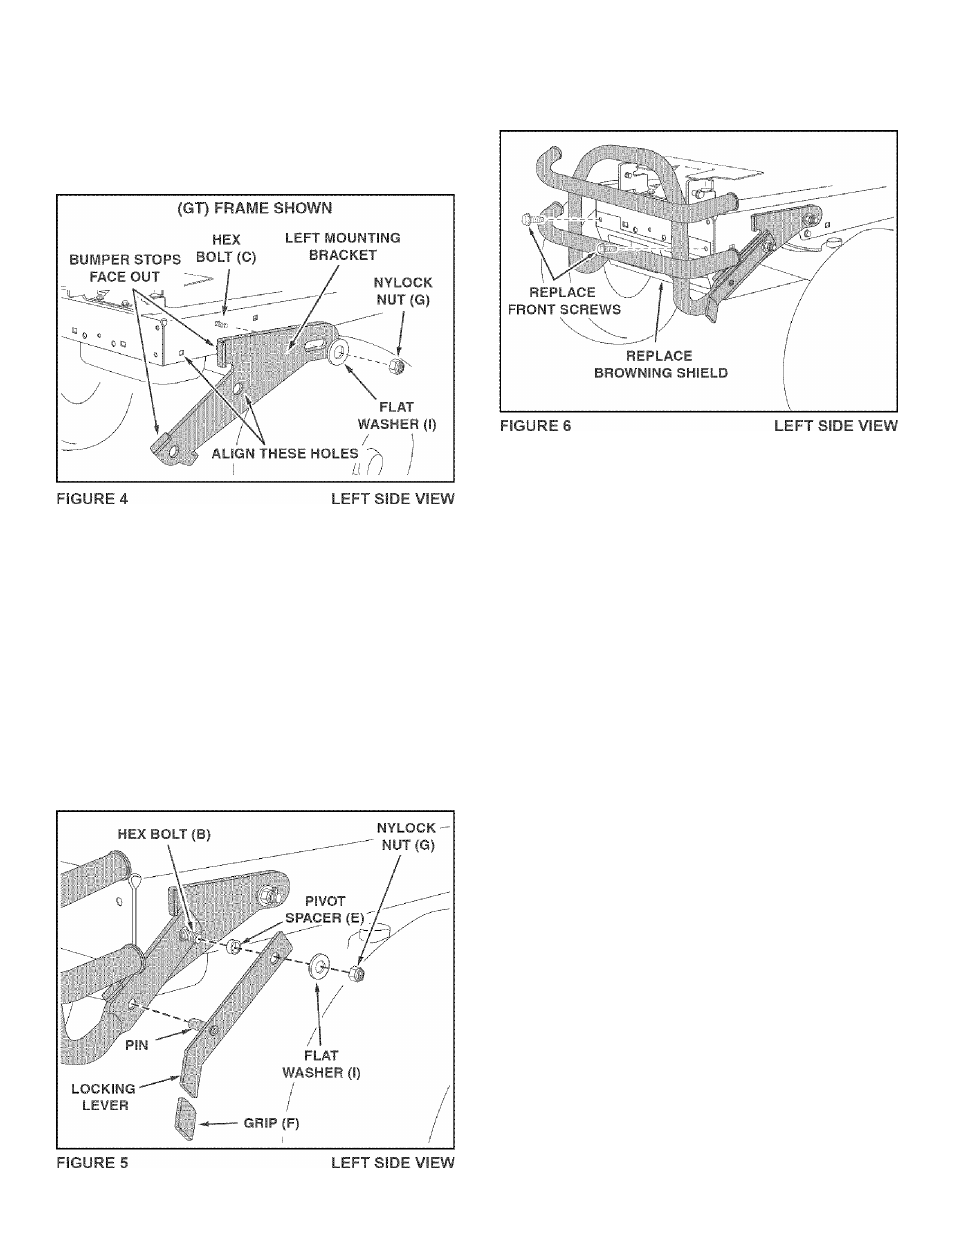
(SEE FIGURE 4)
• Attach left mounting bracket to hole shown in left side
of tractor frame using a hex bolt (C), flat washer (I)
and nylock nut (G). Align middle hole in bracket with
empty hole in tractor frame. Tighten nylock nut {G)
only enough to keep bracket in alignment until step 4.
Repeat for right mounting bracket.
STEP 5:
(SEE FIGURE 6)
• Replace the front screws and browning shield you
removed in Step 1 as shown.
STEP 4:
(SEE FIGURE 5J
•
Fasten bumper to mounting bracket using a hex bolt
(B), pivot spacer (E), a locking lever, a flat washer
(I) and a nylock nut (G) as shown. The pivot spacer
inserts into hole in bumper. Tighten both nuts on
mounting bracket at this time. Repeat for other side.
•
Assemble plastic grips (F) onto locking levers.
•
Lift up on bumper until pins in locking levers snap into
holes in mounting brackets.
IMPORTANT; You must lower bumper before raising tractor
hood. Pull out on locking levers and push bumper down as
far as it will go.