Keyless chuck, Adjustable torque clutch, To adjust torque – Craftsman 315.271220 User Manual
Page 12: Bit storage, Operation
Attention! The text in this document has been recognized automatically. To view the original document, you can use the "Original mode".
OPERATION
KEYLESS CHUCK
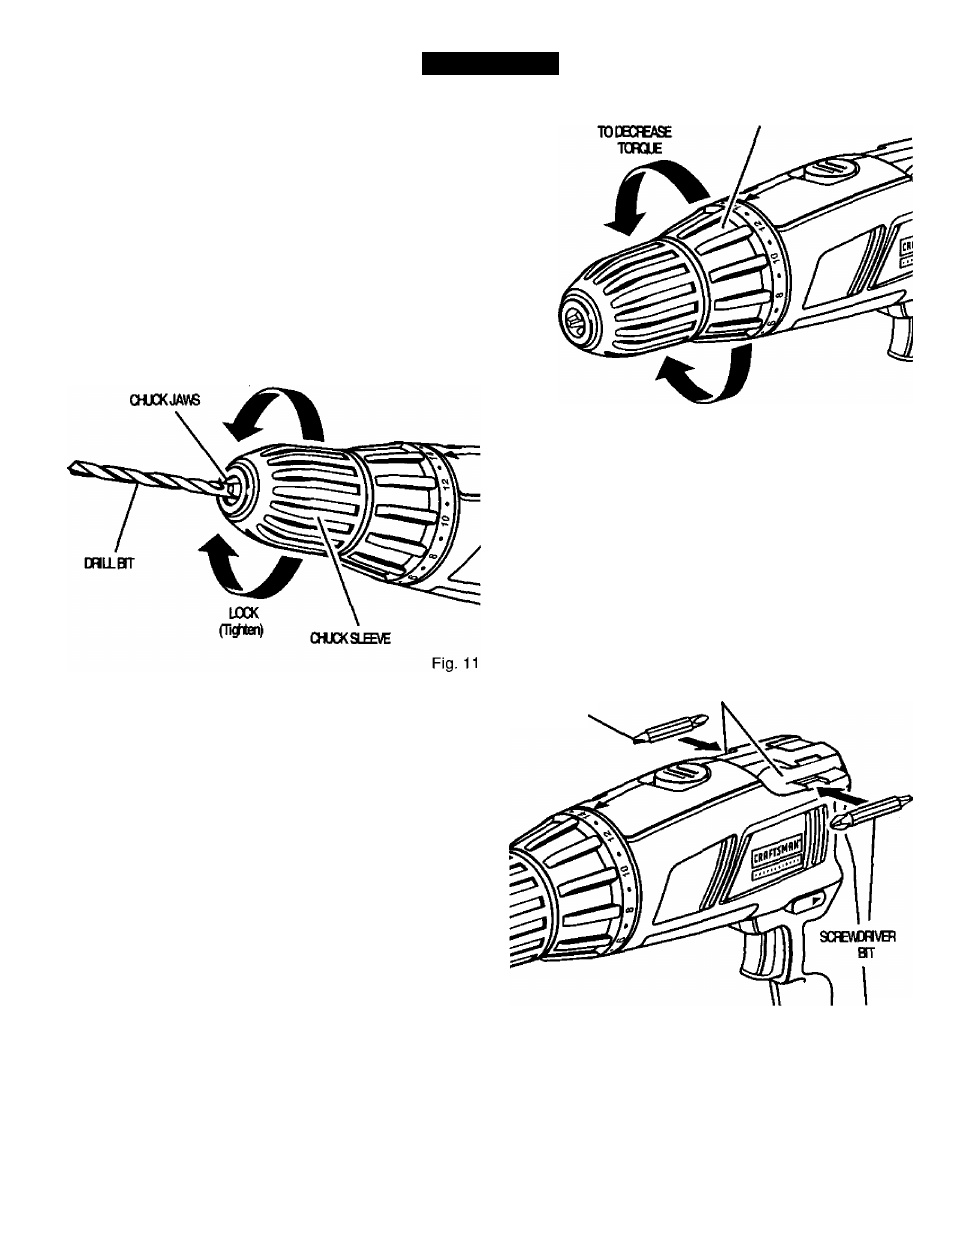
See Figure 11.
A keyless chuck has been provided with your drill to allow
for easy installation and removal of bits. As the name
implies, you can hand tighten or release drill bits in the
chuck jaws. Arrows on the chuck indicate which direction
to rotate the chuck sleeve in order to
LOCK (tighten) or
UNLOCK (release) the chuck jaws. Loosen the chuck
sleeve by rotating it counterclockwise with one hand.
Insert drill bit into the chuck the full length of the jaws,
tighten securely by rotating the chuck sleeve in clockwise
direction.
uruocx
(Rdease)
ADJUSTING RING
A WARNING:
Do not hold chuck sleeve with one
hand and use power of the drill to tighten chuck jaws
on drill bit. Chuck sleeve could slip in your hand or
your hand could slip and come in contact with
rotating drill bit. This could cause an accident
resulting in serious personal injury.
ADJUSTABLE TORQUE CLUTCH
Your drill is equipped with an adjustable torque clutch for
driving different types of screws into different materials.
The proper setting depends on the type of material and
the size of screw you are using,
TO ADJUST TORQUE
■ Identify the twenty four torque indicator settings
located on the front of your drill. See Figure 12.
■ Rotate adjusting ring to the desired setting.
1 - 4
For driving small screws.
5 - 8
For driving screws into soft
material.
9 - 12
For driving screws into soft and
hard materials.
13 - 16
For driving screws in hard wood
17 -20
For driving large screws.
21 --411
For heavy drilling.
TO INCREASE
TOHCUE
Fig. 12
Note: Remember the two-speed feature (HI-LO) when
setting torque. The amount of torque will vary depending
on which speed setting you have your drill-driver. Switch
ing to
LO speed will increase torque. Switching to HI
speed will decrease torque,
BIT STORAGE
See Figure 13.
When not in use, bits provided with your drill can be
placed in the storage area located on the top of your drill
as shown in Figure 13.
sce&mm
m
err STORAGE AREA
Fig. 13
12