Installing bits, Removing bits, Adjustable torque clutch – Craftsman 973.2748.70 User Manual
Page 10: To adjust torque
Attention! The text in this document has been recognized automatically. To view the original document, you can use the "Original mode".
OPERATION
INSTALLING BITS
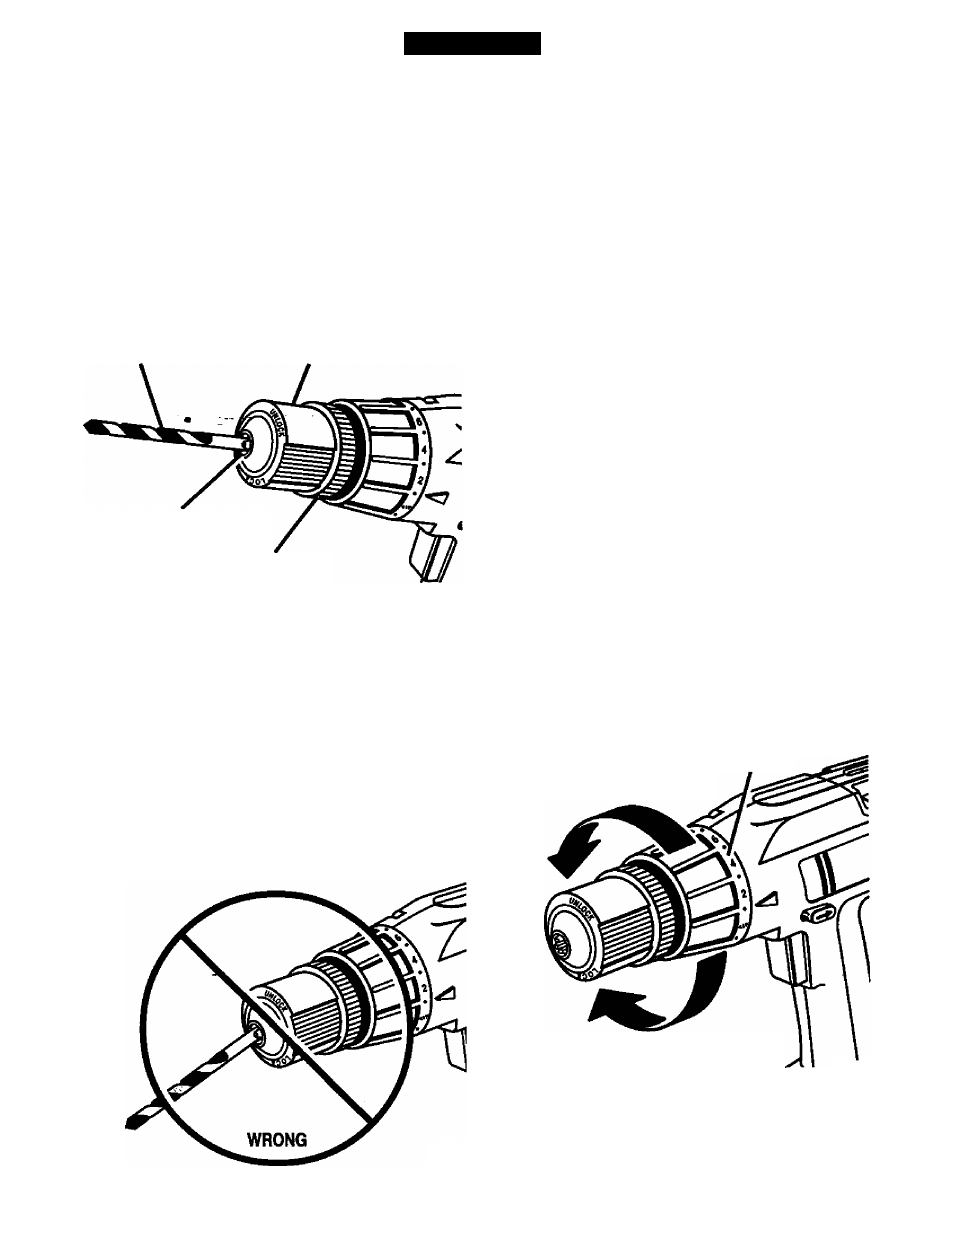
See Figure 7.
.
.
■
Lock the switch trigger by placing the direction of
rotation selector in center position. See Figure 2.
■
Open or close chuck jaws to a point where the
opening is slightly larger than the bit size you
intend to use. Also, raise the front of your drill
slightly to keep the bit from falling out of the chuck
jaws.
■
Insert drill bit into chuck the full length of the jaws
as shown in figure 7.
■ Tighten the chuck jaws on drill bit.
DRILL err
CHUCK BODY
CHUCKJAWS
CHUCK COLLAR
RIGHT
Fig. 7
To tighten the chuck jaws on drill bit; grasp and
hold the collar of the chuck with one hand, while
rotating the chuck body with your other hand.
Note: Rotate the chuck body in the direction of
the arrow marked LOCK to tighten chuck jaws.
Do not use a wrench to tighten or loosen the
chuck jaws.
. WARNING:
Do not insert drill bit into chuck
* jaws and tighten as shown in figure 8. This could
cause drill bit to be thrown from drill resulting in
possible serious personal injury or damage to the
chuck.
REMOVING BITS
See
Figure 7.
■ Lock the switch trigger by placing the direction of
rotation selector in center position.
See Figure 2.
■ Loosen the chuck jaws from drill bit.
■ To loosen: grasp and hold the collar of the chuck
with one hand, while rotating chuck body with your
other hand.
Note:
Rotate chuck body in the
direction of the arrow marked
UNLOCK
to loosen
chuck jaws.
■ Do not
use a wrench to tighten or loosen the
chuck jaws.
■ Remove drill bit from chuck jaws.
ADJUSTABLE TORQUE CLUTCH
Your drill is equipped with an adjustable torque clutch
for driving different types of screws into different mate
rials. The proper setting depends on the type of mate
rial and the size of screw you are using.
TO ADJUST TORQUE
■ Identify the twenty four torque indicator settings
located on the front of your drill.
See Figure 9.
■ Rotate adjusting ring to the desired setting.
• 1-4 For driving small screws.
• 5-8 For driving screws into soft
material.
• 9 - 1 2 For driving screws into soft and hard
materials.
• 13 -16 For driving screws in hard wood.
• 17 - 20 For driving large screws.
• 21 - 24 For heavy drilling.
TO DECREASE
TORQUE
ADJUSTING
RING
TO INCREASE
TORQUE
Fig. 9
Rg.8
10