Step 1 ¡connect your monitor to your computer, Connecting to an ibm pc/at or compatible computer, Connecting to a macintosh or compatible computer – Sony CPD-G500 User Manual
Page 6: Step 1 : connect your monitor to your computer, Setup
Attention! The text in this document has been recognized automatically. To view the original document, you can use the "Original mode".
Setup
Before using your monitor, check that the following accessories
are included in your carton:
• Power cord (1)
• HD 15 video signal cable (1)
• Macintosh adapter (1)
• Windows Monitor Information Disk (1)
• Warranty card (1)
• Notes on cleaning the screen’s surface (1)
• This instruction manual (1)
Step 1 ¡Connect your monitor to
your computer
Turn off the monitor and computer before connecting.
Notes
• Do not touch the pins of the video signal cable connector as this might
bend the pins.
• When connecting the video signal cable, check the alignment of the
HD 15 connector. Do not force the connector in the wrong way or the
pins might bend.
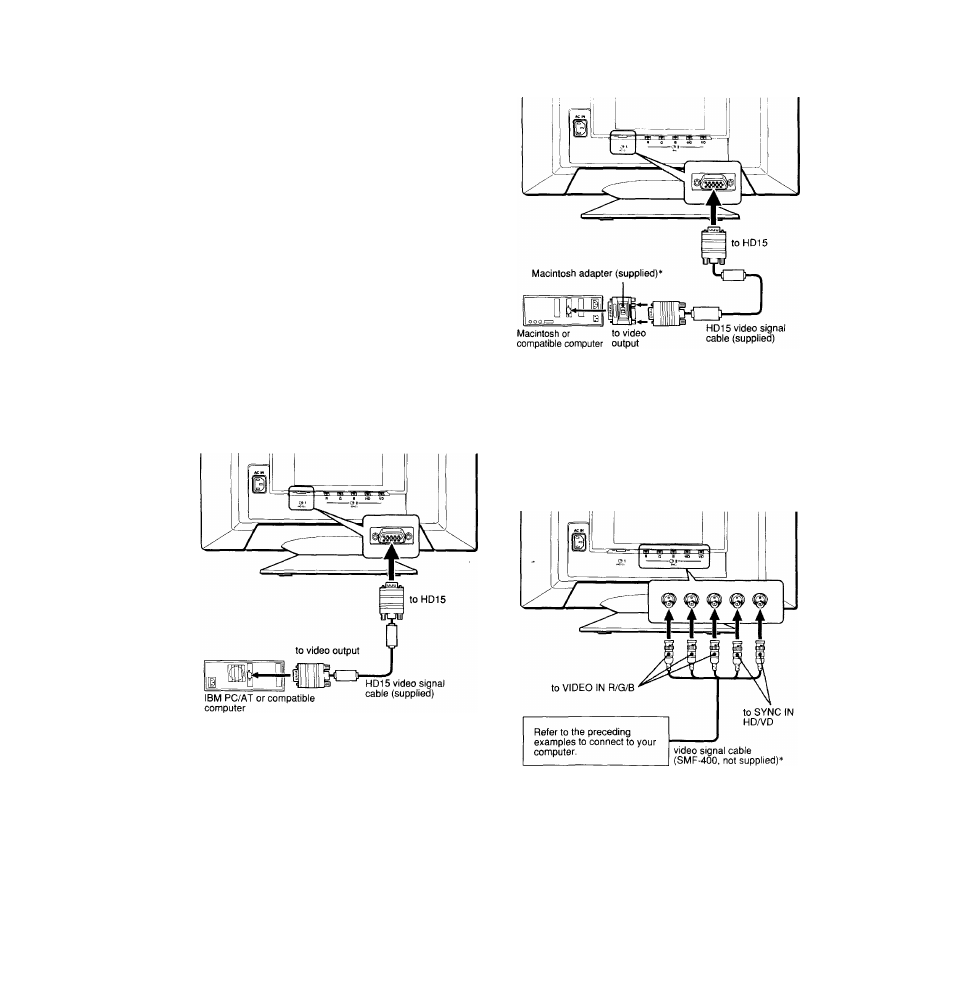
■ Connecting to an IBM PC/AT or compatible
computer
Connecting to a Macintosh or compatible
computer
Connect the supplied Macintosh adapter to the computer before
connecting the cable. This adapter is compatible with Macintosh LC,
Performa, Quadra, Power Macintosh and Power Macintosh G3 series
computers (sold before January, 1999). If you are connecting to a
Power Macintosh G3 series that sold after January 1999, you will need
a different adapter (not supplied). Macintosh II series and some older
versions of PowerBook models may need an adapter with micro
switches (not supplied).
I Connecting to the five BNC connectors
Connect the cables from left to right in the following order: Red-Green-
Blue-HD-VD.
Note
Plug & Play (DDC) does not apply to the five BNC connectors. If you
want to use Plug & Play, connect your computer to the HD 15 connector
using the supplied video signal cable.