Chariot Carriers CX 1 User Manual
Page 27
27
6FUHZWKHUHGUHÀHFWRUVLQWRWKHUHDUJURPPHWVRQWKHVWRUDJH
bag.
6FUHZWKHZKLWHUHÀHFWRUVLQWRWKHIURQWJURPPHWVRQWKH
passenger compartment.
3XVKWKHWZRVDIHW\ÀDJURGVWRJHWKHUDQGJXLGHWKHERWWRP
end into the hole located in the plastic end cap in the upper left
rear frame tube. Push the rod in until it stops.
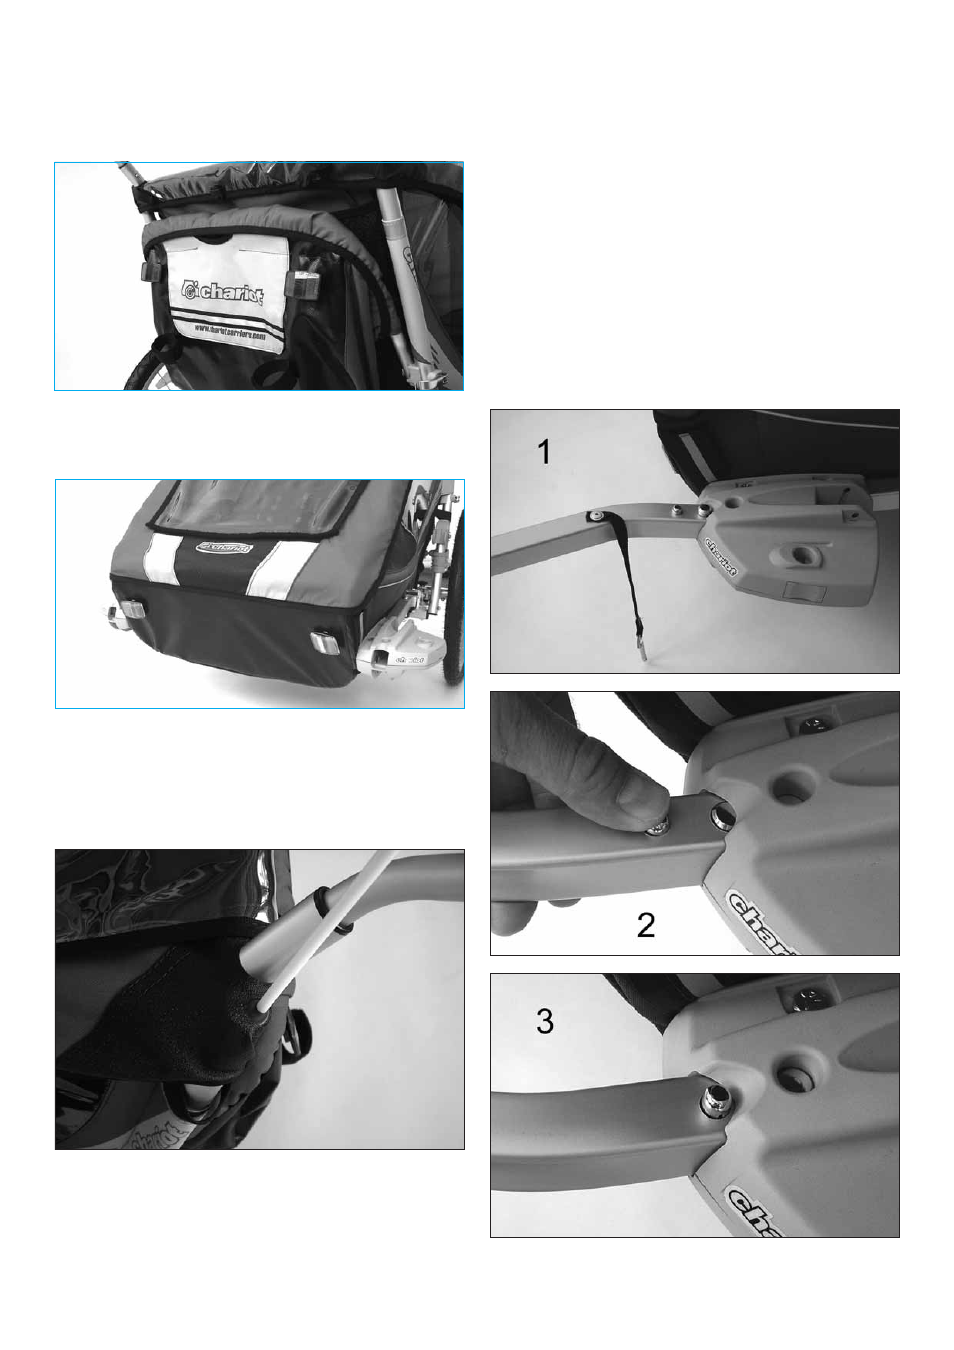
Attaching the hitcharm to the
CTS Ready Chassis
The hitcharm is attached to the CTS Ready Chassis into the left
“VersaWing 2.0” bracket.
The hitcharm must always be attached into the left-hand
side of the carrier (as seen in the direction of travel). The
hitcharm must always be attached with both spring buttons
pointing upwards.
Press down the small button and slide the hitcharm into the
VersaWing 2.0 until the large button engages in the VersaWing
2.0 (Figures 1 to 3).