Chicago Electric 98107 User Manual
Page 14
Page 14
For technical questions, please call 1-800-444-3353.
SKU 98107
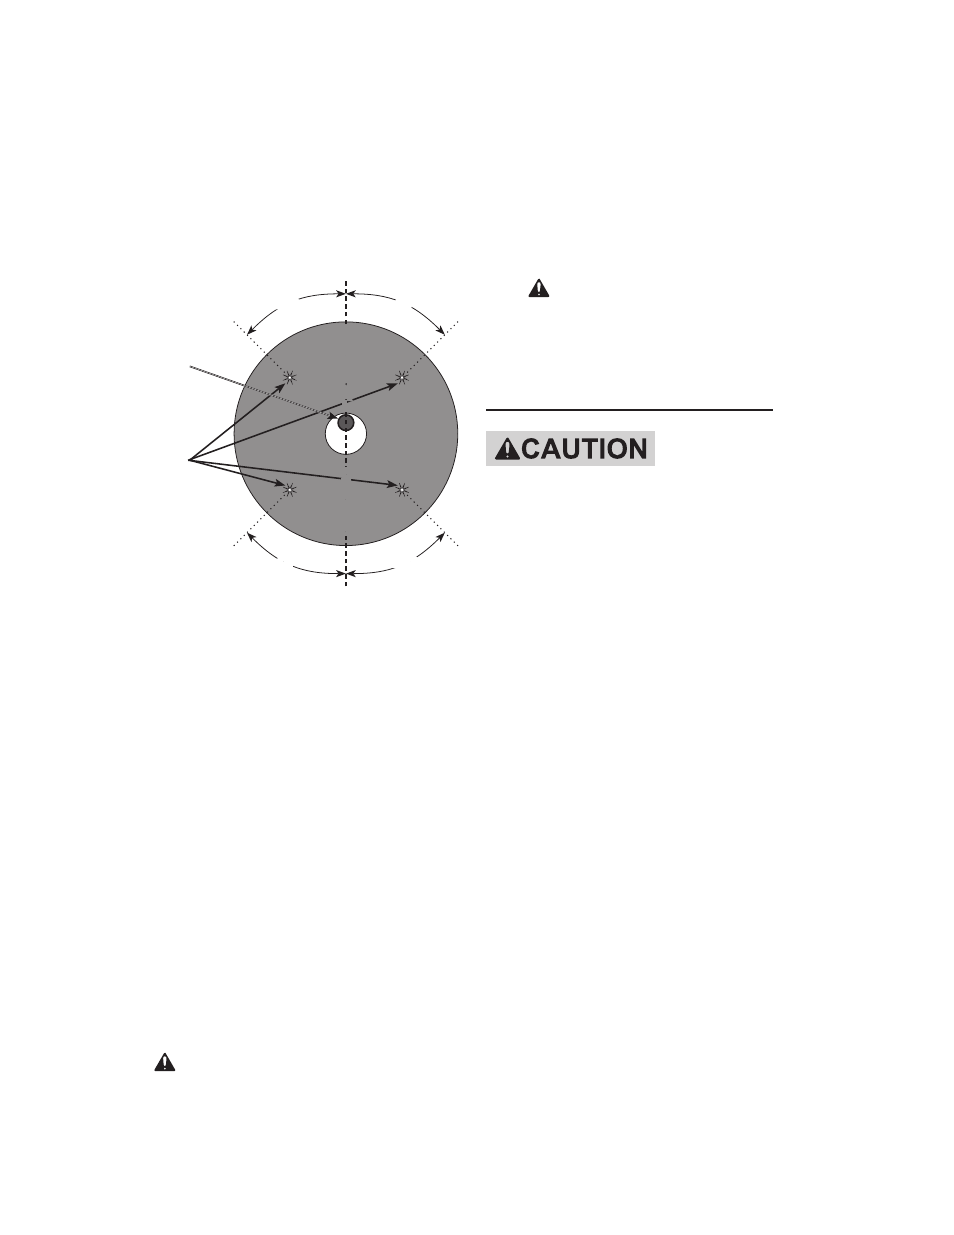
Closely inspect the Grinding Wheel
4.
before mounting. Perform a ring-test
on the wheel (unless wheel is smaller
than 4” or is an unusual shape) as
follows:
Suspend wheel using a pin or finger
a.
through the arbor hole.
tap
wheel
Here
45°
45°
45°
45°
Hang
wheel
from
pin
V
e
r
t
i
c
a
l
c
e
n
t
e
r
b. Tap the flat side of the wheel with a
light non-metallic object, such as a
screwdriver handle, at a point 45°
from the vertical center line on each
side of the wheel and 1 – 2 inches
from the edge of the wheel (see Il-
lustration).
Rotate the wheel 45 degrees and
c.
repeat the test until the entire wheel
has been checked.
An undamaged wheel will give a
d.
clear tone. If cracked, there will be a
dead sound and not a clear ring.
Slip the grinding wheel onto the Spin-
5.
dle with a paper gasket, or blotter,
first. The blotter should be centered
on the grinding wheel and the wheel
and blotter should rest flat against the
Inner Flange.
warning: to prevent serious
injury, blotters must be used for all
grinding wheels they are provided
with. Blotters help prevent grind-
ing wheel damage and wheel slip-
page, causes of wheel failure.
Thread the Outer Flange Arbor Nut
6.
onto the Spindle. Wrench tighten
only enough so that the wheel is se-
curely held on the spindle.
warning: to prevent serious
injury, do not overtighten flange.
Overtightening can damage the
wheel, causing wheel failure.
installing a threaded accessory
tO preVent
injurY:
wear heavy-duty work gloves
when handling wire wheels
and brushes. these
accessories are sharp and
can cause injury.
Before installing an accessory, review
1.
the warnings on pages 5 - 7.
The accessory MUST be:
rated to at least 10,500 RPM.
•
no larger than 4-1/2” in diameter.
•
fitted with a threaded opening of
•
5/8” x 11 TPI.
undamaged.
•
a sanding disc and backing pad, a
•
sanding flap disc, a wire wheel or
a wire cup brush (accessories not
included).
Press in and hold the Spindle Lock
2.
Button (26) to prevent the Spindle (9)
from turning.
Remove the Outer Flange Arbor Nut
3.
(1) and the Inner Flange (2) and keep
in a safe place.
Thread disc accessory firmly onto
4.
the Spindle. Wrench tighten onto the
spindle.