Part 6 - saving, recalling and deleting labels – Casio KL-7400 User Manual
Page 48
45
E
Part 6 - Saving, Recalling and
Deleting Labels
To save a label
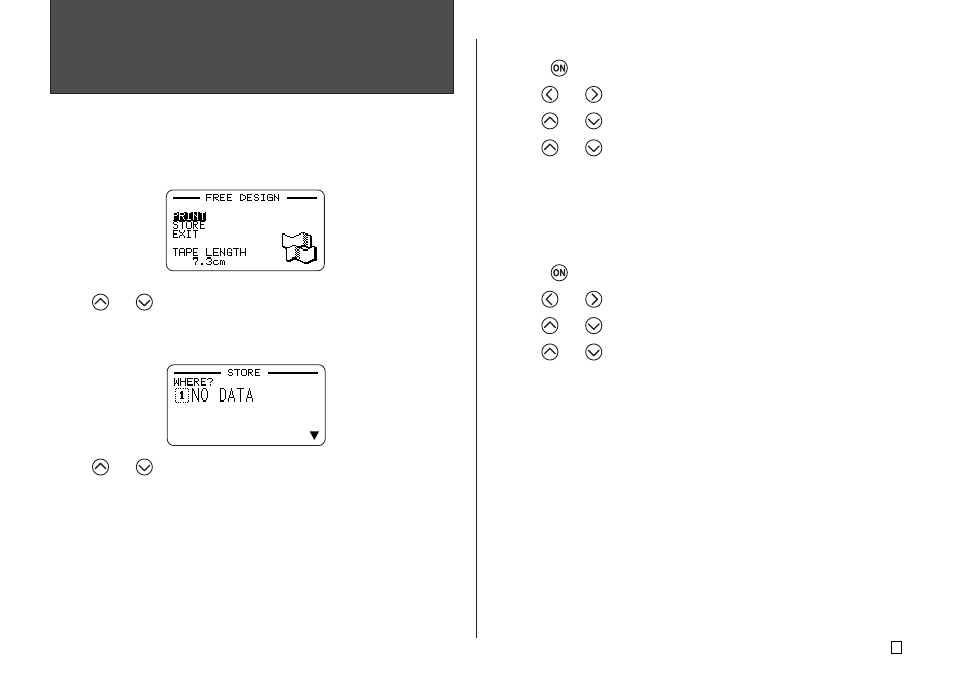
1.
Create the label you want to save.
2.
After you finish inputting text, the following screen will appear on the printer
display.
3.
Use
and
to select STORE.
4.
Press SET.
5.
Input up to seven characters for the label name, and then press SET.
6.
Use
and
to select the location (1 to 10) where you want to save the
label.
• Up to 10 labels can be stored in memory.
• If you specify the number of a location that already contains a label,
existing label will be replaced by the new label when you press SET in
step 7.
7.
Press SET.
8.
In response to the confirmation message that appears, press SET to save
the label or ESC to abort.
To recall a label
1.
Press
to turn on the printer.
2.
Use
and
to select STORED DATA, and then press SET.
3.
Use
and
to select RECALL, and then press SET.
4.
Use
and
to scroll through the label names until the one you want to
recall is displayed.
5.
Press SET to display the label.
• Now you can print the label or make any changes you want in it.
To delete a label
1.
Press
to turn on the printer.
2.
Use
and
to select STORED DATA, and then press SET.
3.
Use
and
to select DELETE, and then press SET.
4.
Use
and
to scroll through the label names until the one you want
to delete is displayed.
5.
Press SET.
6.
In response to the confirmation message that appears, press SET to de-
lete the label and return to step 2 of this procedure.
• To cancel the delete operation, press ESC instead of SET.