Tl2402, Maintenance (continued) – Campbell Hausfeld TL2402 User Manual
Page 4
Maintenance (Continued)
CLEANING A GUN USED WITH A PAINT
TANK
Shut off the air supply to the
tank and release the pressure
in the tank.
1. Open the vent on the paint tank. If
using an external mix air cap, loosen
the cap slightly.
2. Reduce air pressure to 10-20 psi. Hold
a piece of cloth, wadded in the hand,
tightly around the air cap opening(s)
and pull the trigger. The air will back
up through the fluid tip and force
the paint out of the hose and back
into the tank.
3. Pour the paint from tank and use
solvent and rags to clean.
4. Put enough solvent into the tank to
wash the hose and gun thoroughly.
Close the tank and spray from the
gun until the solvent comes out clean.
5. Remove and blow out the material
hose with compressed air to get rid
of any trace of solvent in the hose.
When
blowing
out the hose, the open end should be
aimed away from any person to avoid
blowing solvent into the eyes or on the
skin causing possible injury.
PERIODIC CLEAN-UP
Due to improper cleaning and paint it
may be necessary to inspect and clean
the internal parts and the gun body.
1. Examine openings in air cap and fluid
tip. If clogged, remove any o-rings
and soak the air cap or fluid tip in
solvent.
2. A brush or toothpick or something
similar may be used to dislodge the
dried paint from holes and passages.
NEVER USE METAL OBJECTS
TO CLEAN PRECISELY DRILLED
PASSAGES. DAMAGED PASSAGES
WILL CAUSE IMPROPER SPRAYING.
3. Remove and check the adjusting
needle for excessive wear at the tip
and straightness.
IMPORTANT: If the needle tip is worn
more on one side than the other, either
the needle is bent or the gun body
has been dropped or knocked out-of-
line. There are no adjustments that
can be made to a bent gun body. Test
the needle by rolling on a flat surface.
Replace if necessary.
4. Check and replace any damaged o-
rings and seals. O-rings and seals can be
wiped clean but not soaked in solvent.
5. Unscrew packing nuts and replace
the packing ONLY if a leak will not
stop when the nut is tightened (See
Figure 8). Do not over-tighten a
packing nut because this will restrict
movement of the needle.
6. Re-assemble in reverse order of
above and use a non-silicone oil on
moving parts. Apply Vaseline® or
light grease on threaded joints and
hose connections.
STORING
1. When not using spray gun,
turn the fluid adjustment knob
counterclockwise to open which
will reduce spring tension on needle
fluid tip.
2. Spray gun MUST BE well cleaned
and lightly lubricated.
Operating Instructions
TL2402
4
www.chpower.com
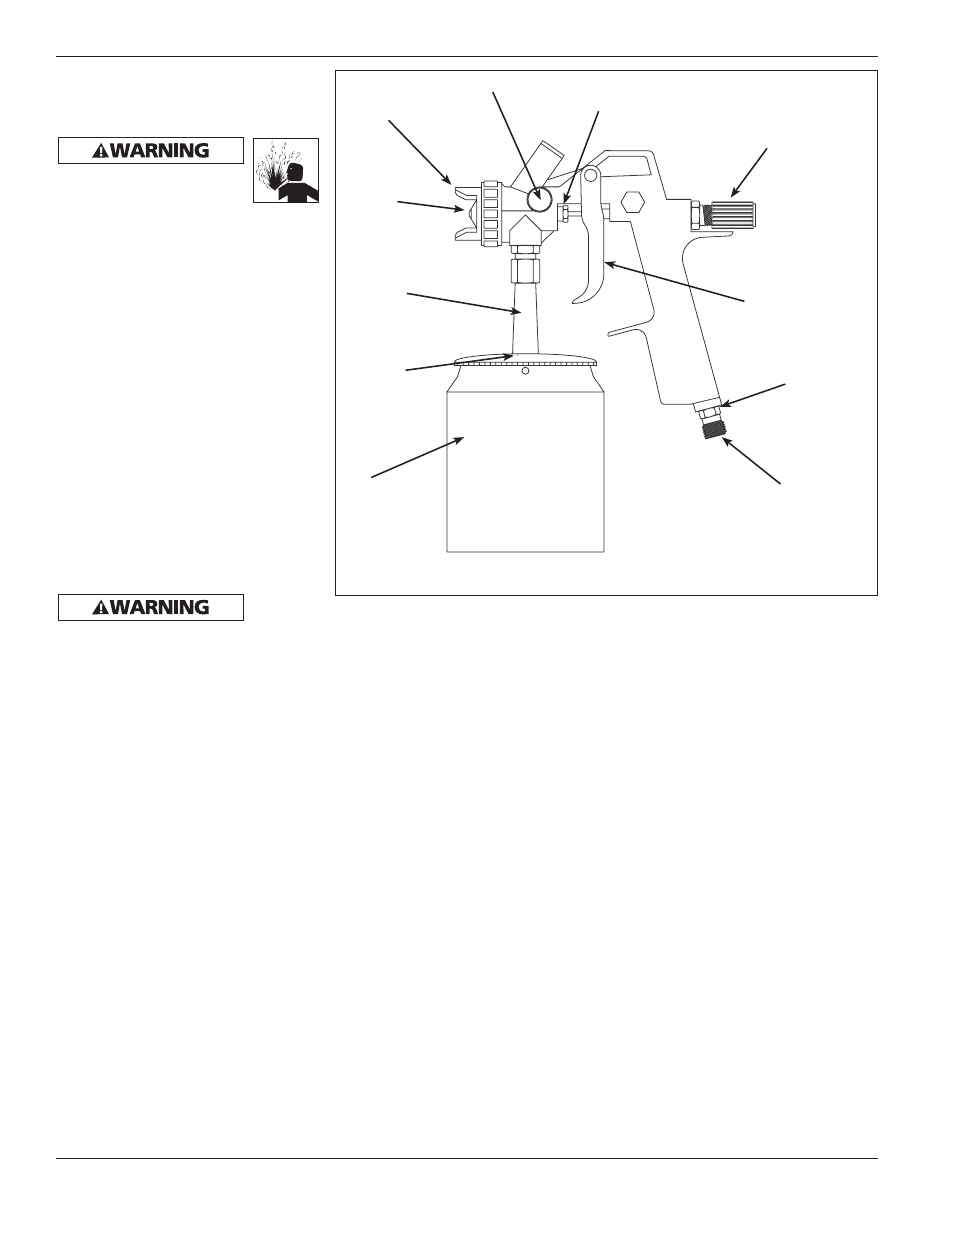
Figure 8
Air Cap
Fluid Tip
(Nozzle)
Fluid Inlet
Cup
Vent Hole
1/4” NPS
Air Inlet
fitting
Trigger
Air Valve
Fluid Control Knob
Pattern Control Knob
Packing Nut