Front loader preparation mounting the bucket, First installation of loader on tractor – Cub Cadet 59A40003727 User Manual
Page 11
11
fronT loader preparaTion
Mounting the Bucket
To attach the bucket to the boom & mast assembly, make sure the
bucket is sitting on its bottom and proceed as follows:
Warning: Use care when working on the front
loader. Make certain the loader is adequately
supported and balanced.
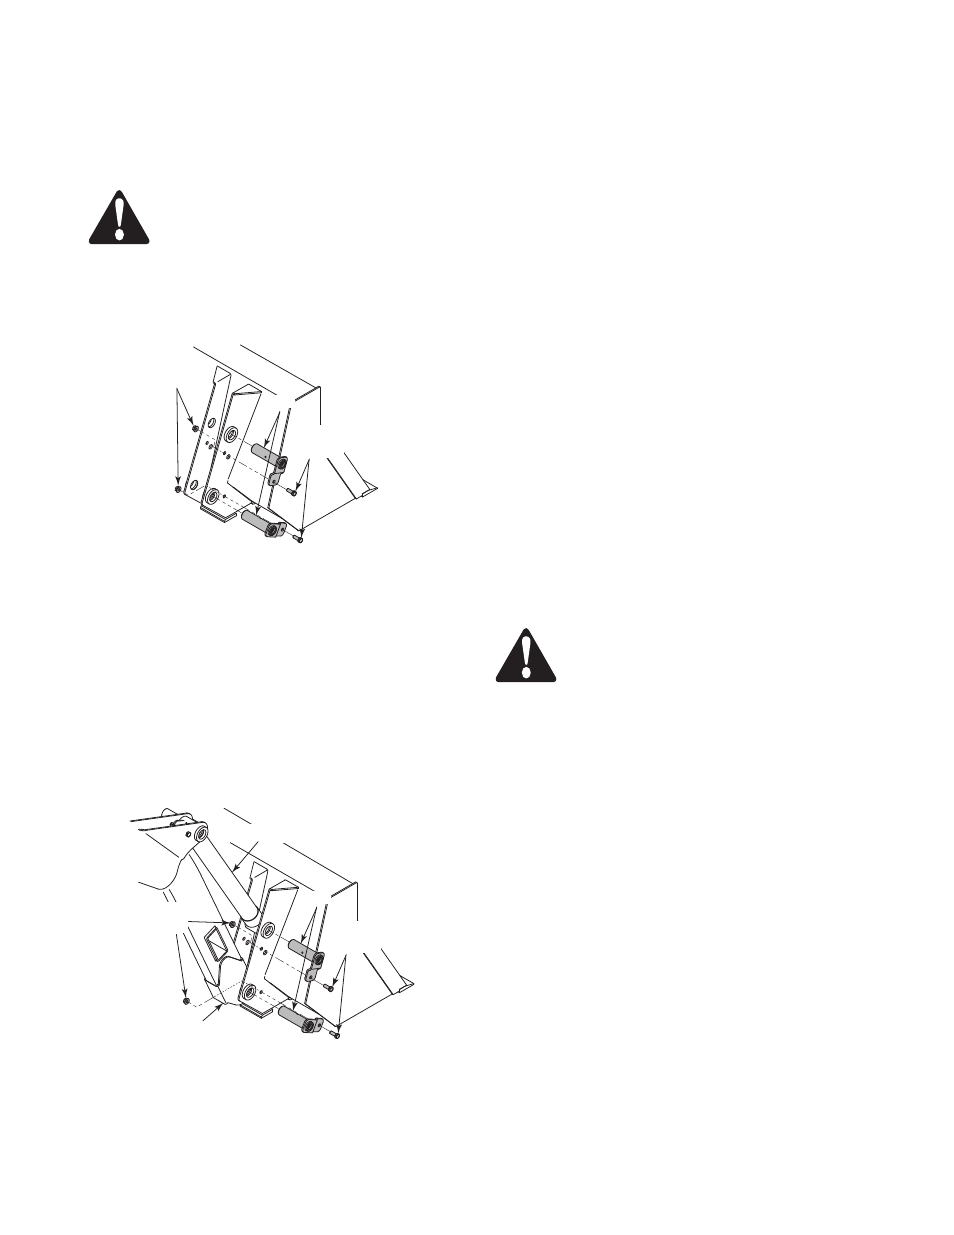
• Remove the four pins (two on the left and two on the right)
from the rear mounting brackets of the bucket by removing
the hex flange lock nuts and screws, and withdrawing the pins
from the brackets. See Figure 5.
figure 5
• Position the bucket in front of the boom and mast assembly.
Align the bottom of the left and right hand boom arms with
the lower holes in the rear mounting brackets of the bucket.
Refer to Figure 6.
nOTe: it may be necessary to manually roll
the bucket to align the boom arm and rear mounting bracket
holes.
• Reinsert two pins (one on the left and one on the right) to
fasten the boom to the bucket mounting brackets. Secure the
pins with the screws and hex flange nuts removed earlier. See
Figure 6.
figure 6
Pin
Hex Cap
Screw
Hex Flange
Lock Nut
• Cut and remove the wire (or plastic ties) securing the bucket
cylinder to the boom arm.
nOTe: the pistons of the two bucket cylinders may be retracted
too far to connect the cylinders to the bucket rear mounting brack-
ets by simply rolling back the bucket and/or manually extending
the cylinder pistons. if the cylinders cannot be connected to the
bucket now, wait until the hydraulic hoses are connected to extend
the cylinder pistons.
• Lift the front of the bucket upward and rollback the bucket
to align the upper holes in the rear mounting brackets with
pistons of the bucket cylinders. Reinsert the two remaining
pins (one on the left and one on the right) to fasten the bucket
cylinders to the rear mounting brackets of the bucket. Secure
the pins with the two remaining screws and hex flange nuts
removed earlier.
firsT insTallaTion of loader
on TraCTor
The initial installation of the front loader onto the tractor can be
accomplished by utilizing an overhead lift (recommended), or by
pre-charging the loader hydraulic cylinders before beginning the
installation procedures.
The instructions in this sub-section apply only to the initial instal-
lation. Once the hydraulic lines and cylinders have been charged
with oil during the initial installation, the dismounting procedure
should leave the loader in position to be re-mounted.
Warning: Some installation steps require the
tractor to be running and driven. Use caution
when completing these steps. engage the
parking brake before dismounting the tractor.
if working with an assistant, make certain that
person is made aware that the tractor or any part
of the loader is about to be moved.
Using an Overhead Lift For initial installation
To complete the initial installation of the loader using an overhead
lift, proceed as follows:
• Using the overhead lift apparatus, raise the loader so that
the bottoms of the masts are high enough to clear the front
axle/tire of the tractor and the tubular bars of the RH and LH
loader mounts. Refer to Figure 7.
• Slowly drive the tractor forward while guiding the bottoms of
masts into the RH and LH mounts. Refer to Figure 8. Carefully
lower the overhead lift to set the notches at the bottom of the
masts partially onto the tubular bars of the mounts.
Bucket Cylinder
Pin
Hex Cap
Screw
Hex Flange
Lock Nut
RH Boom Arm