Radiance direct vent /natural vent gas heater – Vermont Casting 3390 EN User Manual
Page 31
31
Radiance Direct Vent /Natural Vent Gas Heater
20004188
CO100
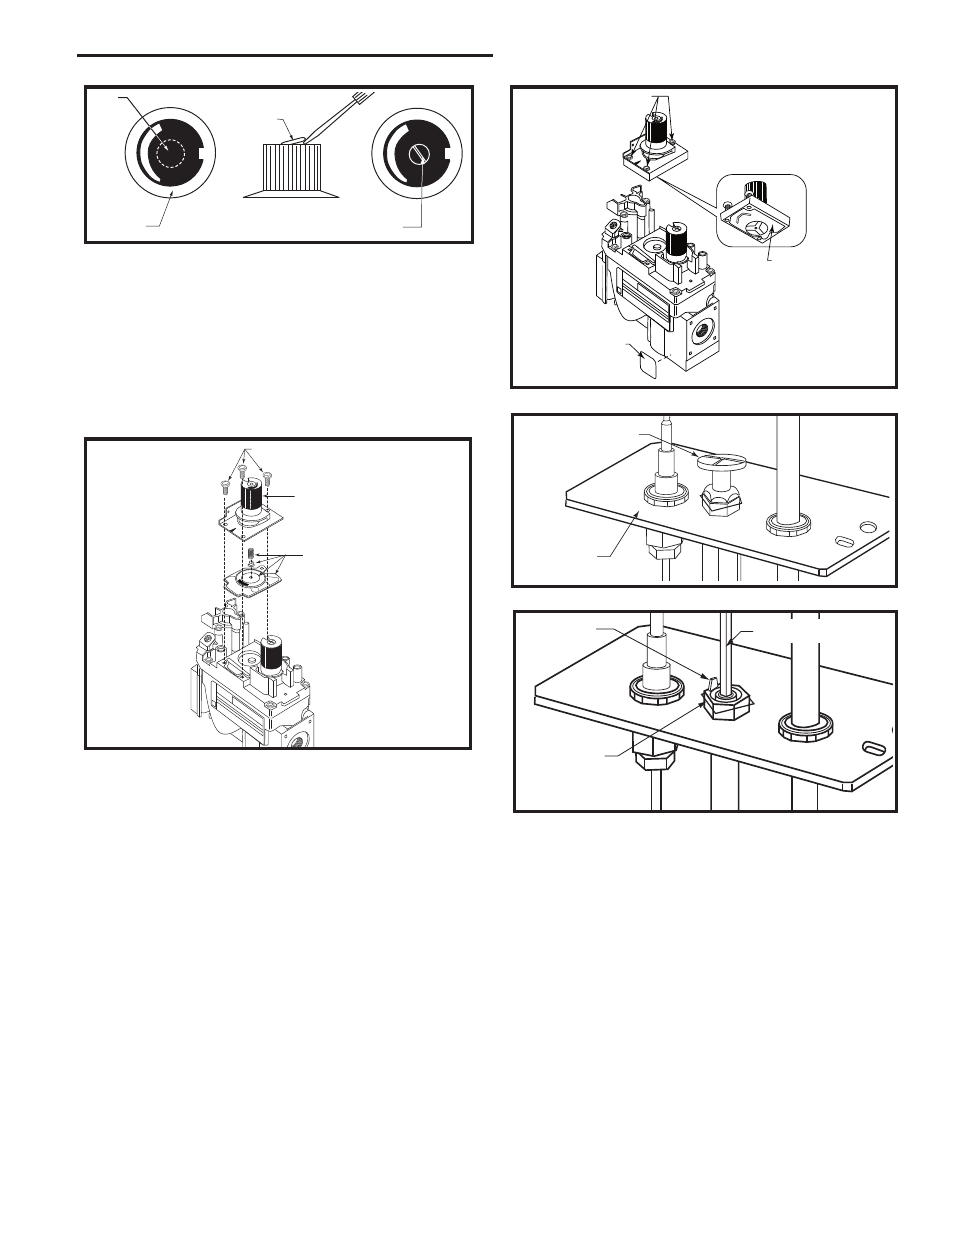
Gas conversion
HI-LO knob
3/15/99 djt
LO
HI
LO
HI
Cap
Hi-Lo
Knob
Lift Open
Center Screw
CO100
Fig. 55 Remove center screw from Hi-Lo knob.
3. Insert blue painted screw when converting to natural
gas and red painted screw when converting to LP.
4. Tighten screw (do not over tighten), replace cap.
SIT 820 Valve
1. Using TORX T20 bit, remove and discard the three
(3) pressure regulator mounting screws (A), pressure
regulator tower (B) and the spring and diaphragm
assembly (C). (Fig. 56)
FC107
SIT820
valve conversion
10/03
A
B
C
OFF
PIL
OT
O
Fig. 56 Remove mounting screws, pressure regulator tower
and spring and diaphragm assembly.
FC107
D
E
F
FC108
SIT
regulator
conversion
10/03
OFF
PIL
OT
O
FC108
Fig. 57 Replace regulator.
2. Insure the rubber gasket (D) is properly positioned
and install the new HI/LO pressure regulator assem-
bly to the valve using the new screws (E) supplied
with the kit. Tighten the screws securely. (Ref. torque
= 25 in/lb) (Fig. 57)
3. Install the enclosed conversion label (F) to the valve
body where it can easily be seen. (Fig. 57)
Pilot Orifice Conversion
1. Locate pilot. (Fig. 53)
2. Replace pilot orifice.
Pilot Type 1 (SIT Pilot)
•
Remove pilot hood by lifting up. (Fig. 58) Do not
remove the snap ring to remove the pilot hood.
NOTE: It is not necessary to remove the pilot tube
for conversion.
•
Remove pilot orifice with allen wrench. (Fig. 59)
CO105a
gas conversion
Pilot
1/28/00 djt
Pilot Hood
Pilot
Bracket
CO105a
Fig. 58 Remove pilot hood.
CO106a
DV360/580
Gas Conversion
Pilot2
1/28/00 djt
Index Tab
Snap Ring
Allen Wrench
CO106a
Fig. 57 Remove pilot orifice.
•
Install the conversion orifice.
•
Reinstall pilot hood. Be sure to align hood with
index tab.
Pilot type 2 (Honeywell Pilot)
•
Loosen pilot hood turning counterclockwise using a
7/16” wrench. (Fig. 60) NOTE: You may use pen-
etrating oil to prevent pilot hood threads from seizing
up.
•
Remove pilot orifice with needlenose pliers. (Fig.
61) NOTE: Use a wrench to hold pilot tube in place
while removing the orifice.
•
Install the conversion orifice.
•
Reinstall pilot hood and tighten until mark on pilot
hood aligns with mark on pilot bracket.