Important – Coleman 9992-645 User Manual
Page 13
13
IMPORTANT!
T
O ENSURE PROPER GAS FLOW
,
BURNER
CONTROL VALVES MUST BE
“OFF”
BEFORE
OPENING THE GAS CYLINDER VALVE
.
WARNING:
During assembly
of the grill and when attaching or
replacing the L.P. gas cylinder,
insure that the gas supply hose is
free of kinks and/or damage and
is at least 3 inches away from hot
surfaces such as the grill casting.
Fig. 25
LP Cylinder Installation
Fig. 24
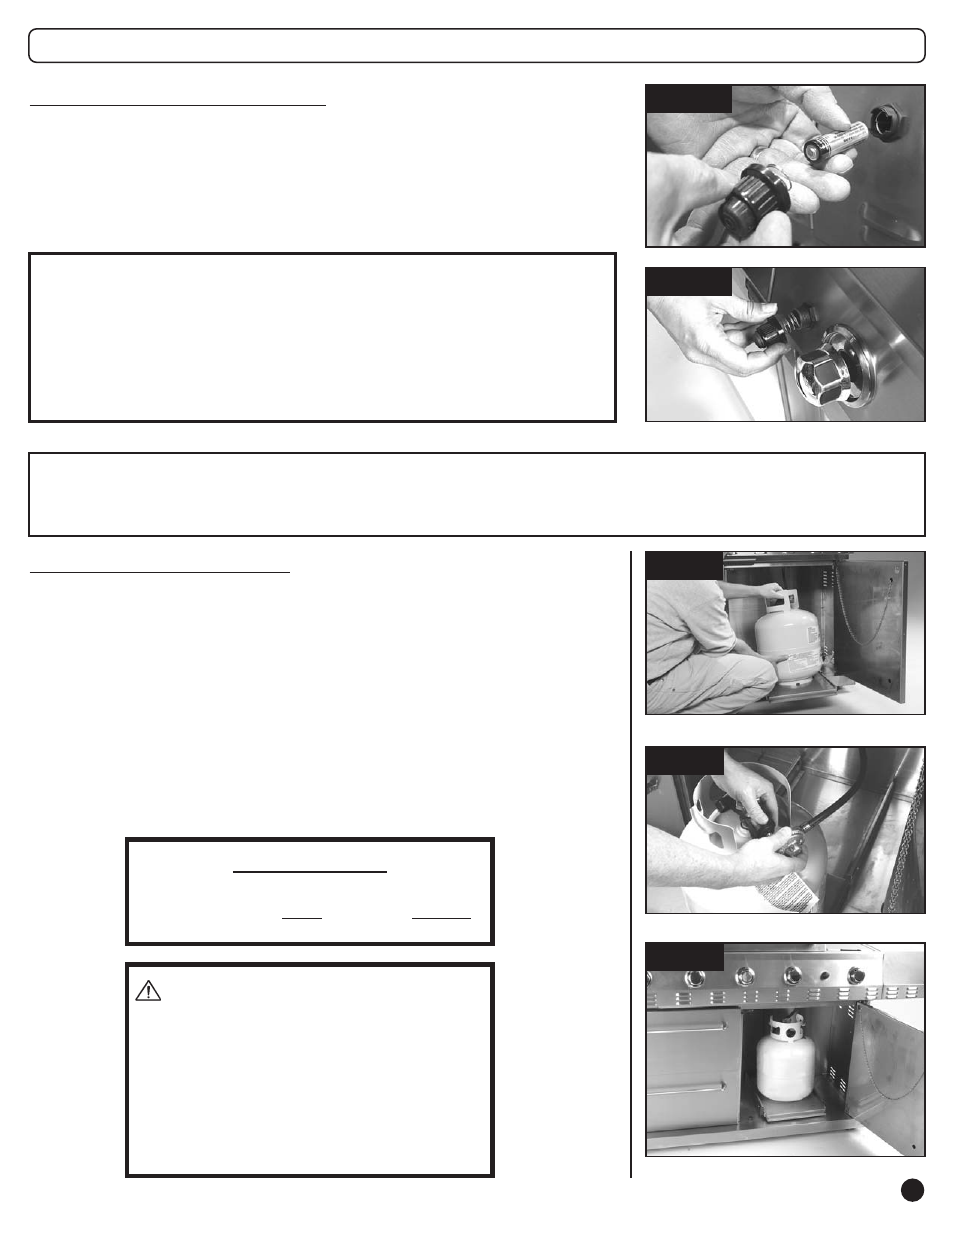
1.
Slide out the cylinder support and set the LP cylinder in the
cylinder support location with the outlet valve facing toward the
right side of the grill (Fig. 24 and 25).
2.
Insert the TYPE 1 Nipple of the regulator into the cylinder’s fuel
valve outlet as shown. Turn the regulator hand wheel clockwise
to tighten. No tools are needed. The hand wheel will come to a
complete stop when the connection is secure, and the gas will
not flow until a positive seal is achieved.
3.
Slide the cylinder support back into the grill. Figure 26 shows
the cylinder correctly installed.
Grill Assembly — 8300 Series
NOTE: Your 8300 Series grill is set up from the factory to use LP GAS. If you want to use NATURAL
GAS, you must purchase the NATURAL GAS CONVERSION KIT (sold separately). Please skip
to the section titled “Natural Gas Installation”.
Fig. 26
Fig. 22
Igniter Battery Installation
1.
The AA battery, spring and igniter cap must be installed before
using (Fig. 22).
2.
Install the AA battery, negative end first.
3.
Slide the spring assembly over the battery.
4.
Screw the igniter cap onto the igniter (Fig. 23).
Fig. 23
Test the Igniter:
A spark should appear at electrode tips.
If the spark does not appear:
-Check the wire connections to the electrode module.
-Check the proper assembly of a fresh AA battery.