FRIGIDAIRE CFPWD15A User Manual
Page 3
3
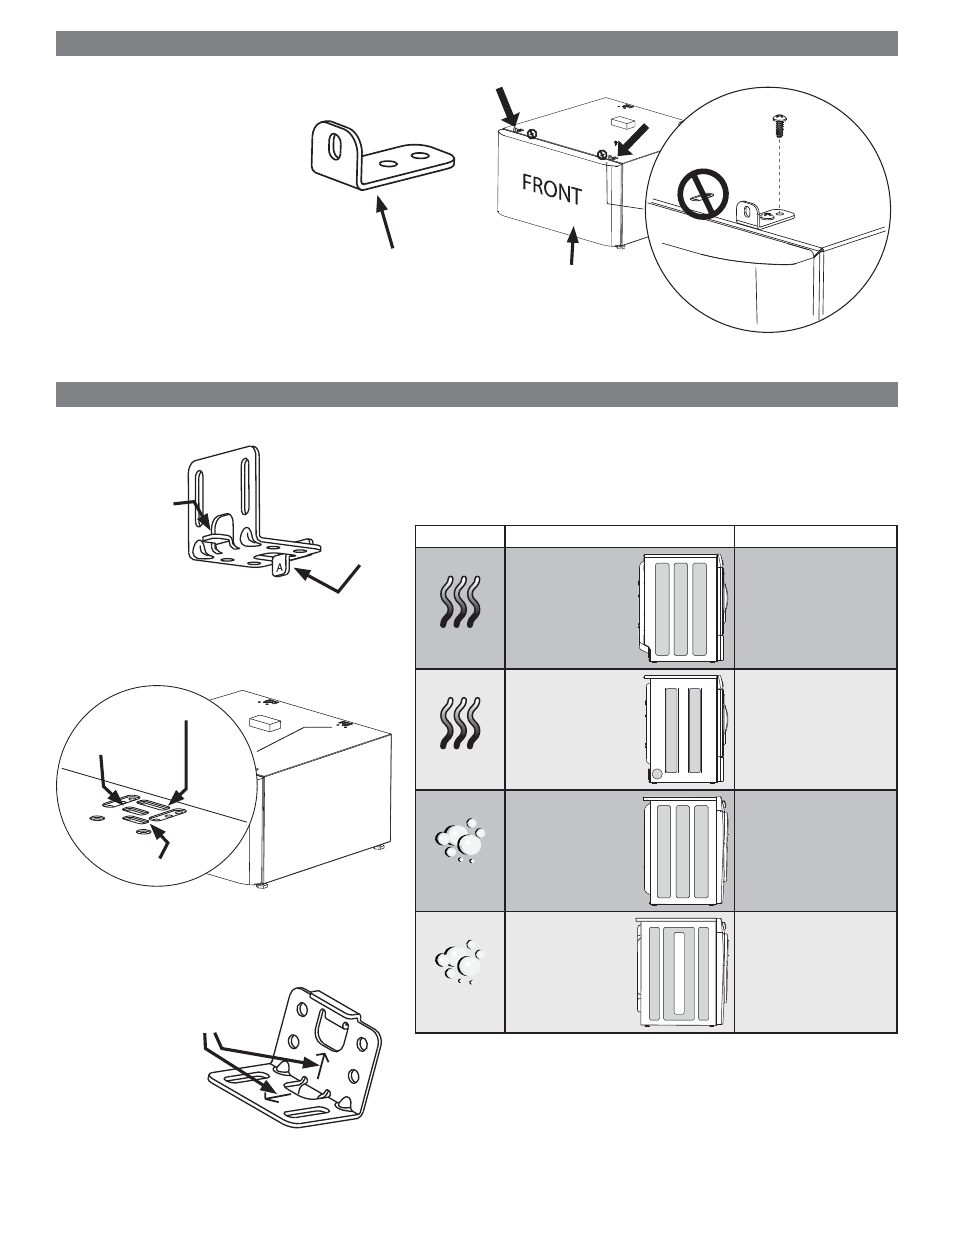
Attach front mounting brackets
Attach rear mounting brackets
DRAWER
1 - Appliance
2 - Side panel style of your appliance
3 - Rear bracket orientation
DRYER
3 indents on side.
Rear brackets from
•
GREEN kit
Tab A into
•
Slot 1
•
Arrow pointing to
•
back
DRYER
2 indents on
side and 4 inch
knockout for side
venting.
Rear brackets from
•
GREEN kit
Tab B into
•
Slot 3
•
Arrow pointing to
•
front
WASHER
3 indents on side.
Rear brackets from
•
GREEN kit
Tab A into
•
Slot 2
•
Arrow pointing to
•
back
WASHER
3 indents on side
in shape of “lOl”.
Rear brackets from
•
GREEN kit
Tab A into
•
Slot 1
•
Arrow pointing to
•
front
TAB A
TAB B
DIRECTION
INDICATOR
ARROWS
Attach each front clip to outer-most
1.
set of holes with 2 screws.
Determine your appliance type (washer or dryer) and style of side panel ac-
1.
cording to columns 1 and 2 in table below.
Orient rear brackets according to column 3 for your particular model.
2.
Attach each bracket with 2 screws through the holes that line up on pedestal.
3.
Each rear bracket has tabs marked “A” and “B”.
•
Each pedestal has slots in the rear marked “1”, “2”
•
and “3”.
Each rear bracket also has 2 arrows indicating
•
bracket direction when mounted on the pedestal.
Front brackets from
GREEN kit.
SLOT 1
SLOT 2
SLOT 3