Assembly instructions – Centro 3900 User Manual
Page 8
12
13
ASSEMBLY INSTRUCTIONS
13
14
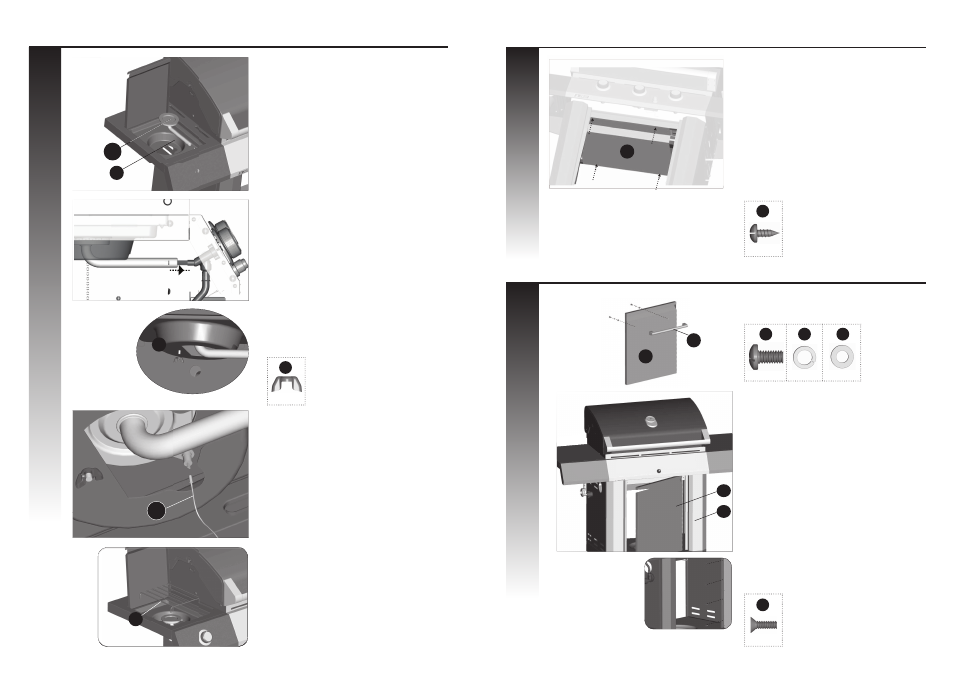
TIP: Before attempting to assemble the door (EF)
to the right pillar (ED), locate the two clasps
on the door Hinge. Next, locate the two
small openings on the right side pillar.
a. Hold the door perpendicular to the BBQ Cart.
Align the two clasps on the door hinge (EF),
with the two holes on the right side pillar (ED).
Once aligned push the two clasps into the
openings, and immediately push down to lock
clasps in place.
b. Assemble the door (EF) to the right pillar (ED),
as shown in fi gure B, using the screws pro-
vided.
EF
ED
YOU WILL NEED:
11
ASSEMBLY INSTRUCTIONS
12
a. Position the side burner (DD1) through the
opening in the left side burner drip pan (DC).
Underside view
DD1
b. Make sure that the side burner (DD1) engages
the side burner valve (CC) as shown in fi gure B.
c. Using the wing nut provided, assemble the
side burner to the side burner drip pan (DC), as
shown in fi gure C.
A
B
C
DC
d. Attach the end of the side burner electrode
wire (DD2) to the underside of the side burner
electrode, as shown in fi gure D.
Ensure that the wire is pushed in fi rmly.
DE
D
E
DD2
e. Place the side burner cooking grate(DE) into
postion on the side burner shelf, as shown in
fi gure E.
YOU WILL NEED:
13
X 1
YOU WILL NEED:
9
Place the heat shield (CN) into the groove
which is located at the back side of the front
panel as shown in fi gure A. Next, attach the
heat shield (CN) to the upper back panel (CM)
by using the self tapping screws (x 4), as shown
in fi gure B.
THE HEAT SHIELD RESTS BELOW THE FRONT
BRACE AND BACK PANEL.
X 4
A
B
X 4
c. Assemble the towel bar (CO) onto door (EF).
EF
CO
8
7
6
YOU WILL NEED:
1
4
5
X 2
X 2
X 2
CN
DC